
A Fraser homeowner may notice the problem during a spring storm: heavy rain is coming down, the basement sump pit is filling quickly, and then the power goes out. The primary pump stops immediately, even though groundwater and runoff haven't stopped. That's the situation a battery backup sump pump is built to handle.
Learning how to install a battery backup sump pump is manageable when the pit has enough room, the discharge plumbing is accessible, and the electrical setup already meets the manufacturer's requirements. The work becomes less suitable for DIY installation when wiring, pump sizing, tight pit clearance, or permanent plumbing changes are involved. In Macomb County, Oakland County, and Wayne County, a careful installation matters because spring rain, rapid snowmelt, and Michigan winters can expose weak points quickly.
Table of Contents
- Why a Battery Backup Sump Pump Matters in Southeast Michigan
- Tools, Materials, and Safety Prep Before You Start
- Preparing the Sump Pit and Positioning the Backup Pump
- Connecting Discharge Plumbing and Checking Valves
- Installing the Battery, Controller, and Electrical Connections
- Testing the System and Deciding When to Call a Professional
- Maintenance Tips and Local Plumbing Support in Michigan
Why a Battery Backup Sump Pump Matters in Southeast Michigan
A basement in Fraser, Sterling Heights, Clinton Township, Troy, Macomb, or Shelby Township can take on water during the same storm that interrupts utility power. Heavy rain and rapid snowmelt raise the demand on drainage systems, while aging sewer lines and saturated soil can make basement water levels rise faster than expected. A primary sump pump that relies on household electricity can't keep moving water during an outage.
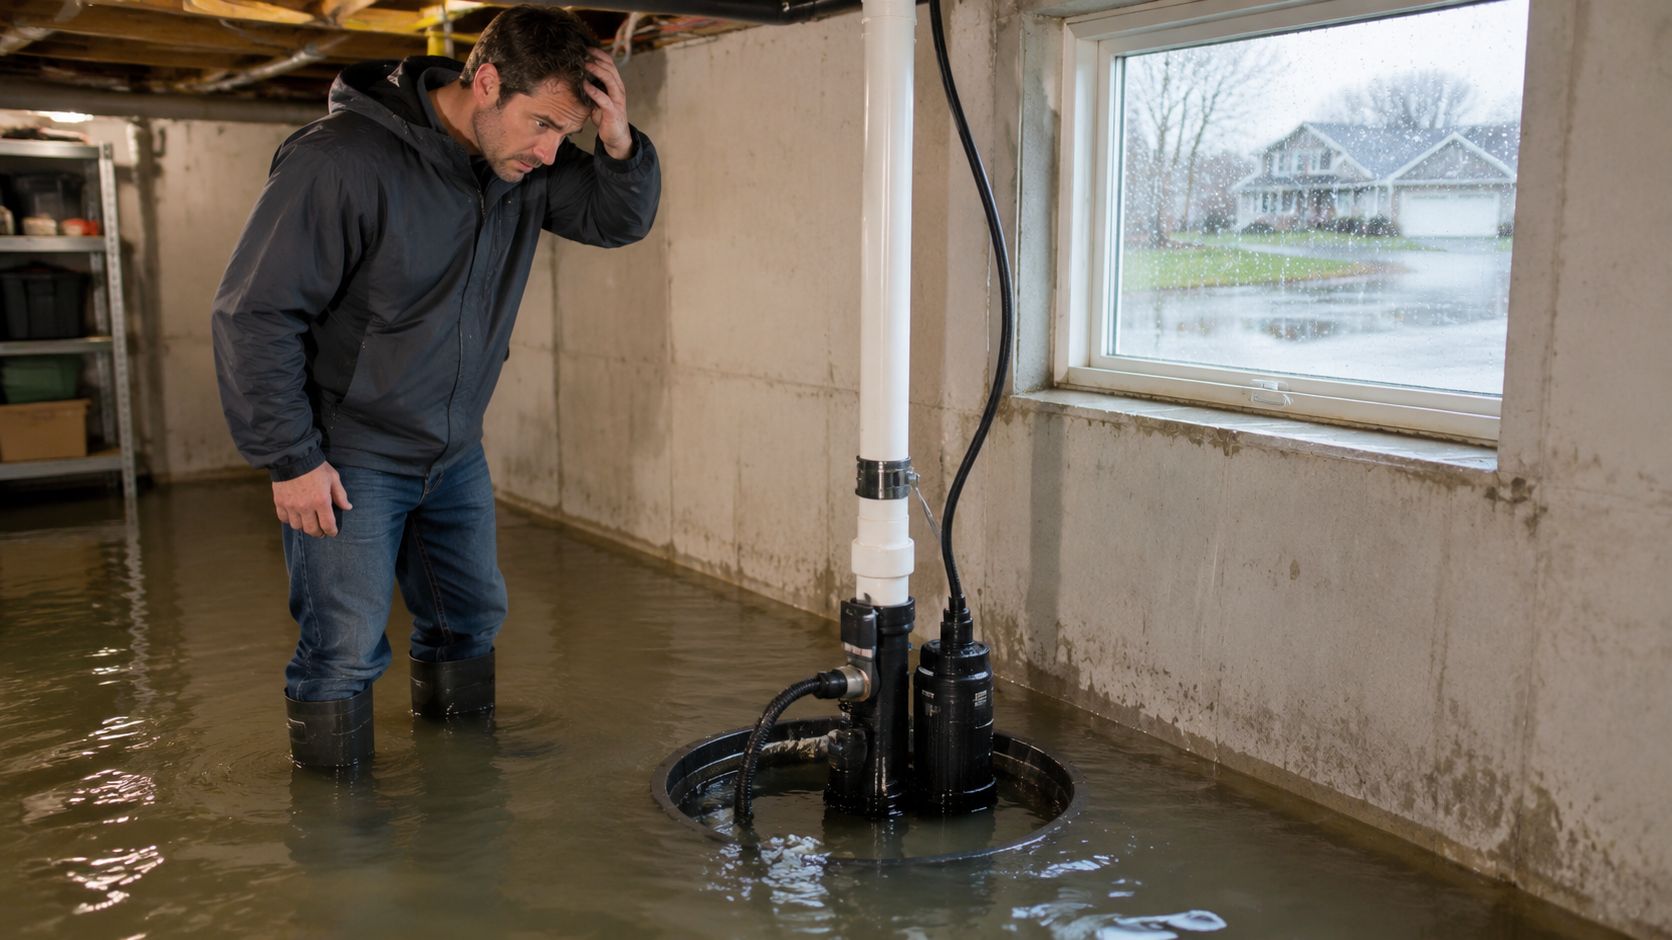
A backup system adds a separate pump beside the primary unit. It usually has its own float switch, controller, and battery, so it can activate when the water reaches a higher level or when the main pump can't operate. It doesn't replace a properly sized primary pump. It provides another way to move water during the failure conditions that disable or overwhelm the first pump.
Battery backup sump pumps became a standard resilience upgrade as homeowners recognized that flooding often happens during power failures. A history of battery-powered backup sump pumps describes the first system as a response to basement flooding caused by residential outages.
What the backup protects
The benefit isn't limited to keeping the pump running. A working backup can help protect stored belongings, finished basement materials, flooring, and mechanical equipment from standing water. It also supports broader basement flood prevention, alongside clear discharge piping, functioning check valves, and regular sump pump testing.
For a home buyer or seller, the sump system is also part of the property's practical condition. Property managers and commercial owners face the same concern, especially where a flooded lower level can interrupt tenants, inventory, or business operations. If your primary pump has failed before, or your basement sits in a low area, backup protection deserves a closer look before the next heavy-weather event.
Tools, Materials, and Safety Prep Before You Start
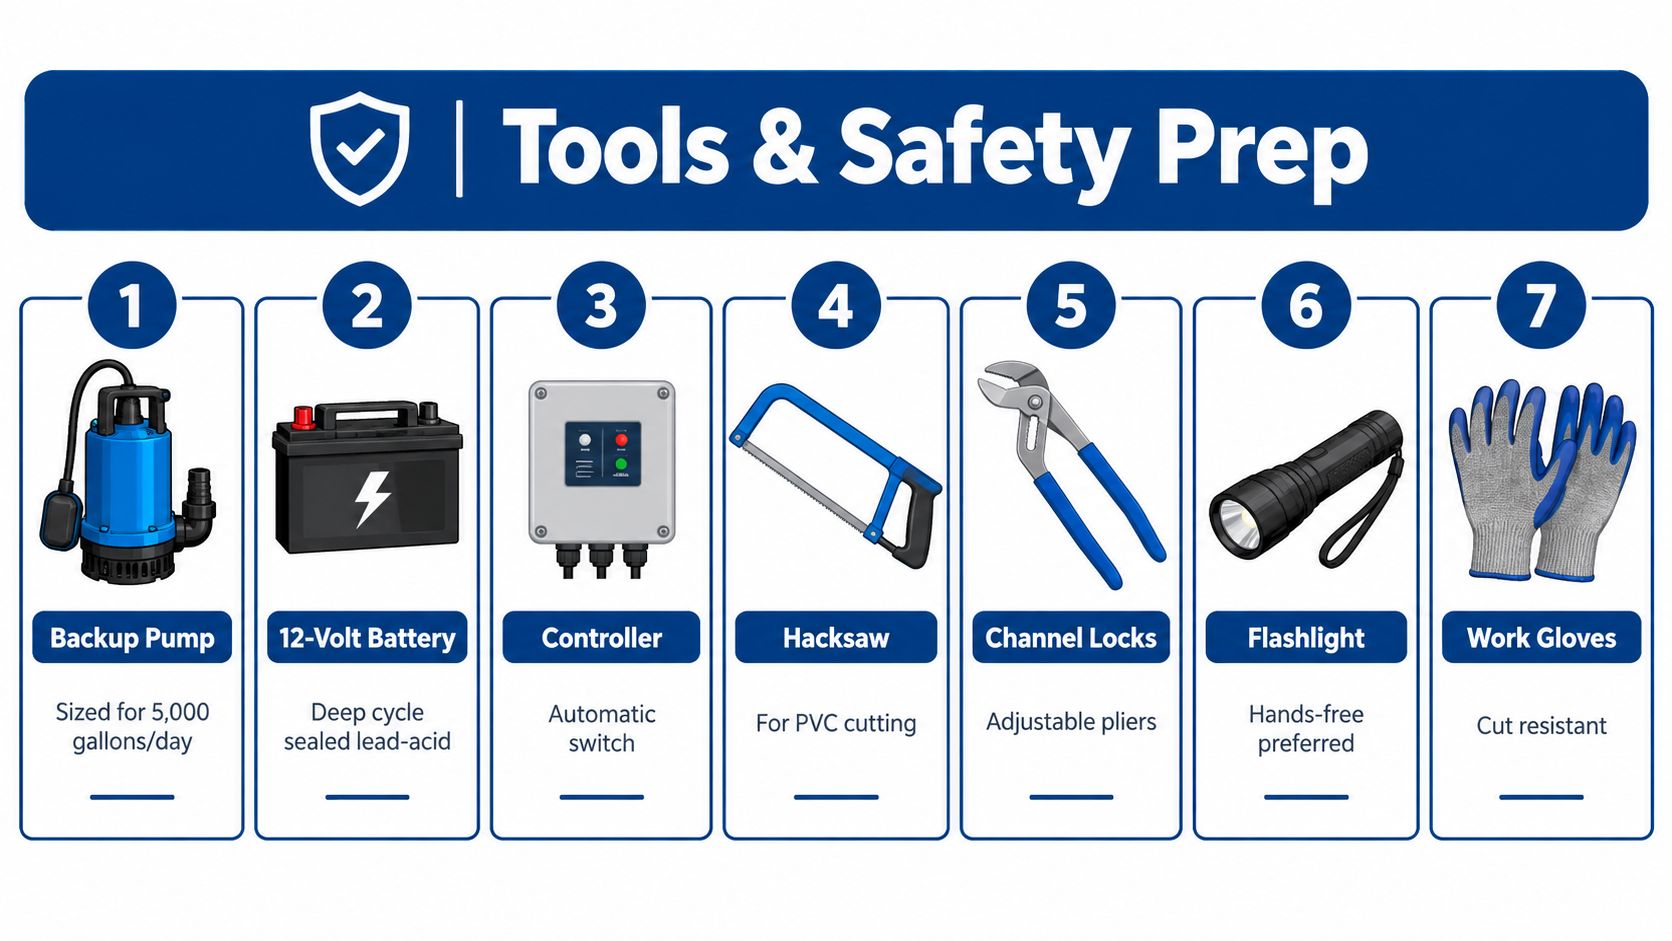
Start with the equipment list, not the sump pit. The exact parts depend on the pump manufacturer and the existing discharge layout, but most installations need a 12-volt DC backup pump, a compatible battery, a controller, discharge pipe, fittings, check valves, pipe sealant, and hand tools for cutting and joining the plumbing.
Build a practical checklist
Gather these items before disconnecting anything:
- Backup pump: Choose a model that fits the pit and can handle the required lift.
- Battery: Confirm that the controller accepts the battery type. One system is designed for a maintenance-free AGM battery, so compatibility matters more than using a battery that merely looks similar.
- Controller and charger: Keep the controller above floor moisture and follow the wiring diagram supplied with the unit.
- Discharge components: Plan for piping, a Y fitting, connectors, and check valves. Avoid improvising with cramped or unsupported fittings.
- Basic tools: A hacksaw or pipe cutter, channel-lock pliers, a flashlight, work gloves, and appropriate eye protection are useful starting points.
- Safety equipment: Keep the work area dry, remove jewelry before handling battery terminals, and avoid sparks or open flames around lead-acid batteries.
A battery backup installation is often designed around a 120-volt, 15-amp AC charger or controller outlet. Manufacturer manuals commonly instruct installers to label the circuit in the main panel as a backup power supply that must not be turned off. Liberty Pumps installation guidance also emphasizes a solid, level base, short and straight discharge routing, and check valves or carefully separated discharge plumbing to reduce backflow.
Practical rule: If the installation requires work inside the electrical panel, stop at the planning stage and bring in a qualified professional.
Before choosing a pump style, compare how a pedestal sump pump differs from a submersible pump. The available pit space, float movement, and discharge height all influence the right arrangement.
Preparing the Sump Pit and Positioning the Backup Pump
The pit needs to be clean and stable before the backup pump goes in. Turn off and disconnect power to the primary pump, then remove sediment, gravel, and debris that could block an intake or interfere with a float. Inspect the primary pump while you have access to it. A backup pump can't compensate for a damaged discharge line or a primary unit that is already failing mechanically.
Place the backup pump as close to the bottom of the pit as practical, while keeping its intake open. It shouldn't sit directly on clay, earthen material, or loose sand. If the bottom is unstable, use a solid pump stand that keeps the unit level without blocking the intake.
Give the floats room to work
Float interference is one of the easiest installation problems to overlook. The backup float must travel freely without touching the pit wall, the primary pump, wires, or discharge piping. Keep the primary and backup pumps from touching each other, and position the backup so its float activates at a higher water level than the primary float.
That higher setpoint gives the main pump the first opportunity to handle ordinary inflow. The backup starts when the water rises beyond the primary operating range or when the main pump isn't removing water effectively. The correct position depends on the specific float design, so don't force a universal height onto every system.
Plan the pipe route before cutting
Dry-fit the discharge components first. A short, direct route usually creates fewer restrictions than a series of tight bends, but a cramped pit may require a carefully supported layout. The battery and controller should sit on a shelf or stand above floor moisture, not on the pit rim where vibration or accidental contact could pull on cables.
Independent Liberty Pumps installation instructions describe a practical sequence: de-energize the primary pump, clear the pit, position the backup higher than the primary float, use a Y fitting rather than a T fitting, install check valves, raise the battery and controller, and test by simulating a power outage.
Connecting Discharge Plumbing and Checking Valves
Discharge plumbing determines whether the pump's rated capacity reaches the outside of the home. Join the primary and backup lines with a Y fitting, not a T fitting, when the system design calls for a shared discharge. The angled junction gives water a more direct path and reduces the chance that one pump's discharge will work against the other.
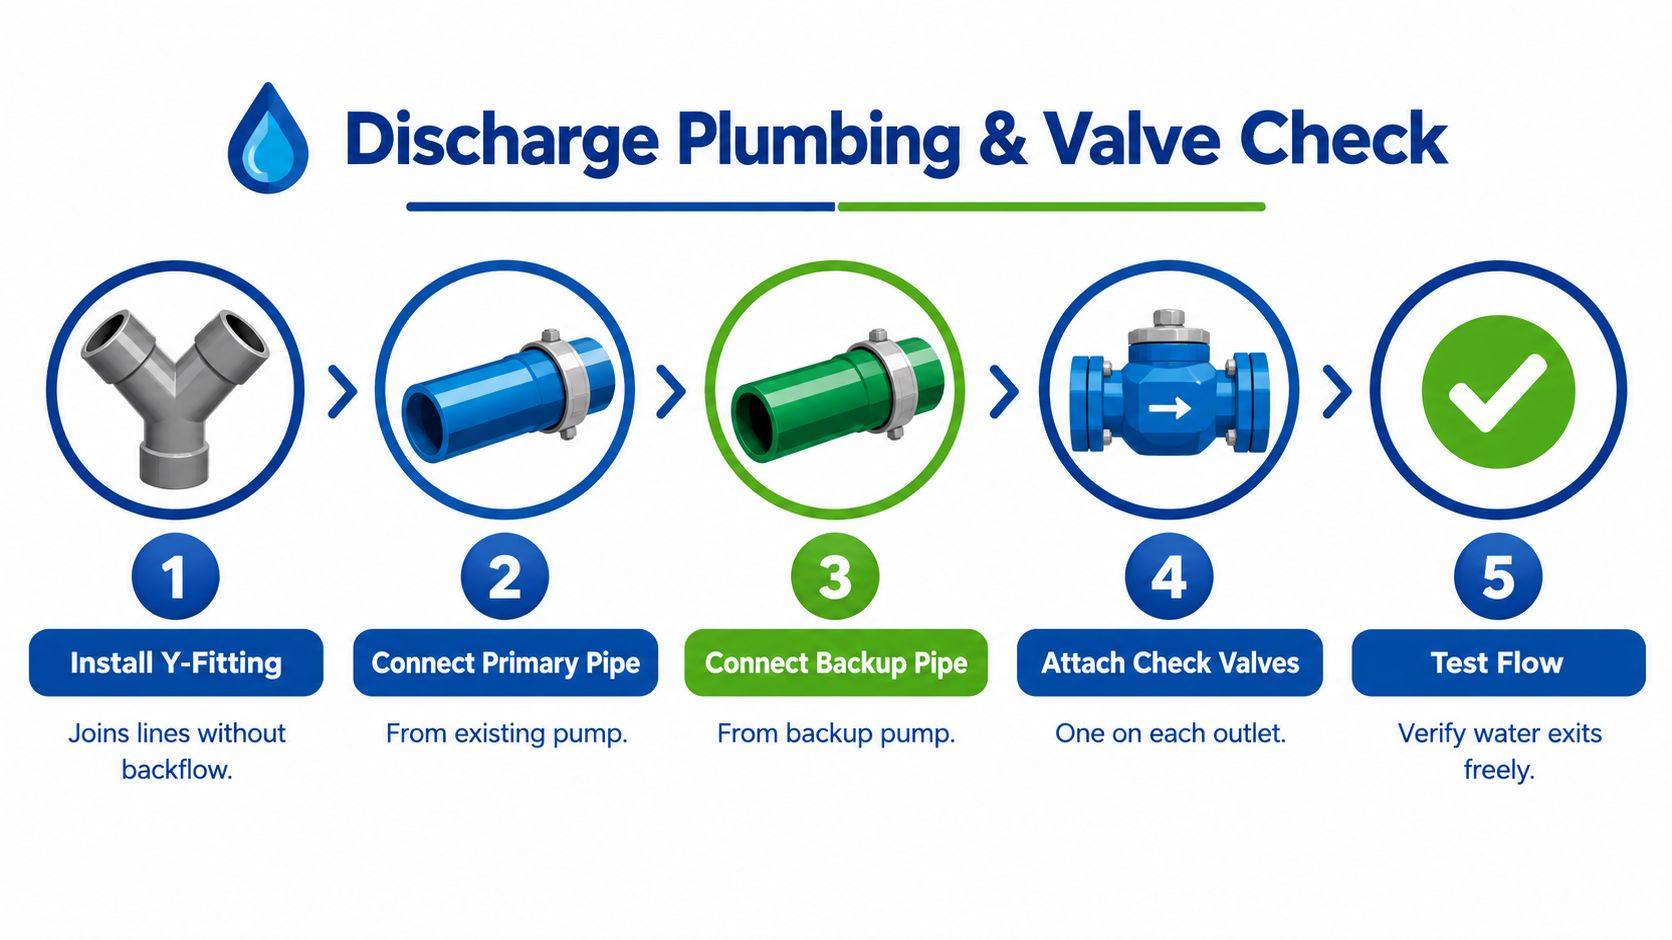
A check valve belongs on each pump's discharge path when the manufacturer's layout uses separate outlets. The valve stops water already in the pipe from falling back into the pit after the pump shuts off. Without that protection, the pump may need to move the same water repeatedly, and the pit can refill faster after every cycle.
Keep the flow path open
The check valve must remain unobstructed. Canada's flood-prevention guidance for sump pumps describes the valve as part of the inside discharge pipe and says water must be able to flow freely through it.
Check the following before sealing the joints:
- Pipe size: Match the pump outlet and the manufacturer's requirements. An undersized line can reduce actual performance.
- Valve direction: The arrow on the valve should point toward the discharge outlet.
- Support: Secure the piping so its weight doesn't pull on the pump outlet.
- Junction layout: Use the specified Y fitting and avoid forcing pipes into alignment.
- Outdoor termination: Confirm the discharge exits safely and doesn't immediately return toward the foundation.
Don't rely on a glued joint to correct poor alignment. Cut and dry-fit the pipe until the pump remains stable, the float moves freely, and the discharge line has a clean route.
After the plumbing is assembled, allow the joints to cure according to the product instructions before testing. If the existing discharge line is brittle, heavily restricted, or difficult to modify without disturbing the primary pump, a professional can assess whether separate discharge piping is the safer long-term option.
Installing the Battery, Controller, and Electrical Connections
The electrical side should be treated with the same care as the plumbing. Set the battery and controller on a raised shelf or stand where floor moisture can't reach them. Then follow the manufacturer's diagram for cable routing, controller connections, charger placement, and polarity.
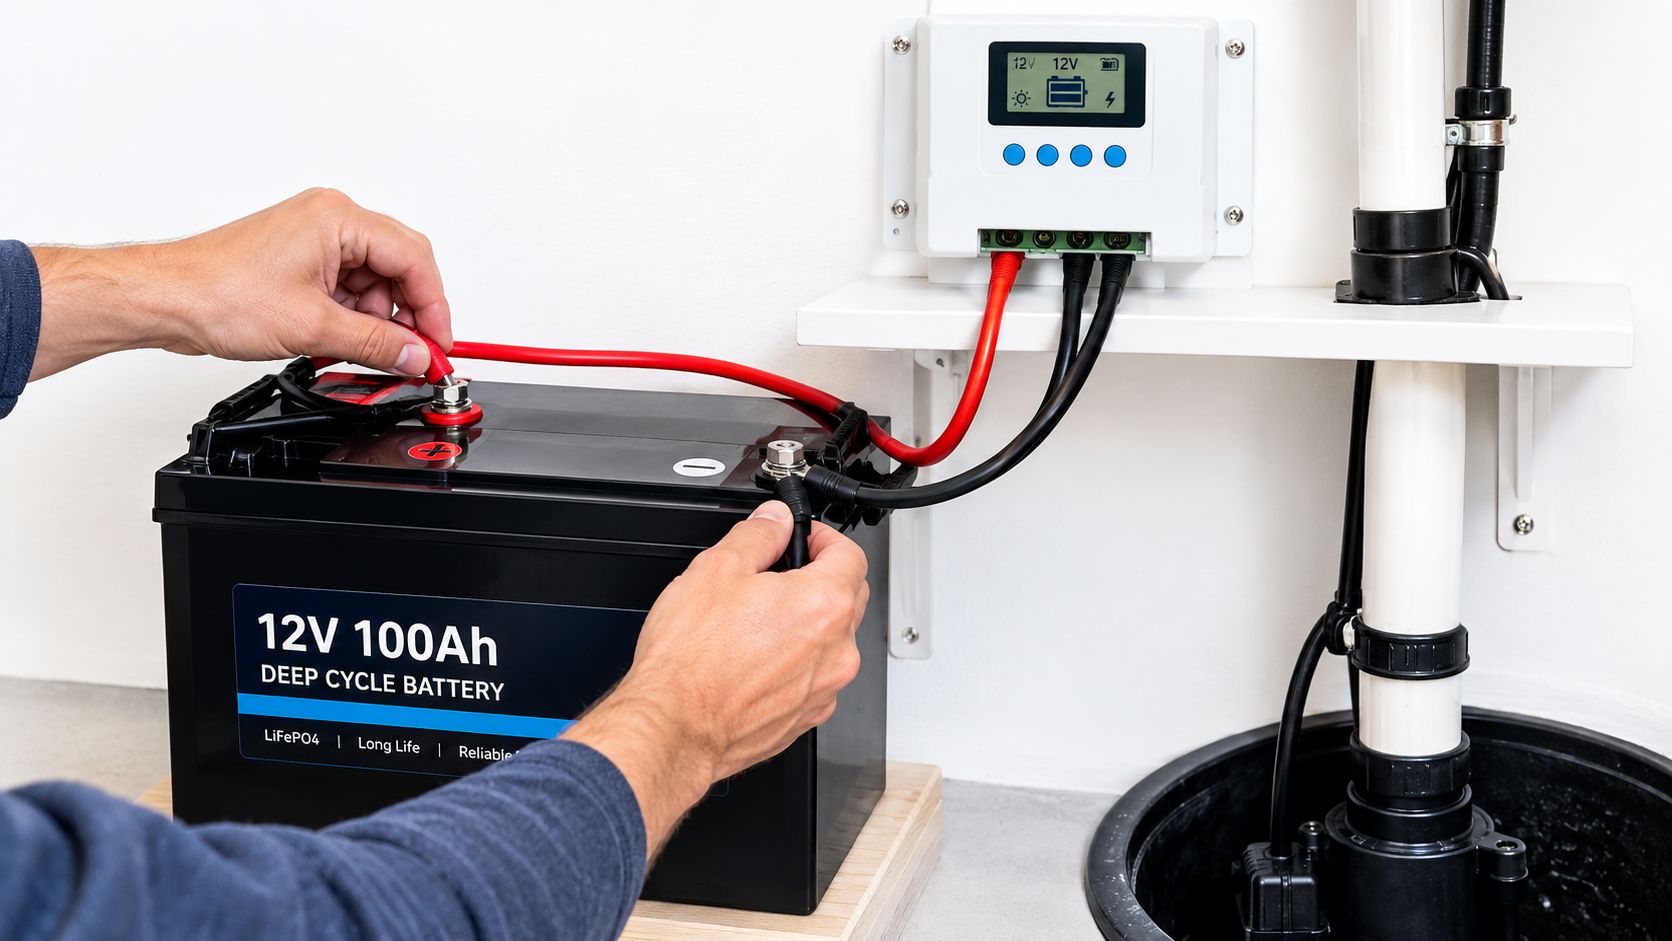
For a typical 12-volt system, the battery and controller must be compatible. Connect the positive and negative cables exactly as shown in the product manual, with the charger disconnected while the battery connections are being made. A reversed connection can damage the controller or create a hazardous short.
Size for real lift, not the box label
Pump output falls as water has to travel upward. One Grainger product specification lists a 1/3 hp, 12V DC pump at 30 gpm at 10 feet of head, with a 22-foot maximum head, 15.5 amps at 10 feet of head, a 16-inch minimum sump pit diameter, and a 1 1/2-inch discharge diameter. Another battery-backup unit is rated at 2,000 GPH at 0 feet and 1,000 GPH at 10 feet, illustrating why the discharge height must be part of the selection decision.
Your backup should be sized for the pit's expected inflow and should meet or exceed the primary pump's output where practical. A larger number on a product label doesn't guarantee that performance at your home's actual vertical lift.
Charge, then test the controls
Once the battery cables, pump cable, float switch, and controller connections are secure, connect the charger to the required outlet. Confirm that the controller indicates charging or normal operation. Keep wires away from the float's travel path and from sharp pipe edges.
Don't assume a charged battery proves the installation works. The pump still needs to activate at its intended float level, and the discharge needs to move water all the way to its outdoor exit.
Testing the System and Deciding When to Call a Professional
Testing should imitate the event you're preparing for. With the pit safely filled enough to operate the floats, confirm that the primary pump starts first. Then simulate a power outage according to the manufacturer's procedure and raise the water level until the backup float activates.
Watch the entire discharge path. Water should leave the home without obvious restriction, and it shouldn't fall back into the pit after the pump stops. Listen for unusual grinding, rattling, repeated cycling, or a controller alarm that indicates a battery, power, or pump problem.
Use the home's actual conditions
The backup pump's capacity must match the existing sump conditions. Consumer Reports' sump pump buying guidance explains that capacity is measured in gallons per hour and that vertical lift matters because the pump must push water from the basin to the outdoor discharge point.
A successful float test doesn't prove that the pump can keep up with heavy inflow. If the backup starts but removes water slowly, check the lift, pipe size, check valves, and battery condition before assuming the pump itself is defective.
A working motor isn't the same as a working system. The water has to enter freely, the float has to activate, and the discharge has to carry water away from the foundation.
Call a licensed plumber when the pit is too narrow for safe separation, the discharge line needs major alteration, the primary pump is damaged, or water enters faster than the backup can remove it. Call a qualified electrician for panel changes, permanent circuit work, or any electrical condition you can't identify confidently. A useful companion resource is how to check if your sump pump works, especially before Michigan's spring thaw and heavy-rain season.
Maintenance Tips and Local Plumbing Support in Michigan
Installation only helps if the system is ready when the next storm arrives. Inspect the backup float, clear debris from the pit, look for corrosion or loose battery connections, and confirm that the controller remains plugged into its designated outlet. Test the system before spring thaw, after major plumbing work, and before periods of heavy rain.
Battery runtime varies with battery size, pump load, and cycling frequency. A battery-powered backup should be treated as short-term emergency protection, not as a system designed to run indefinitely. One expert guide to backup sump protection says a single charged deep-cycle battery may provide only a few hours of pumping, while other buying guidance cites roughly 5 to 7 hours of continuous runtime for a quality system.
A simple local maintenance routine
- Before spring storms: Test the float and confirm the discharge outlet is clear.
- During winter: Watch for frozen discharge sections and conditions that could send water back toward the foundation.
- After an outage: Check the controller, battery condition, and pump operation rather than assuming the battery fully recharged.
- During a home sale: Have the sump and backup system evaluated so buyers know whether the installation, discharge, and battery arrangement are serviceable.
- For rental and commercial properties: Keep written service notes and arrange testing before severe weather periods.
Homeowners in Fraser, Sterling Heights, Clinton Township, Troy, Macomb, and Shelby Township can also request help with sump pump repair, backup pump installation, drain cleaning, sewer repair, leak detection, pipe repair, and other residential or commercial plumbing needs. Related guidance on sump pump maintenance can help you organize recurring checks.
A battery backup won't solve every basement flooding problem. It works best as part of a complete system that includes a properly sized primary pump, clear discharge plumbing, functioning check valves, a compatible battery, and realistic maintenance. If you're unsure whether a DIY installation is safe, getting a professional assessment before the next storm is a sensible choice.
Call Jays Plumbing and Sewer at 586-634-3450 for battery backup sump pump installation, sump pump repair, discharge troubleshooting, and related residential or commercial plumbing service in Southeast Michigan. Visit Jays Plumbing and Sewer to schedule service or request an estimate for your Fraser, Macomb County, Oakland County, or Wayne County property.
