
You flush the toilet, hear the tank refill, and notice a thin stream of water running from the area where the tank meets the bowl. A towel catches the first few drops, but the leak returns after every flush. In a Macomb County home, that small puddle can come from a worn rubber gasket, corroded bolts, a cracked porcelain connection, or a leak that only appears to come from the tank-to-bowl joint.
The repair often looks simple, but lasting results depend on even compression, correct replacement parts, clean sealing surfaces, and careful porcelain handling. Tightening the bolts harder is usually not the answer. It can turn a seal problem into a cracked toilet.
Table of Contents
- Why Your Toilet Is Leaking Between the Tank and Bowl
- How to Confirm the Leak Source
- The Three Main Causes of Tank-to-Bowl Leaks
- Repairing the Tank-to-Bowl Connection
- Why Some Toilet Leaks Keep Coming Back
- When to Call a Professional Plumber
Why Your Toilet Is Leaking Between the Tank and Bowl
A homeowner may first blame the wax ring when water appears near the floor. That makes sense because the wax ring seals the toilet to the drain flange. However, when water is tracking down from the back of the bowl or appearing directly below the tank, the tank-to-bowl connection deserves attention first.
This joint uses a large rubber gasket around the tank outlet, along with bolts and washers that hold the tank against the bowl. Every flush sends water through that connection. Years of water exposure can leave the gasket flattened, brittle, or hardened, while the bolts may corrode and stop applying pressure evenly. Porcelain can also develop a hairline crack, especially after a previous repair was overtightened.
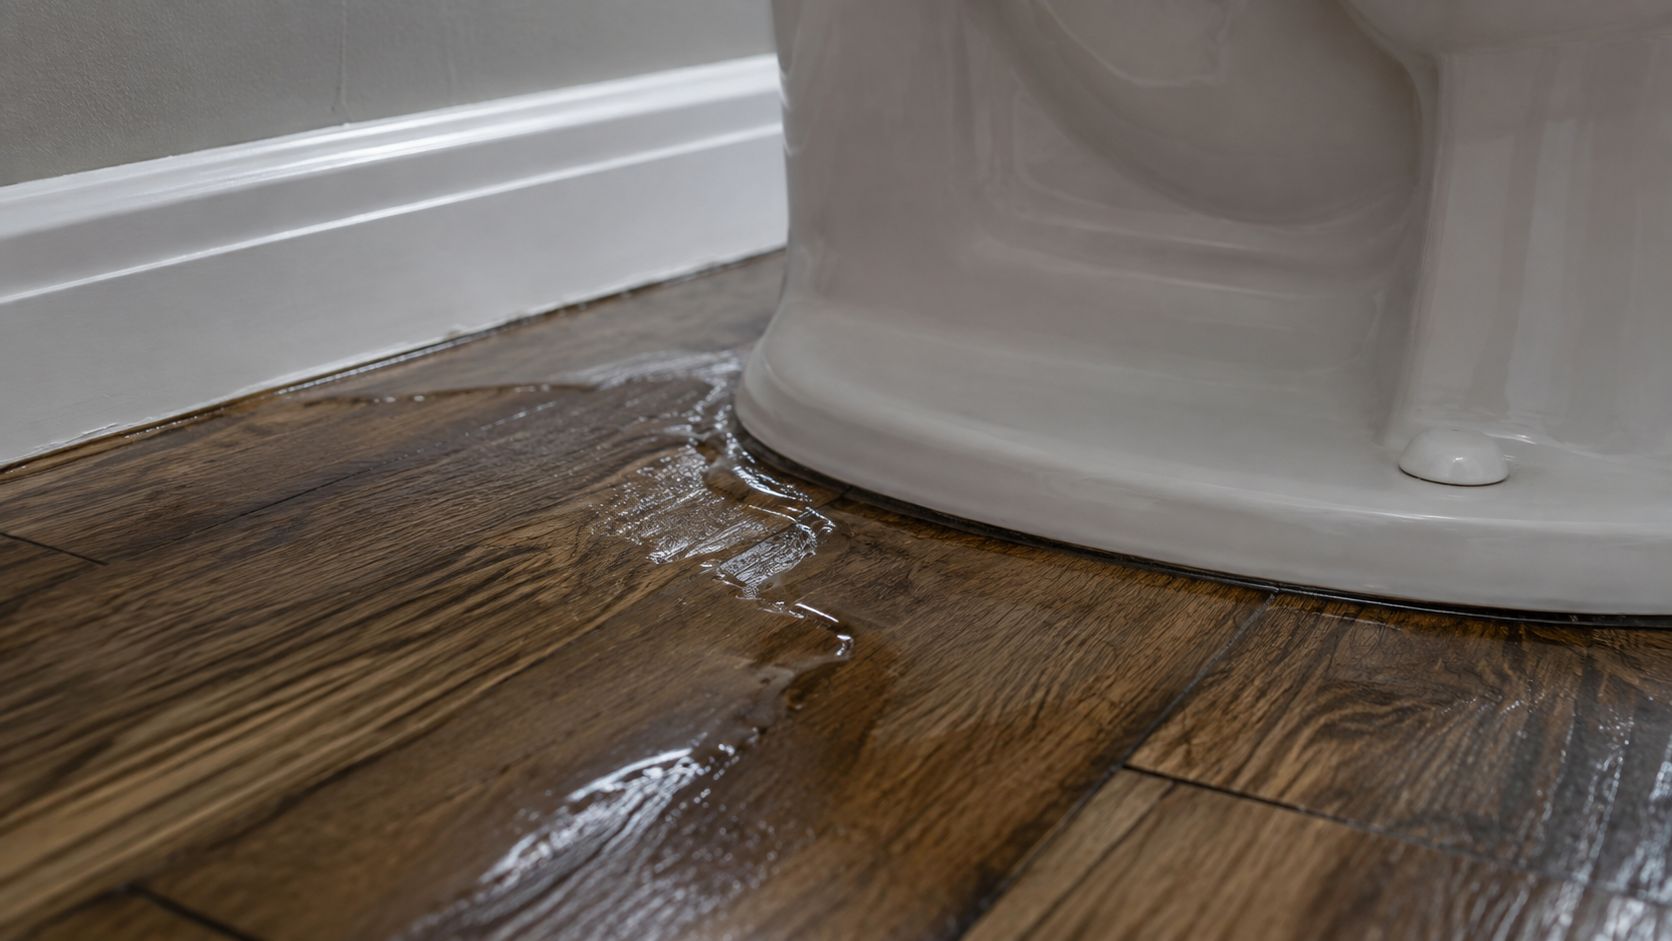
What the leak can tell you
The timing and location of the water provide useful clues:
- Water appears after flushing: The gasket or the tank-to-bowl connection may be losing its seal under flow.
- A steady drip reaches the bolts: Water may be traveling along the gasket or through corroded hardware.
- The tank rocks when touched: The bolts may not be holding the tank evenly, or the porcelain connection may be damaged.
- Water starts at the supply connection: The leak may involve the fill valve or supply line instead of the tank-to-bowl gasket.
Toilets are a major indoor water user. A municipal conservation fact sheet citing the American Water Works Association says toilets account for 45% of indoor water use in a typical residence, and it estimates that 20% of toilets leak. The same fact sheet states that a running toilet may waste over 1 gallon per hour, or about 26 gallons per day, which can reach roughly 780 gallons per month and 9,490 gallons per year when left unresolved. Those figures are documented in the American Standard toilet leak guidance.
That's why a tank-to-bowl leak deserves more than a towel under the toilet. It can damage flooring, create hidden moisture, and raise water use without making a dramatic sound.
How to Confirm the Leak Source
Before removing the tank, identify exactly where fresh water starts. A supply-line drip, condensation, fill-valve leak, or wax-ring failure can wet the same floor area and lead you to buy the wrong parts.
Start by drying the tank, bowl, supply line, bolts, and floor with a clean towel. Use a flashlight to inspect the narrow area where the tank rests on the bowl. Mineral deposits, rust-colored trails, or a damp bolt washer can show where water has been traveling.
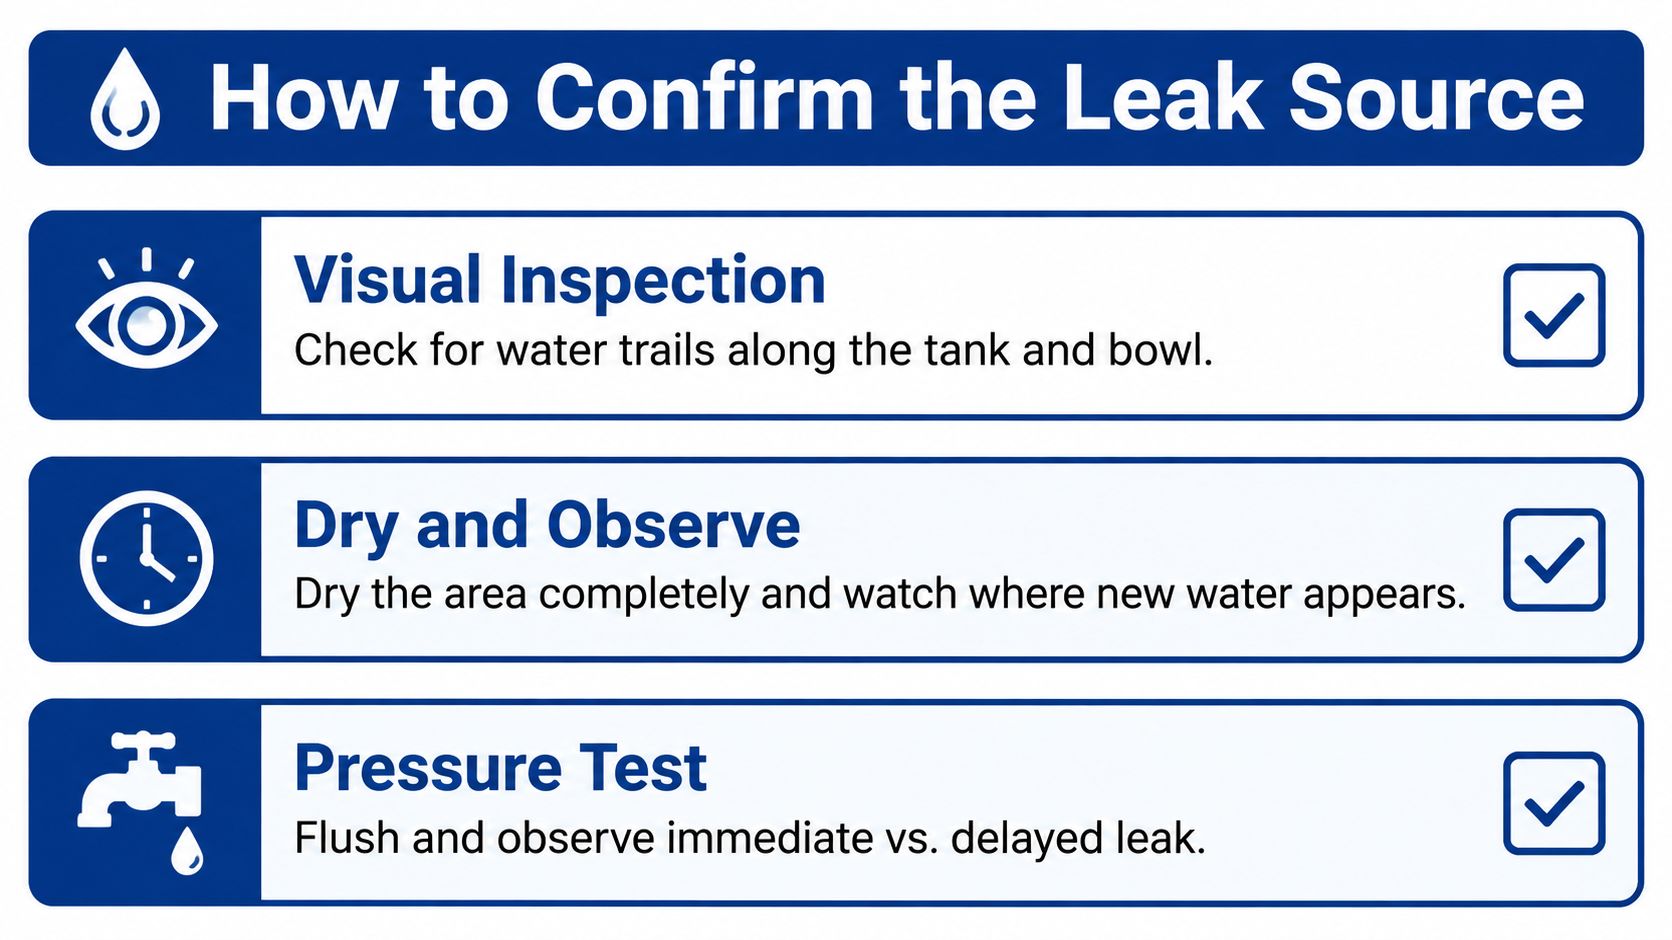
A simple diagnostic sequence
- Dry everything completely. Include the underside of the tank, the supply connection, and the floor behind the toilet. If the bathroom is humid, condensation may collect on the tank and imitate a leak.
- Check the supply line first. Run a dry paper towel around the shut-off valve and the fill-valve connection. Fresh moisture at either point indicates a supply-side problem.
- Use food coloring in the tank. The EPA WaterSense field test recommends placing food coloring in the tank and checking whether color appears in the bowl within 5 to 10 minutes. If it does, the toilet has an internal leak, although that test doesn't by itself identify a tank-to-bowl gasket failure. The procedure is described in the EPA WaterSense toilet leak detection guidance.
- Inspect without flushing. Wait and watch the tank-to-bowl joint. Colored water or a new wet trail at the tank base points toward the connection.
- Flush once and observe. If the joint stays dry while the toilet sits but leaks immediately during flushing, water is likely escaping as it passes through the tank outlet.
For a related fill problem, see this guide to a toilet tank that won't fill with water. The symptom can overlap with other tank leaks, so source confirmation matters.
A toilet that leaks only at the floor after flushing may need a different diagnosis. The tank-to-bowl connection and the wax ring are separate seals, and replacing one won't repair the other.
The Three Main Causes of Tank-to-Bowl Leaks
Most leaks at this joint come from the gasket, the hardware, or the porcelain. Each failure leaves a different pattern, and the repair decision depends on separating a replaceable part from a damaged fixture.
The gasket loses its shape
The tank-to-bowl gasket, sometimes called the spud gasket, seals the large opening between the tank outlet and bowl inlet. Rubber gradually compresses under the tank's weight and can become hard, cracked, flattened, or incompatible with the toilet design. A damaged gasket often leaks during flushing because water is moving through the joint, although a badly deteriorated seal can seep while the tank is full.
The gasket may also look intact while failing. If water runs along the bolts, the bolts can appear to be the source even though the gasket is allowing water into the connection. The correct response isn't always more tightening.
Bolts create uneven pressure
Tank bolts hold the two porcelain sections together. Corrosion, damaged threads, worn rubber washers, or uneven tightening can prevent the gasket from compressing consistently. One side may seal while another leaves a narrow path for water.
A loose tank can also move during use. That movement places repeated stress on the gasket and hardware. Reusing visibly corroded bolts after a gasket swap often leaves the original problem partly in place.
Porcelain can be the real failure
A hairline crack near the tank outlet, bolt hole, or bowl connection can leak intermittently and worsen as the tank moves or the temperature changes. A crack caused by previous overtightening won't be corrected by installing another gasket. Porcelain isn't a flexible sealing material, so a damaged tank or bowl generally calls for fixture replacement rather than a forced repair.
The field-study baseline is useful here, even though it examined flush-valve seals rather than tank-to-bowl gaskets. A major independent study found that less than 6% of toilet fixtures were leaking through the flush-valve seal, showing that internal sealing components have measurable failure rates and are consumable parts. The findings are available in the toilet flapper field study report.
| Failure Point | Common Symptoms | Repair Complexity | Typical Fix |
|---|---|---|---|
| Gasket | Damp joint or seepage after flushing | Moderate | Replace the gasket and clean the mating surfaces |
| Bolts and washers | Moisture around hardware, unstable tank, uneven compression | Moderate | Replace the complete hardware set and tighten evenly |
| Porcelain crack | Persistent leak, visible fracture, movement, or worsening seepage | High | Replace the damaged tank, bowl, or complete toilet |
If the tank is filling beyond its normal level, consult this guide to a toilet tank that overflows. Overflowing water follows different paths and shouldn't be confused with a failed tank-to-bowl seal.
Repairing the Tank-to-Bowl Connection
A gasket and bolt replacement is procedural. The quality of the result depends less on force and more on preparation and alignment.
Remove the tank without stressing the porcelain
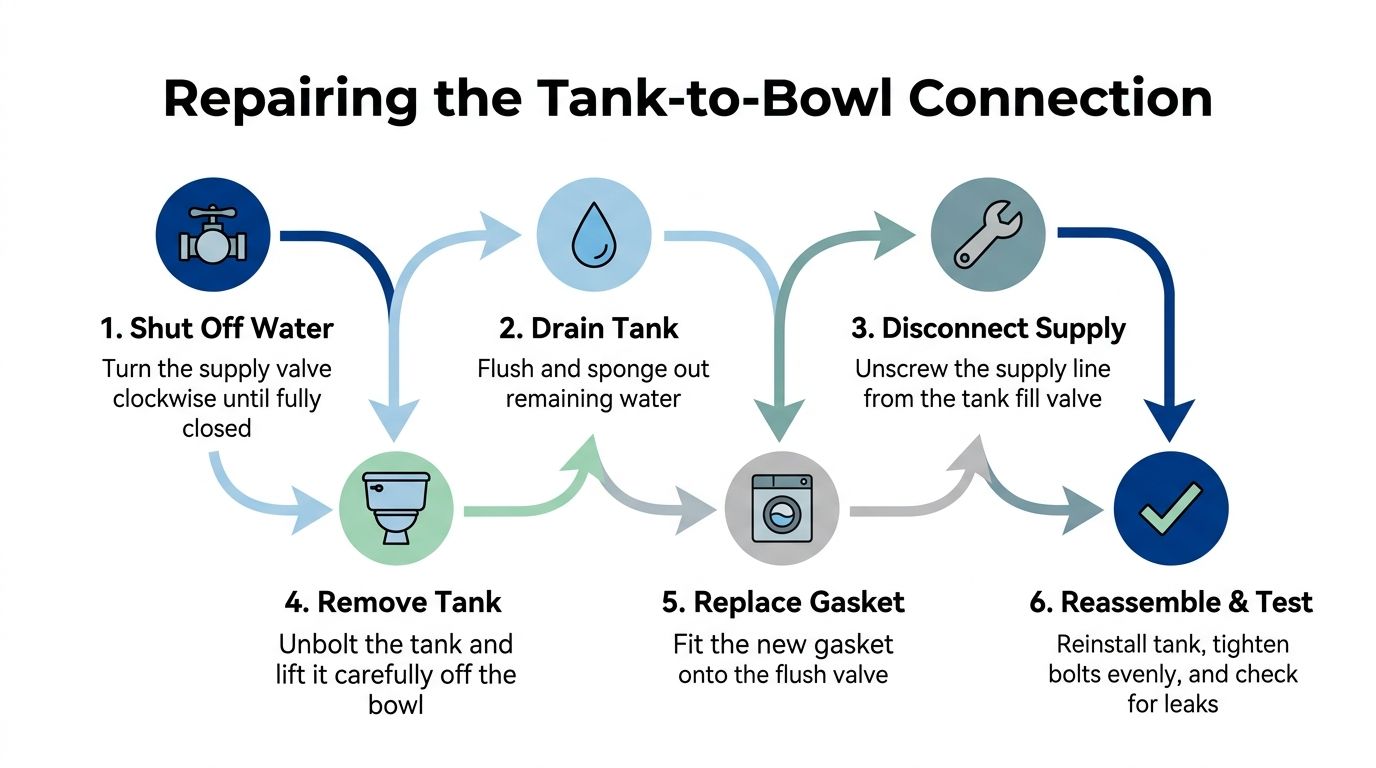
Shut off the supply valve and flush the toilet. Sponge out the remaining tank water into a bucket, then disconnect the supply line from the fill valve. Keep the tank supported as you remove the nuts, because a partially drained tank can still be awkward and can crack if it tips.
Use an adjustable wrench or socket that fits the hardware. If corrosion has locked the nuts in place, penetrating oil may help, but don't twist hard enough to transmit stress into the porcelain. Sometimes cutting badly corroded bolts is safer than forcing them.
Replace the seal and hardware together
With the tank removed, take off the old gasket and bolts. Scrape away mineral deposits carefully and wipe both mating surfaces clean. The new gasket must sit correctly on the tank outlet. Many replacement gaskets have a tapered side that faces away from the tank, but the toilet's design and the part instructions should control the orientation.
Industry repair guidance recommends replacing the gasket and tank bolts or washers as a set when the rubber is hardened, cracked, or the metal is corroded. A new gasket can't compensate for hardware that won't hold uniform pressure.
- Set the tank in position. Lower it straight onto the bowl and make sure it sits level without rocking.
- Install the new bolts and washers. Place the rubber washers where the kit specifies, then add the metal washers and nuts.
- Tighten alternately. Work from side to side in small increments so the gasket compresses evenly.
- Stop when the tank is stable. The goal is a seated tank, not maximum bolt tension.
- Reconnect and fill. Restore the supply, let the tank fill, and inspect the joint while flushing.
- Use a dry paper towel. Run it around the gasket and bolt areas. Even a small wet mark tells you the seal needs attention.
Porcelain warning: Over-tightening can crack the tank or bowl and turn a gasket repair into a toilet replacement.
One installation guide recommends about two to three turns past hand-tight, followed by a leak check and quarter-turn adjustments only if seepage remains. See the detailed Korky tank-to-bowl gasket repair procedure. If the tank still rocks after careful reassembly, the gasket may not be compressed enough. If seepage continues after modest adjustment, replace the gasket and hardware rather than applying more force.
Why Some Toilet Leaks Keep Coming Back
A gasket swap isn't automatically a lasting repair. If the connection fails again, the replacement part may be reacting to a condition that wasn't corrected.
Hard-water scale can collect on the flush-valve seat and create an uneven surface. The gasket then contacts the porcelain in some areas but not others. Clean the mating surfaces and inspect them under a bright light. A rough mineral ridge, chipped edge, or remaining rubber fragment can explain seepage that returns soon after installation.
Parts and hardware matter
Universal kits are convenient, but toilets differ across brands and two-piece designs. A gasket that's too thick may hold the tank above its intended position, while one that's too thin may not compress sufficiently. Compare the old part, the tank outlet, and the replacement instructions before installation.
Corroded bolts create another repeat failure. Even if the nuts tighten, damaged threads or deteriorated washers may not maintain stable clamping pressure. Replace the hardware when corrosion is significant instead of trying to rescue it with extra torque.
Look for stress, movement, and damage
A tank that rocks transfers movement into the seal. Michigan winters can make unheated bathrooms and basement installations more challenging because seasonal temperature changes can contribute to movement and repeated stress at already weak connections. That doesn't mean temperature change alone caused the leak, but it can expose an uneven installation.
Inspect the tank flange and bolt holes for chips or hairline cracks. A warped base or cracked porcelain won't become flat because a new gasket is installed. Guidance on inspecting the fixture for cracks and avoiding excessive tightening appears in American Standard's tank-to-bowl leak guidance.
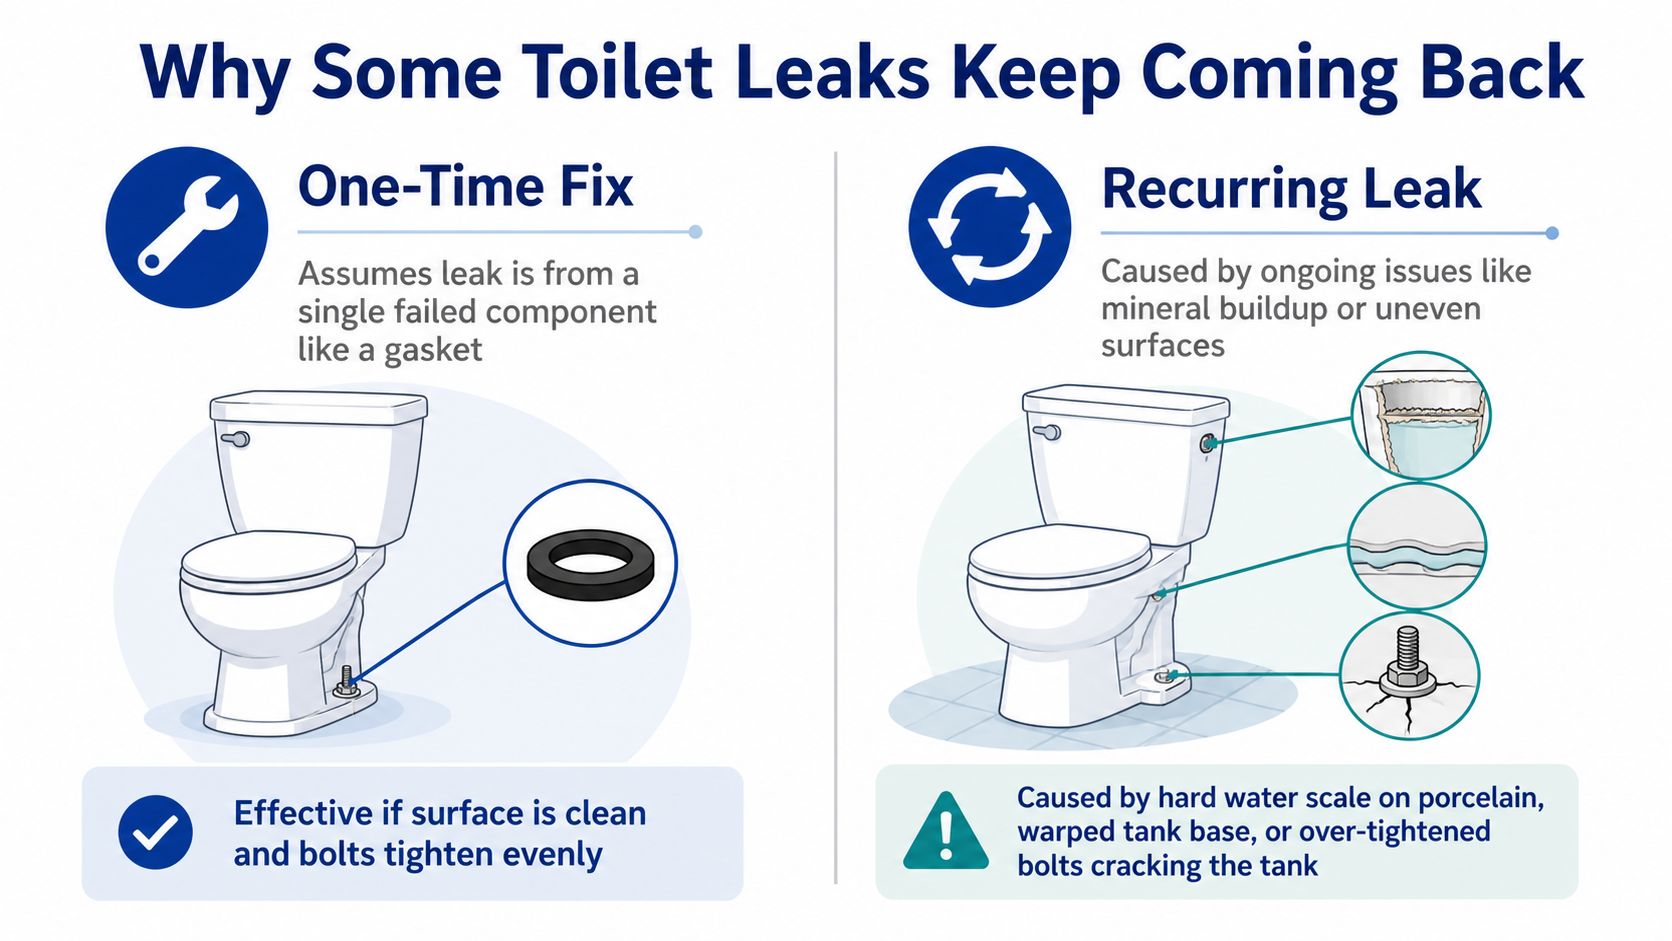
If a second repair fails, stop tightening and reassess the fixture, the part compatibility, and the hardware. In an older Macomb County home, replacing the toilet may be more practical than repeatedly rebuilding a damaged connection.
When to Call a Professional Plumber
A careful homeowner may handle a straightforward gasket and bolt replacement, but certain signs call for professional assessment. Visible porcelain cracks, a rocking tank, repeated gasket failures, or badly corroded hardware indicate that the problem may be larger than a worn seal.
Don't rely on sealant to solve a cracked tank or bowl. It may hide the leak temporarily without restoring the structural strength of the fixture. A sudden failure can release tank water onto the bathroom floor, damage flooring and subflooring, and spread moisture into areas that are difficult to inspect.
A professional is also useful when the toilet is older or the original parts are difficult to identify. Correct gasket dimensions and bolt placement vary across toilet designs. A plumber can determine whether the fixture needs a compatible repair kit, a tank replacement, or a complete toilet replacement.
The leak may also be at the floor flange or wax ring. If the tank-to-bowl area stays dry but water appears at the base after flushing, the toilet may need to be removed and reset. That work requires careful handling of the fixture and the floor connection, especially when the toilet rocks or the flange has been damaged.
For homeowners comparing service options, this leak detection cost guide can help frame the decision. Early diagnosis is usually more sensible than allowing a small leak to continue while flooring absorbs water.
Call Jay's Plumbing and sewer Now @ 586-634-3450
Jays Plumbing and Sewer provides residential and commercial toilet leak detection, tank-to-bowl gasket repairs, hardware replacement, and fixture replacement across Fraser, Macomb County, Oakland County, and nearby communities. If your toilet is leaking between the tank and bowl, visit Jays Plumbing and Sewer to schedule plumbing service or request help with a persistent leak. Call Jay's Plumbing and sewer Now @ 586-634-3450.
