

A toilet that rocks when someone sits down, a faint stain appearing on the ceiling below, or a damp smell around the bathroom base often gets blamed on the wax ring. Sometimes that's the problem. Just as often, the failure is underneath it, where the toilet flange has cracked, corroded, loosened, or ended up too low after new flooring was installed.
To replace a toilet flange correctly, you have to treat the flange as both a plumbing connection and a structural support. The right repair might be a stainless repair ring, a spacer kit, a twist-in gasketed flange, or a complete replacement. Choosing the wrong option, especially around flange height and floor anchoring, is what turns a small toilet repair into recurring leaks and damaged flooring.
Table of Contents
- Why the Toilet Flange Matters More Than You Think
- Tools, Materials, and Prep Before You Touch the Toilet
- Repair Ring, Spacer Kit, or Full Flange Replacement
- Removing the Toilet and Inspecting the Drain
- Setting the New Flange at the Right Height
- Sealing, Bolting, and Getting the Toilet Level
- Testing for Leaks and Knowing When to Call a Pro
Why the Toilet Flange Matters More Than You Think
A toilet that rocks, leaves moisture around its base, or develops a sewer odor may have a flange problem rather than a simple wax-ring failure. The flange, also called a closet flange, connects the toilet outlet to the drainpipe, receives the closet bolts, and gives the wax ring or rubber gasket a surface to seal against.
Its height matters just as much as its condition. New flooring can leave the flange below the finished floor, while an old ring may be cracked, corroded, or loose. A replacement wax ring cannot reliably correct a flange that sits too low or moves under load. That flange-height-to-floor relationship is behind many repeat leaks, and it should be checked before choosing a repair ring, spacer kit, or full replacement.
Plumbing requirements treat the flange as part of the fixture connection and support. The 2024 International Plumbing Code requires plastic closet flanges to be at least 1/4 inch thick, attached to the drain, and anchored to the structure with corrosion-resistant screws or bolts. Comparable guidance describes closet rings as about 7 inches in diameter, with a 1 1/2-inch-wide flange face for the seal. Caulked-on rings must be at least 1/4 inch thick and 2 inches deep, as outlined in this toilet flange code overview.
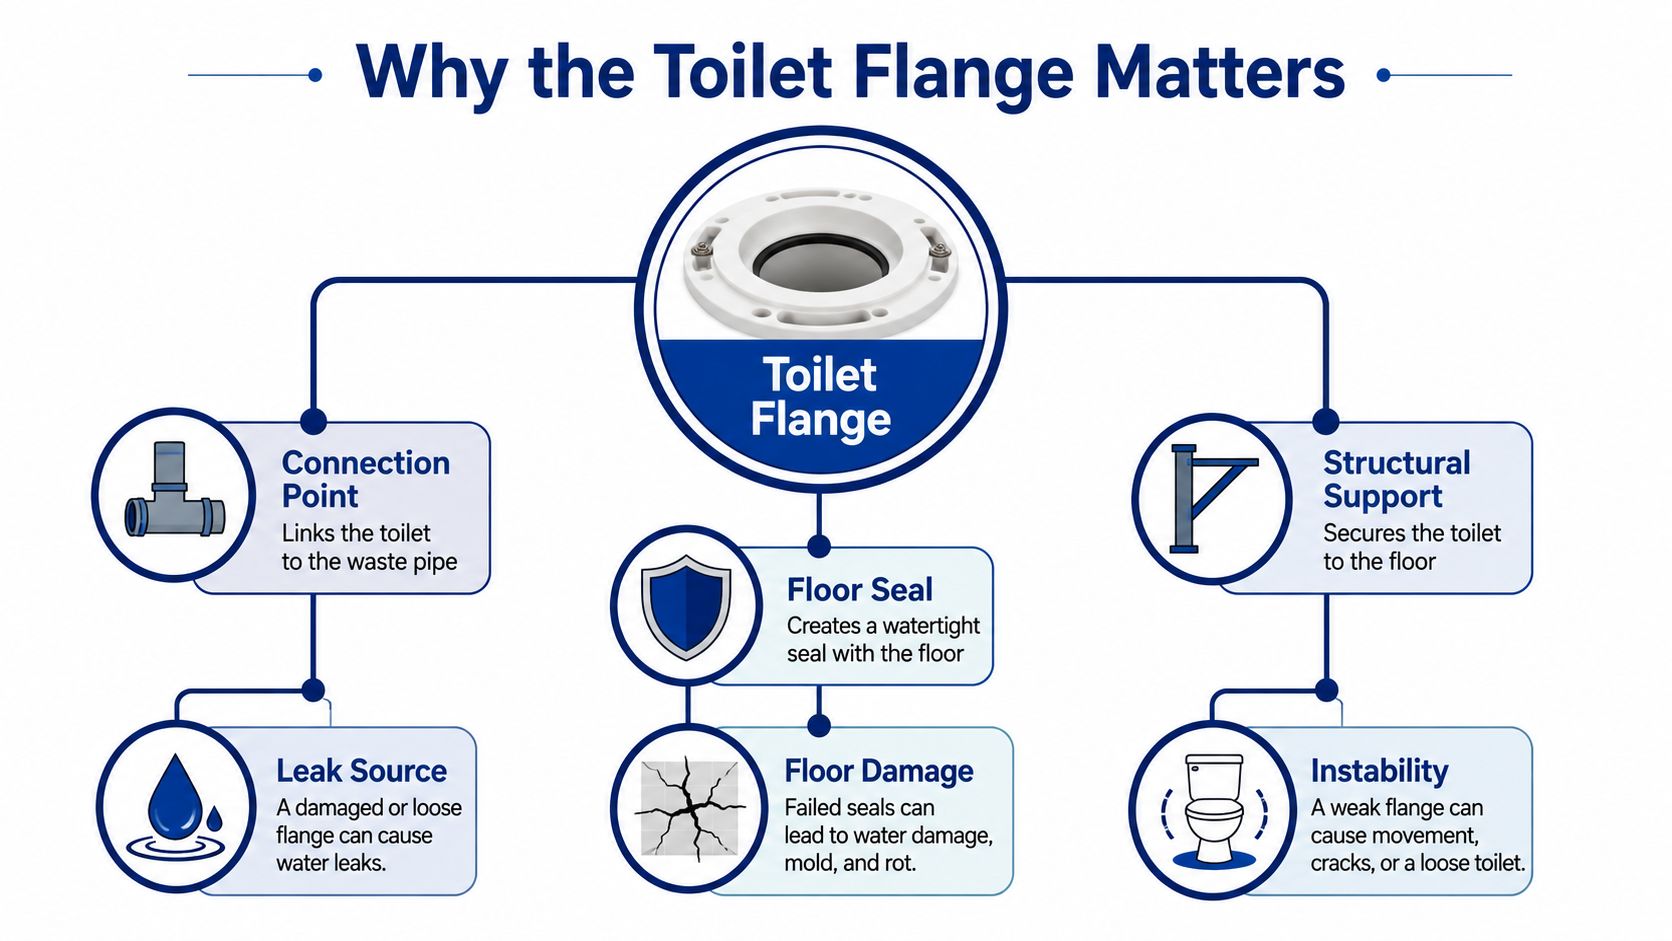
The three jobs that matter
- Connection point: The flange joins the toilet outlet to the drain system.
- Floor seal: A wax ring or rubber gasket helps contain wastewater and sewer gases.
- Structural support: The flange transfers toilet movement and load into the subfloor or slab.
A loose ring lets the toilet shift whenever someone sits down. That movement strains the seal, allows water to reach the flooring around the drain opening, and can loosen the mounting hardware. A firm floor and properly anchored flange prevent those failures.
A Canadian code reference also calls for a flange secured on a firm base, bolted to the fixture, and sealed with a rubber gasket or closet-setting compound. It recognizes brass, PVC, ABS, and iron as approved materials, as explained in this historical and comparative flange code reference.
A sewer odor near the toilet can signal a failed seal. For odors that spread beyond the bathroom, review what causes a sewage smell in a house before treating the flange as the only possible source.
Tools, Materials, and Prep Before You Touch the Toilet
Before removing the toilet, set up the room as if you're trying to avoid an emergency trip to the hardware store. Shut off the angle stop, flush the toilet, and use a sponge to remove the remaining water from the tank and bowl. A bucket, old towels, and cardboard will protect the floor and give you somewhere safe to place the bowl.

What belongs beside the toilet
Have these items ready:
- Hand tools: Adjustable wrench or socket wrench, putty knife, small pry bar, and a hacksaw or oscillating multi-tool for stubborn closet bolts.
- Protection: Nitrile gloves, rags, a bucket, cardboard, and an old towel.
- Replacement parts: A flange that matches the drain system, new closet bolts, a new wax ring or rubber gasket, and silicone caulk where the repair method calls for it.
- Fasteners: Corrosion-resistant screws or appropriate concrete fasteners, selected for the actual subfloor or slab.
Take a quick photograph of the existing flange before you loosen anything. Capture the bolt-slot orientation, the pipe material, and the relationship between the ring and the finished floor. That image can prevent a frustrating moment later when the replacement flange is installed but the toilet holes don't line up.
PVC, ABS, brass, and cast iron are all common flange materials, but the replacement should match the existing drain system where possible. PVC is commonly used with PVC drainage, ABS with ABS, and cast iron with cast-iron piping, as described in this guide to toilet flange sizes and materials.
Practical rule: Don't start cutting pipe until you know whether the existing flange can be repaired and what the finished floor height will be.
In Southeast Michigan homes, especially older properties around Fraser, Warren, Sterling Heights, Royal Oak, and other Macomb and Oakland County communities, you may find older metal connections, remodel layers, or flooring that has raised the finished elevation. Those conditions deserve inspection before you commit to a full swap.
Repair Ring, Spacer Kit, or Full Flange Replacement
The flange repair decision should follow the damage, not the label on the box. A repair ring makes sense when the flange body and pipe connection are sound but the bolt slots or ring edge are damaged. A spacer or extender addresses elevation. A full replacement is necessary when the flange or pipe connection can no longer provide reliable support.
A stainless or steel repair ring can reinforce a cracked section and give the closet bolts a firm mounting surface. Use silicone when the specific repair-ring instructions call for it, and fasten the ring into solid structure. This approach avoids cutting the drainpipe when the underlying flange remains intact.
A spacer kit raises a flange that became recessed after tile, luxury vinyl plank, or underlayment was installed. It's a better solution than trying to make a deep wax stack compensate for a finished-floor problem. Twist-in gasketed replacement flanges can also help with certain cast-iron or difficult-access repairs, but the pipe condition and product compatibility still matter.
| Flange Fix Options Compared | Best For | Typical Cost | When to Skip It |
|---|---|---|---|
| Repair ring | Minor cracks, worn bolt slots, or a corroded ring with a sound body | Varies by product and installation | Skip it when the hub, pipe, or supporting floor is compromised |
| Spacer kit | A flange sitting low after new flooring or underlayment | Varies by product and installation | Skip it when the flange is broken through or cannot be anchored |
| Twist-in gasketed flange | Certain cast-iron and limited-access repairs without cutting the drainpipe | Varies by product and installation | Skip it when the existing pipe is cracked or unstable |
| Full flange replacement | A broken hub, severe corrosion, or a flange that cannot support the toilet | Varies by pipe material and access | Skip a DIY approach when pipe or subfloor work is extensive |
The practical difference is important. A repair ring fixes the mounting surface. A spacer fixes elevation. A full replacement rebuilds the connection between the toilet, drain, and floor.
A 4-inch pipe may accept an inside closet flange, while a 3-inch cast-iron arrangement may require removing or breaking out the old flange, according to this guide to toilet flange types and repair options. If the flange sits below the finished floor, treat that as a separate height-remediation problem, not as a reason to keep adding wax.
Removing the Toilet and Inspecting the Drain
Start at the water supply. Close the angle stop, flush, and sponge the tank and bowl until only a small amount of residual water remains. Disconnect the supply line at the tank connection, not by twisting the shutoff valve or riser, because a damaged valve can create a second repair before you reach the flange.
Remove the plastic caps from the closet bolts and loosen the nuts. If a nut spins with the bolt or the threads are too corroded to release, cut the bolt with a hacksaw blade or oscillating multi-tool. Don't pry aggressively against the porcelain. A cracked toilet creates a much larger problem than a stubborn bolt.
Rock the bowl gently from side to side to break the wax seal. Lift it straight up with both hands and place it on cardboard or a drop cloth. Keep it away from finished concrete or landscaping, where residual trap water can stain surfaces.
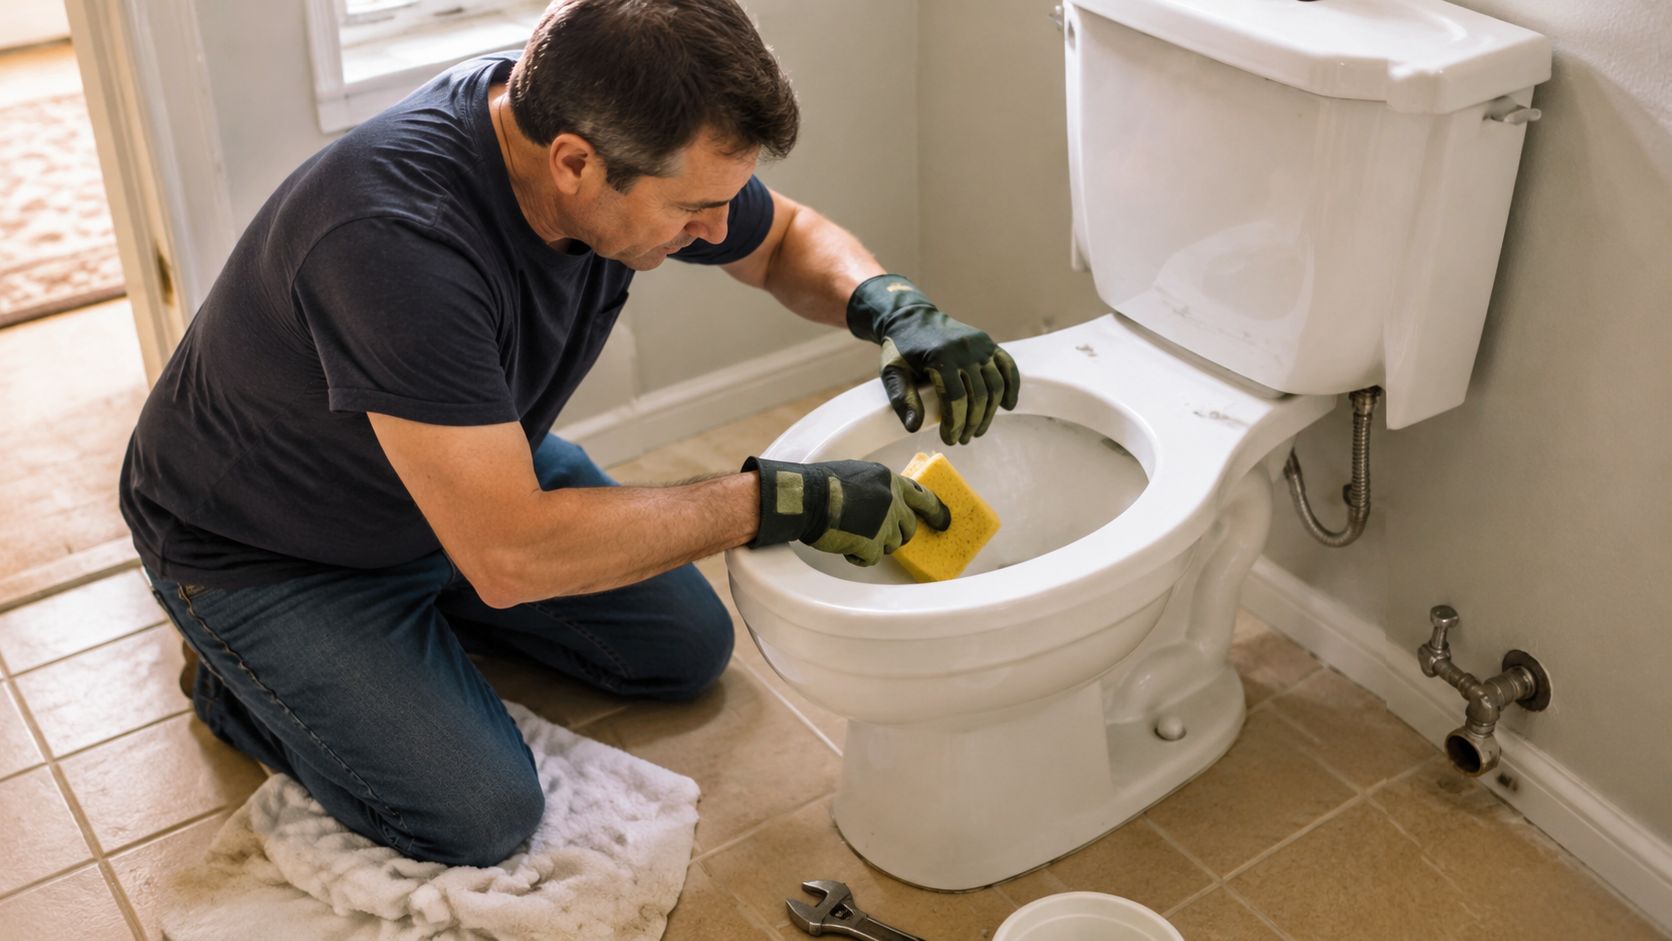
Clean first, then diagnose
Stuff a rag into the drain opening to limit sewer gas and prevent tools from dropping into the pipe. Scrape the old wax from the toilet horn and flange with a putty knife. Remove the old closet bolts so you can see the complete ring.
Look for:
- Cracked bolt slots: These may call for a repair ring if the rest of the flange is stable.
- Corroded metal: Surface rust may be manageable, but corrosion that has removed the bolt-bearing material is not.
- A broken hub: Damage where the flange meets the drainpipe usually points toward replacement or a specialized gasketed repair.
- A low flange: Measure from the top of the flange face to the finished floor, not just to the subfloor.
- Soft flooring: Flexing, staining, swelling, or rot means the flange may not have a firm structural base.
The drain opening also deserves attention. Check whether the pipe is PVC, ABS, cast iron, or another approved material, and confirm the opening is free of wax and debris. If the toilet has a recurring blockage as well as a flange problem, review why a toilet won't drain before reinstalling a fixture over a potentially restricted line.
Setting the New Flange at the Right Height
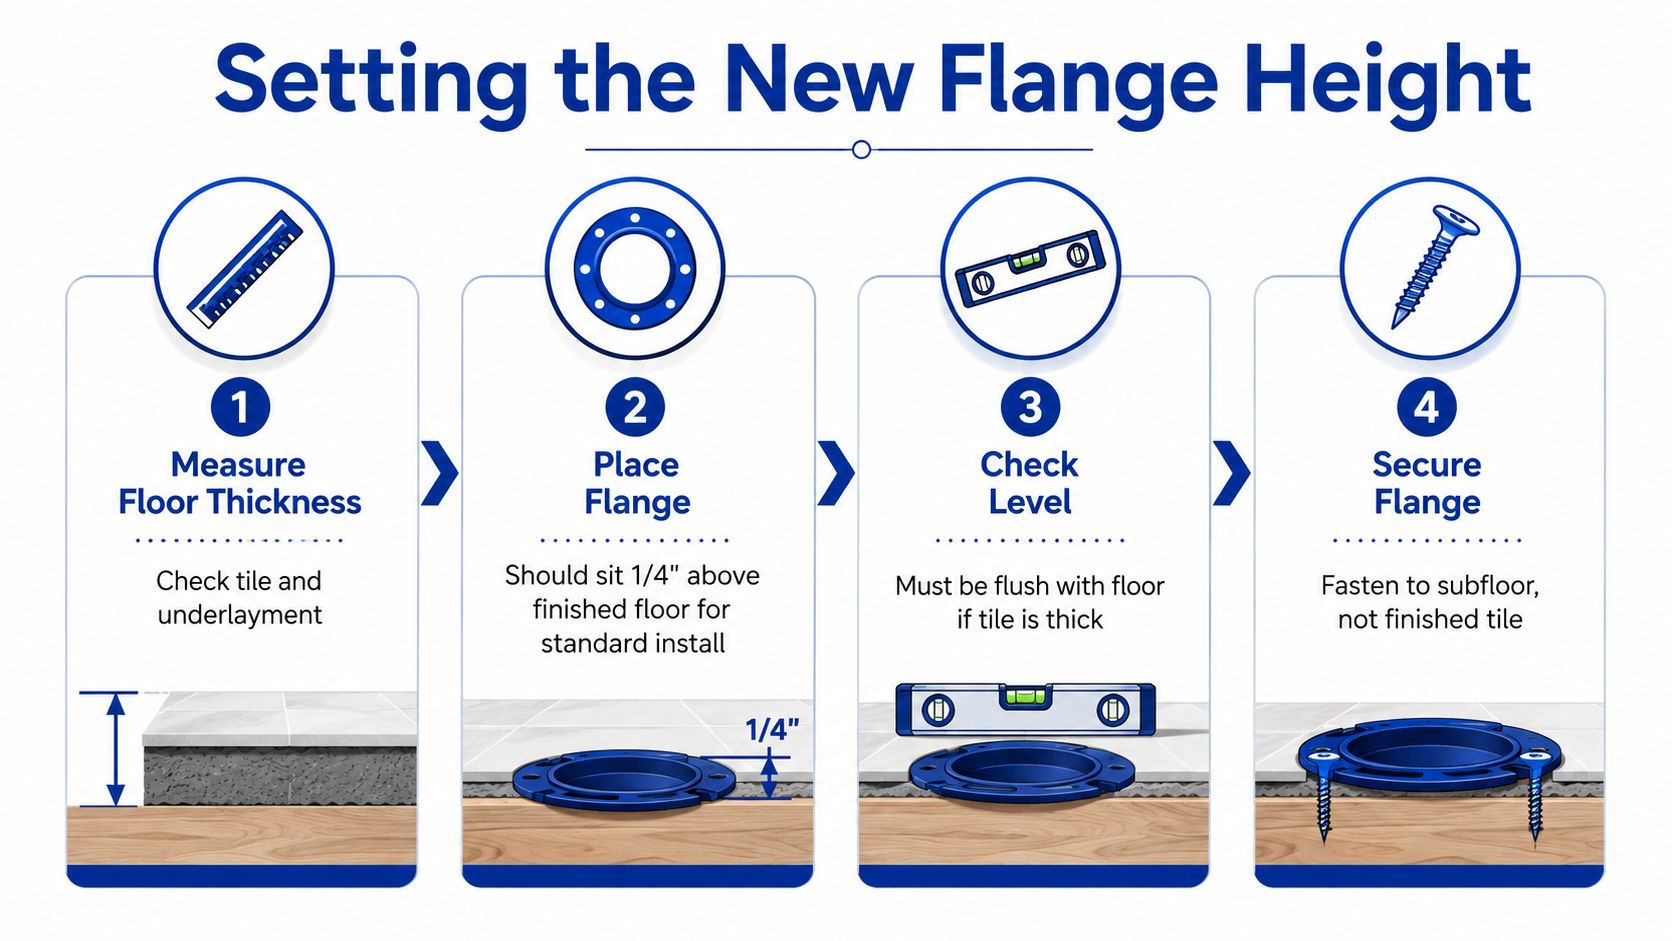
Flange height is where many otherwise careful installations go wrong. The top of the flange should sit on the finished floor, with the flange edge roughly 1/4 inch above the finished surface for a standard installation, according to this toilet flange height guide. A flange below the floor can leave the seal under-compressed. A flange that sits too high can keep the toilet base from resting flat and cause rocking.
The finished floor includes the actual tile, vinyl, laminate, or other surface, not merely the plywood or subfloor. Dry-fit the flange before applying cement or sealant. Rotate the ring until the bolt slots match the toilet base and the flange sits flat without rocking.
Match the connection to the pipe
A PVC replacement generally uses the appropriate cleaner and cement for a solvent-welded connection. An ABS flange requires ABS-compatible cement. Follow the product instructions for working time and surface preparation rather than treating PVC and ABS as interchangeable.
Some inside flanges use a gasketed sleeve instead of solvent welding. Those products still need to be pushed fully into the pipe and positioned so the bolt slots align with the toilet. A cast-iron repair may use a twist-in gasketed design, but cracked or deteriorated pipe should stop the project.
The flange must be anchored to the structure, not just attached to the drainpipe. Modern IPC-style requirements emphasize corrosion-resistant fasteners and structural anchoring, as outlined in this technical flange replacement reference. On wood, use screws that reach solid subfloor. On concrete, use suitable concrete fasteners. If the subfloor is swollen or soft, repair or reinforce the supporting wood before setting the flange.
A common rough-in layout places the flange centerline 12 inches from the finished wall, according to this toilet flange height and rough-in reference. Measure before moving a drain or choosing an offset flange.
Sealing, Bolting, and Getting the Toilet Level
A thicker seal isn't automatically a better seal. The seal has to match the measured gap between the flange and the toilet base.
| Toilet Seal Selection by Flange Height | Recommended Seal | Notes |
|---|---|---|
| Flange at the floor or roughly 1/4 inch above | Standard wax ring | Suitable when the toilet base can compress the ring evenly |
| Flange about 1/4 to 1/2 inch above the floor | Wax ring with polyethylene horn | Helps accommodate the additional flange height |
| Flange above 1/2 inch or a special flooring condition | Foam or rubber gasketed ring | Consider a waxless product when the installation calls for a flexible, height-tolerant seal |
Don't stack wax rings as a substitute for correcting the flange. Stacked wax can create a tall, unstable seal that shifts when the toilet moves. It may appear to work at first, but it doesn't repair a low flange, strengthen a loose ring, or correct weak subfloor anchoring.
Install new closet bolts in the flange slots, with the heads seated and centered in the intended positions. Press the wax ring onto the toilet horn when that seal design calls for it, then lower the bowl straight down over the bolts. Sliding the toilet sideways can smear the seal and leave part of the drain opening inadequately covered.
Press the bowl down until the base contacts the floor. If it rocks, use suitable toilet shims under the base rather than tightening the nuts harder. Snug the nuts by hand, then make only a small additional turn with a wrench. Porcelain can crack when the hardware is overtightened, and a cracked toilet base won't be rescued by a new flange.
Check level from front to back and side to side with a level placed on the bowl rim. Trim the closet bolts only after the toilet sits steady and the nuts are secure. If water is appearing between the tank and bowl instead of at the base, use this guide on toilet leaks between the tank and bowl to avoid diagnosing the wrong connection.
Testing for Leaks and Knowing When to Call a Pro
Give the installation a short settling period before testing. Fill the tank, flush while watching the base, and hold a dry paper towel near the closet bolts. Paper will reveal a small amount of moisture that may be difficult to see against tile.
Check the ceiling or basement area below the bathroom with a flashlight if access allows. Run water through a nearby shower or fixture, then flush the toilet several more times while checking the flange area from above and below. The toilet shouldn't move when you apply gentle pressure to the bowl.
Stop when the structure is uncertain
Call a licensed plumber if the subfloor flexes under foot pressure, the pipe is cracked cast iron or orangeburg, the flange is recessed below the finished floor beyond what a proper spacer can address, or sewer gas remains after the water test. These conditions may involve structural repairs, buried drain access, pipe transitions, or code-sensitive work.
A plumber should also inspect the installation when a previous repair used several wax rings, the flange won't anchor into solid material, or the drain opening has shifted from the toilet centerline. Those are signs that replacing parts alone may not solve the underlying problem.
Homeowners and property managers in Fraser, Sterling Heights, Warren, Troy, Royal Oak, and nearby Macomb and Oakland County communities can also call for related bathroom plumbing, leak detection, sewer repair, drain cleaning, pipe repair, sump pump repair, or emergency plumbing service. Jays Plumbing and Sewer handles residential and commercial plumbing work, including toilet repairs and fixture installations, with scheduled service and 24-hour emergency response.
Call Jay's Plumbing and sewer Now @ 586-634-3450
If the flange is loose, low, corroded, or leaking, Jays Plumbing and Sewer can inspect the pipe, floor support, seal, and finished-floor height before recommending a repair ring or full replacement. Call Jay's Plumbing and sewer Now @ 586-634-3450 to schedule toilet flange service or request help with a related bathroom plumbing problem.
