
You discover the problem when a supply line lets go under a sink, a water heater connection starts spraying, or a toilet supply tube suddenly fails. You reach for the main shutoff, only to find a wheel that won't turn, a handle that spins without stopping the flow, or a valve buried behind stored boxes. At that point, the repair is no longer just about replacing a valve. It's about regaining control of the water entering your property.
Main water shut off valve replacement is often a preventive maintenance decision based on age, corrosion, valve type, and access. The work can be straightforward when the valve is exposed and the pipe is sound, but it can also involve the water utility, permits, difficult pipe connections, or access through a wall, crawlspace, or slab. This guide explains what homeowners, property managers, real estate agents, and commercial property owners in Macomb and Oakland County should know before cutting into the line.
Table of Contents
- Why Your Main Shutoff Valve Matters More Than You Think
- Finding the Valve and Knowing Who Owns It
- Tools, Materials, and Permits Before You Start
- How to Replace the Main Shutoff Valve Step by Step
- Troubleshooting the Most Common Replacement Problems
- Cost, Access, and When to Call a Licensed Plumber
- Testing Your New Valve and Keeping It Reliable
Why Your Main Shutoff Valve Matters More Than You Think
A burst pipe at two in the morning creates one urgent question: can you stop the water? If the main valve closes completely, a plumbing failure may remain limited to one section of the system. If the valve is seized or no longer seals, water can continue entering the home until someone reaches an upstream control point.
Older wheel-style gate valves are especially troublesome because mineral scale can cause the internal gate to seize before the valve body visibly fails. A lever-style quarter-turn ball valve operates differently. Turning the handle 90 degrees rotates a drilled ball inside the body, aligning the bore with the pipe when open and blocking flow when closed, as explained in this overview of water shutoff valve types.
Age is a practical replacement signal
A main water shutoff valve typically serves for about 15 to 25 years, while modern quarter-turn ball valves are often rated for 20 to 30 years, according to main shutoff valve service-life guidance. Those ranges aren't a guarantee. Hard water, corrosion, long periods without operation, poor installation, and repeated stress can shorten useful life.
Once a valve reaches the 15 to 25 year window, replacement becomes a sensible risk-reduction step, particularly in a hard-water area. A valve can look intact while failing to close when a pipe breaks. That's why replacement shouldn't wait until the handle snaps during an emergency.
Practical rule: A main valve is only useful if someone can reach it, turn it, and confirm that it stops the downstream flow.
Accessibility matters just as much as age. A valve hidden behind drywall, boxed in during a remodel, or surrounded by storage may technically work, but it won't be dependable during a stressful event. Homeowners should identify the valve before Michigan winters, frozen pipes, heavy rain, or basement flooding create a situation where every minute matters.
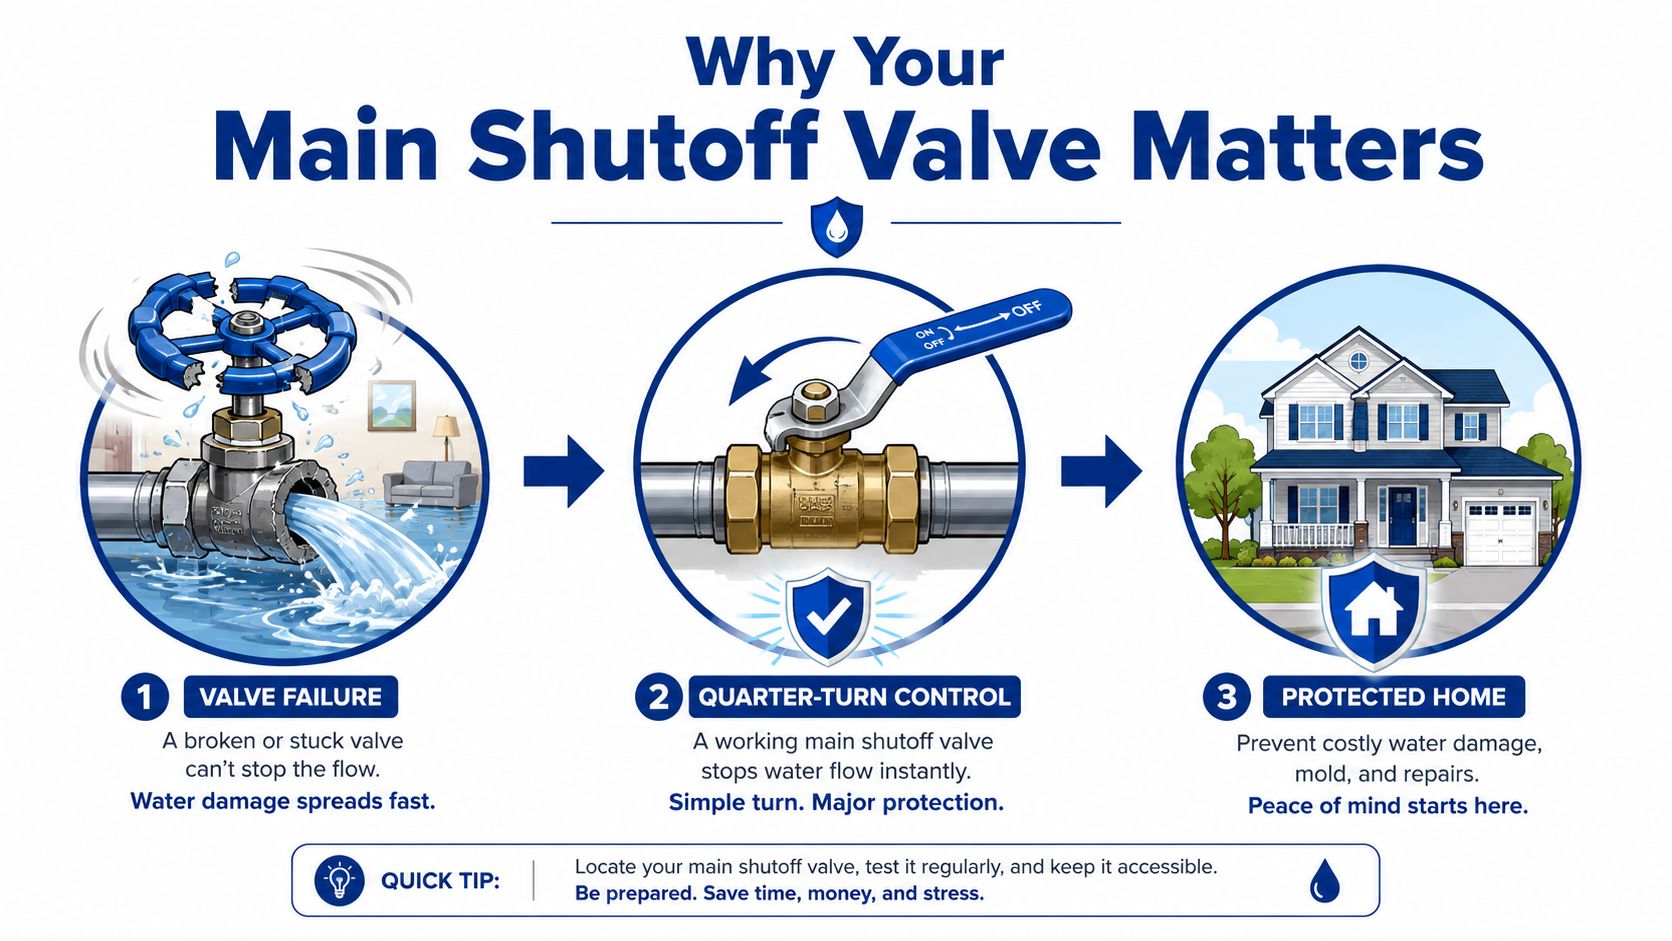
The goal isn't to scare you into replacing a working valve immediately. It's to make the decision based on observable conditions: the valve's age, its ability to close completely, visible corrosion, difficult access, and the condition of the pipe around it. If it won't close or you have active flooding, call an emergency plumber rather than forcing the handle.
Finding the Valve and Knowing Who Owns It
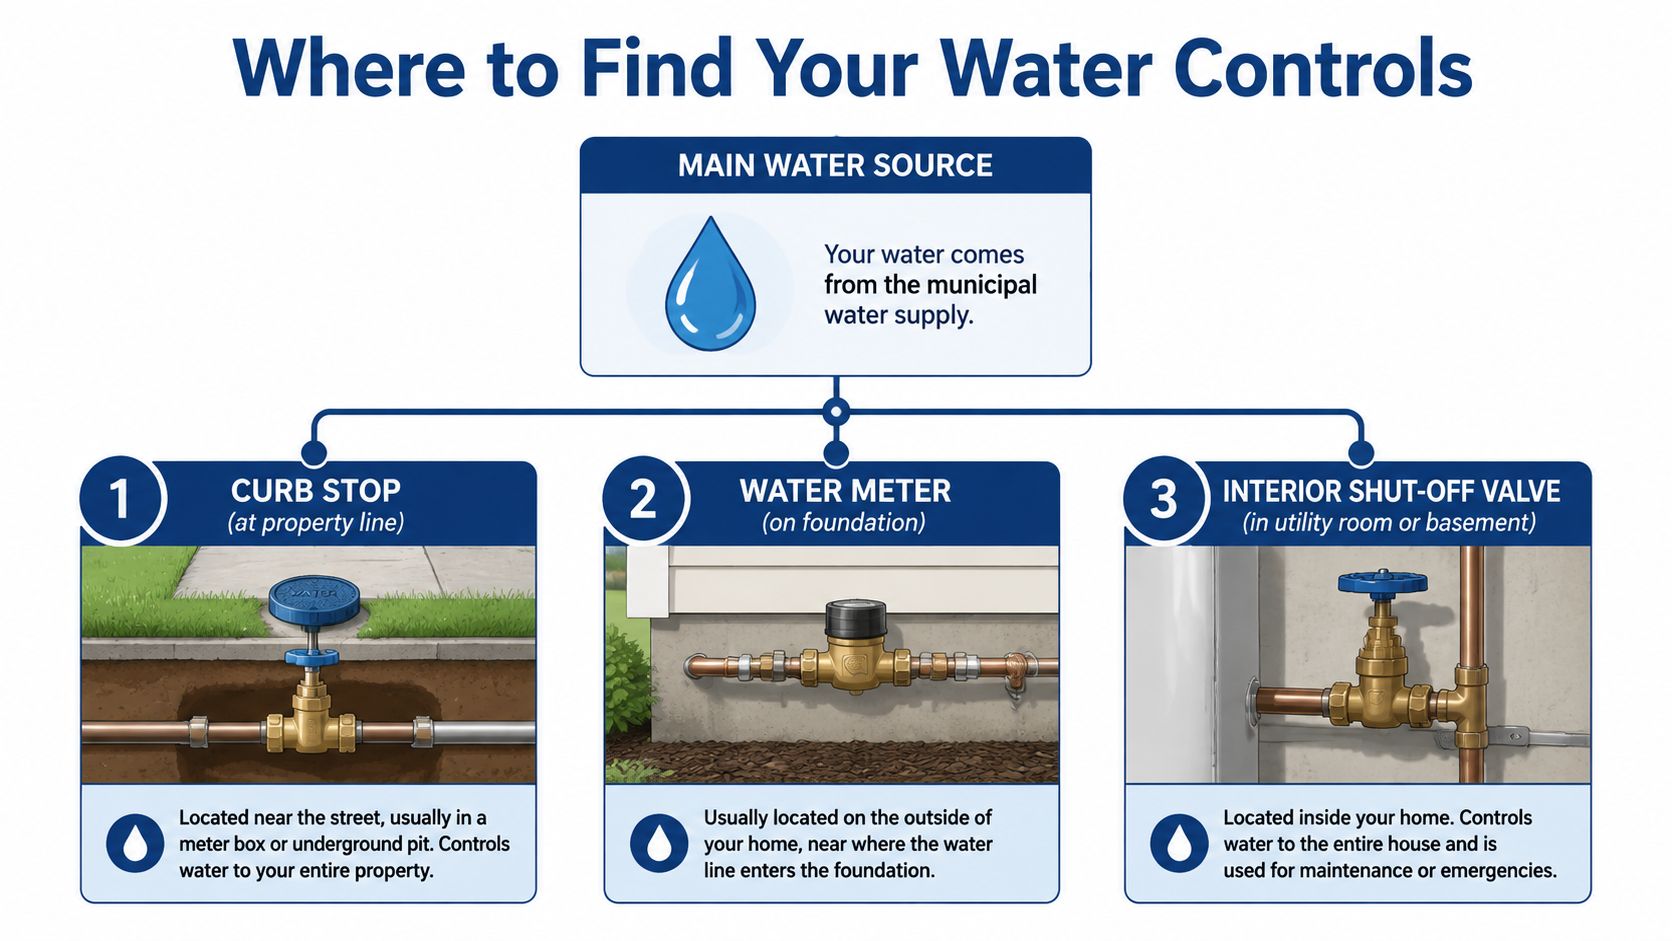
Most properties have several water controls, and confusing them can delay an emergency repair. The interior main shutoff is usually near where the service line enters the building, often in a basement, utility room, mechanical room, or crawlspace. Start at the water heater or the point where the main pipe enters the foundation, then trace the larger supply line toward the building exterior.
The other controls are outside. A water meter may sit in the basement, utility room, meter pit, or another service area depending on the property. Near the property line, you may see a rectangular curb box in the lawn, sidewalk area, or near the street. That box generally provides access to the curb stop on the service pipe.
The ownership boundary matters
The valve inside the building and the piping on the house side of the meter are generally the homeowner's or property owner's responsibility. The meter and curb stop are commonly controlled by the water utility, but local ownership rules can differ. Confirm the boundary with the local water provider before touching an exterior control.
UpCodes describes an accessible shutoff near where the distribution pipe enters the building, along with another main shutoff or curb stop near the curb on the service pipe. Its water piping and shutoff requirements show why replacement planning must account for both the interior access point and the service-line arrangement.
Before turning an outside valve: Call the utility serving your address and ask which control you're authorized to operate.
In Macomb and Oakland County, this distinction is especially important when the meter or curb stop is involved. Unauthorized operation can create a service problem, damage utility equipment, or lead to charges under local policies. If the curb stop won't work, don't keep applying force. Ask the utility to isolate the service, then have the plumber replace the house-side valve.
Mark the location for the next emergency
Once you find the interior valve, label it clearly. A simple tag, a note near the electrical panel, and a clear path to the valve can save time for a family member, tenant, property manager, or emergency plumber. Don't bury the control behind shelving or finish materials during a basement remodel.
Tools, Materials, and Permits Before You Start
The replacement should be planned before the water is shut off. First identify the pipe material, valve connection, available working space, and upstream isolation point. A copper line in an open basement is a different project from galvanized pipe in a tight joist bay or a valve concealed behind a finished wall.
A practical preparation checklist
For copper, the usual tools include a pipe wrench, adjustable wrench, tubing cutter or hacksaw, emery cloth, propane torch, lead-free solder, and flux. Press-connect fittings can avoid open flame, but they still require the correct press tool, compatible fittings, clean pipe, and proper insertion depth.
Materials depend on the existing system. A new valve should match the pipe size and connection type, and potable-water components should meet NSF 61 and NSF 372 requirements, as outlined in this shutoff valve replacement guide. Where dissimilar metals meet, a dielectric union or suitable transition fitting can help limit galvanic corrosion.
The most common valve choices are:
- Full-port ball valve: Usually the preferred main-line replacement because the opening matches the pipe diameter and limits flow restriction.
- Gate valve: Sometimes selected to match older plumbing, though older gate valves are more likely to seize or stop sealing reliably.
- Curb-stop style valve: Intended for suitable exterior or service-line applications, subject to utility requirements and access conditions.
The International Residential Code calls for the main supply control valve to be a full-port valve that's accessible from occupied space, with a drip or drain valve included in the installation. Review the applicable local requirements rather than assuming a like-for-like replacement is automatically acceptable.
Preparation comparison
| Valve Type | Best Use | Required Tools | Permit Required |
|---|---|---|---|
| Full-port ball valve | Main interior supply line | Wrenches, cutter, pipe-prep tools, and connection-specific equipment | Check with the local municipality |
| Gate valve | Matching an existing older system when required | Pipe wrenches, adjustable wrench, and threading or cutting tools | Check with the local municipality |
| Curb-stop style valve | Appropriate exterior service applications | Utility-approved access and connection tools | Coordinate with the utility and municipality |
Wear eye protection, keep towels and a bucket nearby, and make sure another adult knows the water is being shut off. If you're using a torch, understand where the electrical panel, combustible materials, insulation, and finished surfaces are located. Many Michigan municipalities require a licensed plumber for main-line work, along with a permit and inspection, so verify that before starting.
How to Replace the Main Shutoff Valve Step by Step
Start by confirming that you're allowed to isolate the service. Close the utility-approved curb stop or have the water provider close it. Don't force a curb stop that's stuck, and don't assume the interior valve can isolate the line if you're replacing that valve itself.
Open a faucet downstream from the main valve to relieve pressure. Drain from a low point in the home, such as a basement laundry sink, hose connection, or another low fixture. Incomplete drainage leaves water in the pipe, which can interfere with soldering, make press connections unreliable, and create a wet work area.
Set a bucket beneath the valve and protect nearby surfaces with towels. Cut the existing valve out with a tubing cutter, hacksaw, or reciprocating saw suited to the pipe material. Use two wrenches on threaded sections, one to turn the fitting and one to support the pipe, so you don't twist a concealed connection inside the wall.
Fit the new valve carefully
Clean copper pipe with emery cloth until the surface is bright and free of oxidation. For threaded connections, use a suitable thread sealant, such as approved tape or pipe compound, applied in the correct direction. Compression fittings need a clean pipe, a new ferrule and nut, and careful tightening. Industry guidance commonly recommends approximately one-quarter to one-half turn past hand-tight for compression assemblies, with small adjustments if a joint seeps, as explained in this main valve replacement walkthrough.
Install a same-size full-port quarter-turn ball valve with the handle positioned where it can be operated. Sweat the valve if the installation calls for soldering, press it with compatible equipment, or thread it into place when the existing system uses threaded fittings. Support the pipe so the valve isn't carrying the weight of the surrounding line.
Reassemble every connection before restoring water. Slowly reopen the curb stop while watching the valve body and each joint. Don't open the supply abruptly. Slow repressurization gives you time to spot a drip before the system reaches full service pressure.
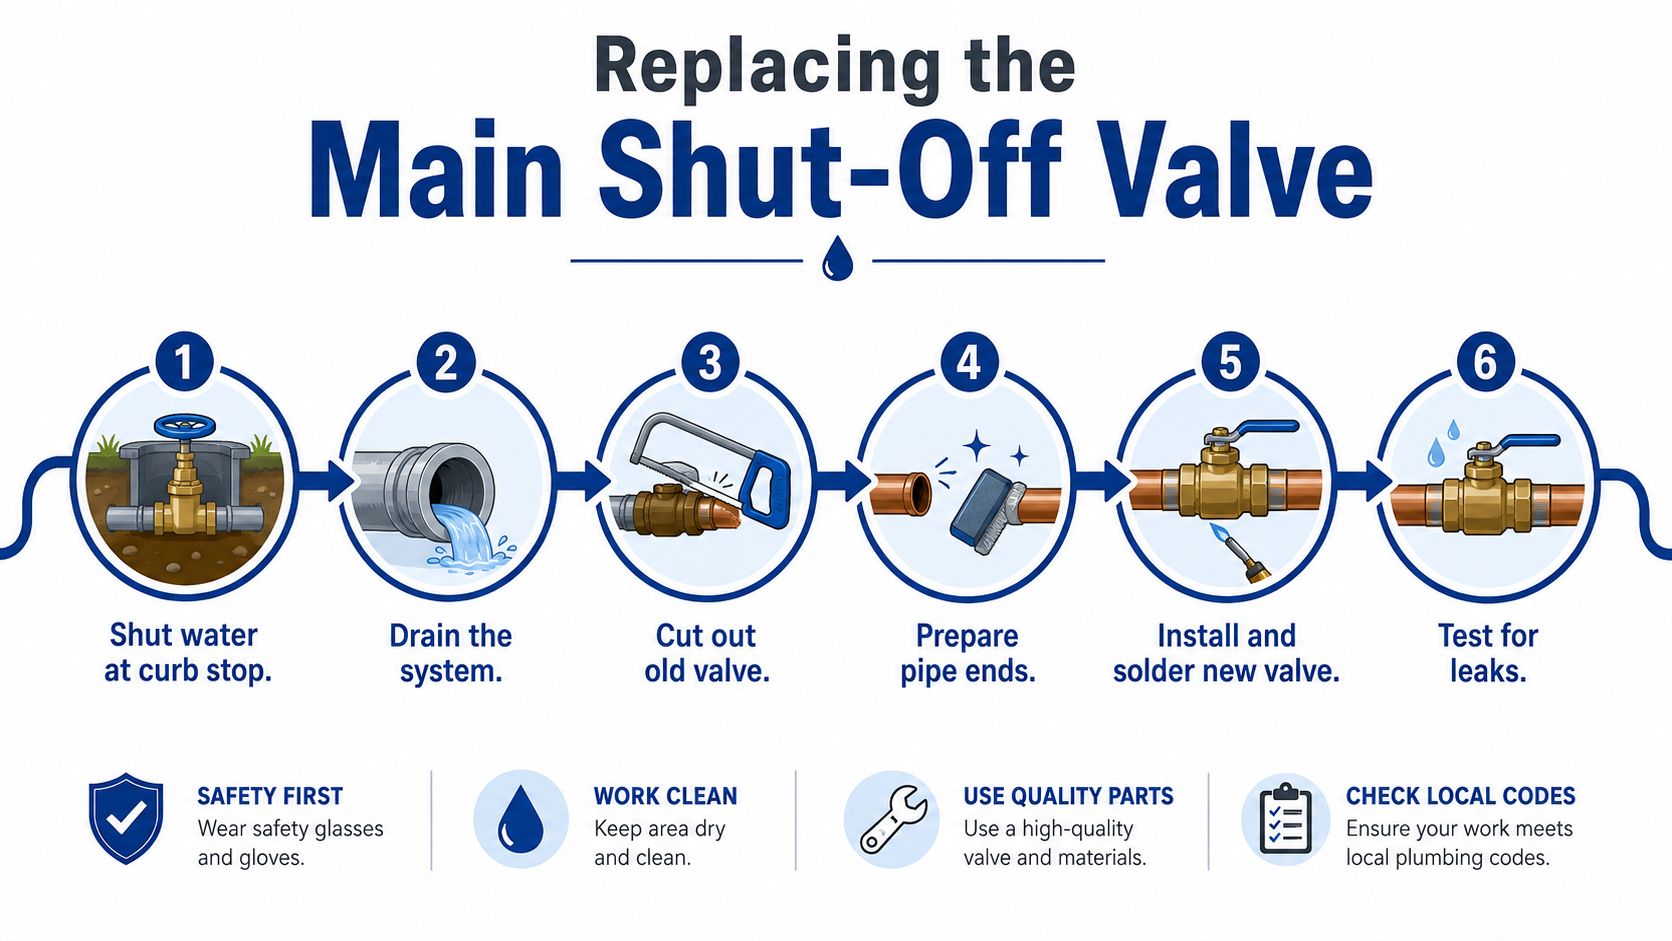
Run fixtures to clear air and flush the lines for several minutes. Then close the new valve and confirm that downstream flow stops completely. The same careful approach used for other household plumbing work, including replacing a toilet flange, starts with isolation, pressure control, sound connections, and a final leak check.
Troubleshooting the Most Common Replacement Problems
Most post-installation problems point to a specific connection or preparation error. A small wet ring at a solder joint usually means the pipe or fitting wasn't dry enough, the joint didn't reach proper temperature, or the solder didn't draw through the connection. Shut the water off, drain the section, and reheat the joint. Adding more solder over a contaminated or poorly heated joint rarely solves the cause.
A press fitting that leaks may not have been inserted fully, or the fitting may not have been crimped with the correct jaw and tool. Cut it out and redo the connection rather than repeatedly squeezing the fitting. A threaded joint that drips may have insufficient sealant, tape wrapped in the wrong direction, damaged threads, or a fitting that was stressed during removal.
Read the symptom before reaching for a wrench
A stiff ball-valve handle isn't automatically a defective valve. The pipe may be under strain, the valve may have been overtightened into a threaded connection, or the handle may be contacting nearby framing. Relieve stress and inspect the installation. Don't use excessive force, because breaking the stem can turn a manageable adjustment into an active leak.
If the home won't hold pressure after the new valve is installed, check the broader system. A toilet fill valve, water heater connection, irrigation line, or another open fixture can create the impression that the main replacement failed.
| Symptom | Likely Cause | First Response |
|---|---|---|
| Weeping solder joint | Moisture, poor heating, or incomplete solder draw | Isolate, drain, dry, and reheat the joint |
| Press connection drips | Incomplete insertion or crimping | Cut out and remake the connection with compatible equipment |
| Threaded connection leaks | Incorrect sealant, damaged threads, or pipe stress | Isolate and inspect the threads before resealing |
| Handle feels stiff | Pipe strain or overtightened threaded valve | Support the line and inspect alignment |
| Pressure won't hold | Another fixture or branch is passing water | Check toilets, water heaters, irrigation, and open fixtures |
Stop and call a licensed plumber if water is entering a wall or ceiling, the upstream isolation point fails, the pipe begins twisting, or you can't safely drain the line. Continuing to chase a leak with the water active often makes the damage worse.
Cost, Access, and When to Call a Licensed Plumber
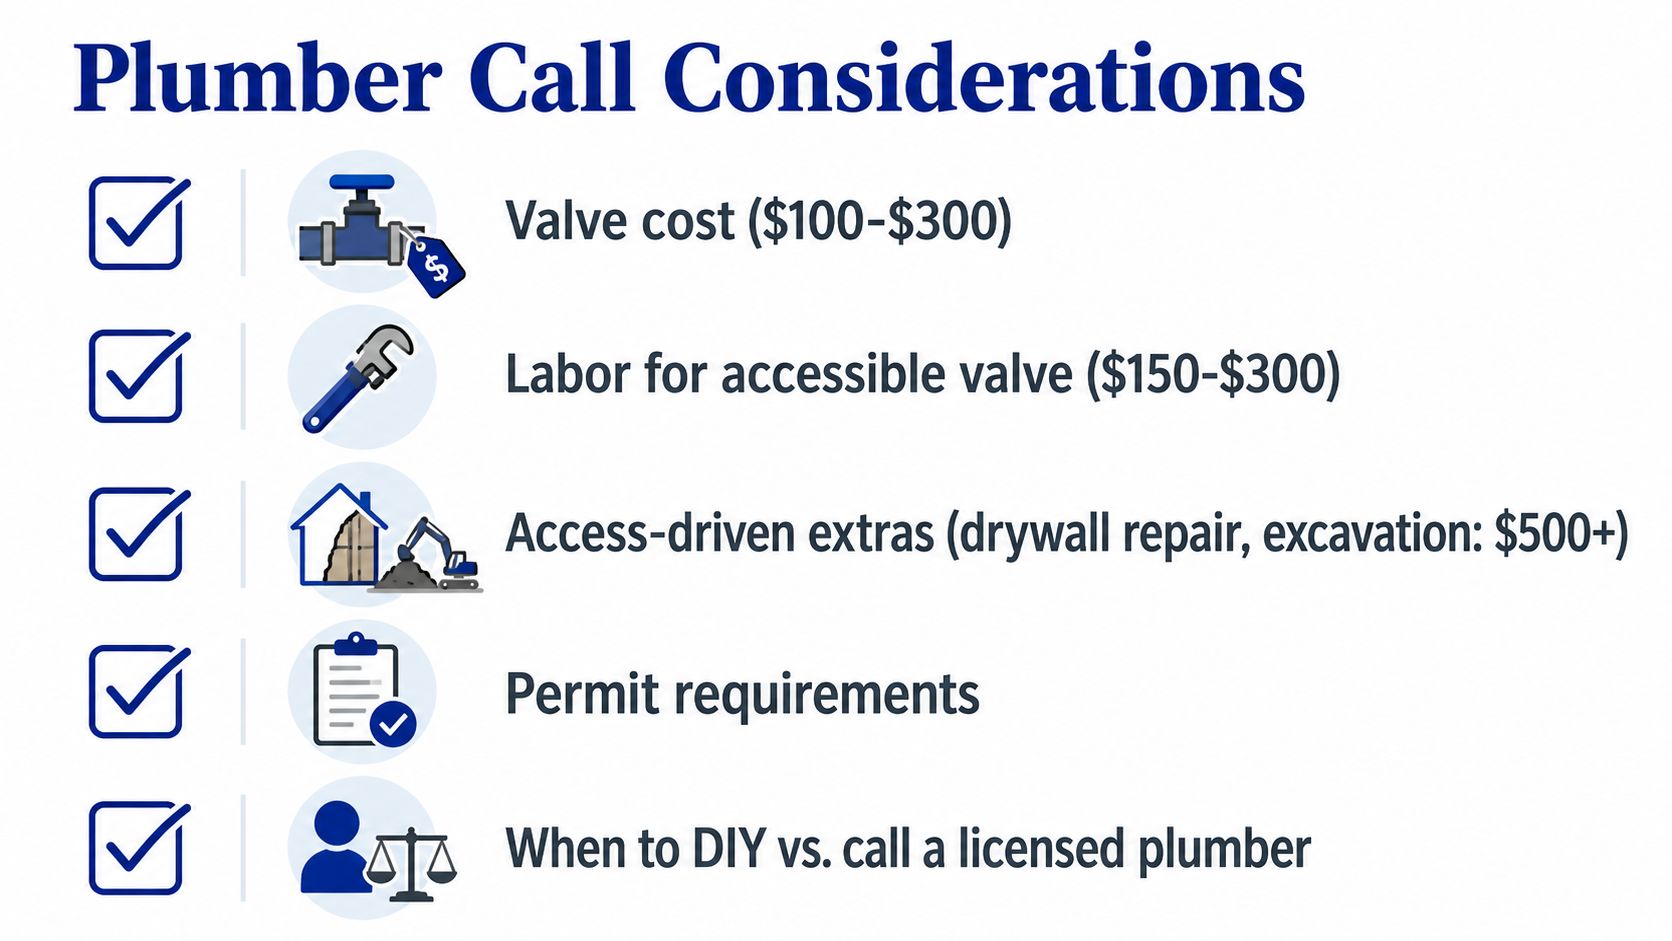
A main shutoff valve can be replaced as preventive maintenance, especially when the existing valve is aging, stiff, or difficult to reach. Replacing it before an emergency gives you time to correct access problems and confirm who controls the upstream shutoff. The typical replacement cost is estimated at $250 to $600, with a homeowner spend around $425, as described in the Home Depot installation guidance. Labor covers isolating the building, draining the system, removing the old connection, installing the new valve, and testing the completed work.
Access often determines the final scope. An exposed valve in an open basement may require ordinary pipe preparation and connection work. A valve in a crawlspace, behind drywall, at a concrete slab entry, or attached to corroded galvanized pipe may require transition fittings, finished-surface removal, excavation, or restoration.
Choose professional help when the risk is structural
Call a licensed plumber when:
- The curb stop won't close: The utility may need to isolate or repair its equipment. Do not force a utility-controlled valve.
- Galvanized pipe is heavily corroded: Old threads can break during removal, leaving a larger repair.
- The valve sits in a tight joist bay: Torch work and pipe movement are harder to control in confined framing.
- The line enters through a slab: The leak may involve concealed piping or require concrete access.
- Water is actively flooding finished space: Shut off the nearest safe control and request emergency service.
- The valve won't close during a burst pipe: Call promptly if water continues spreading.
- A permit or inspection applies: Confirm the local process before opening walls or changing the service connection.
Ownership matters as much as access. In Macomb and Oakland County, contact the local utility before touching the curb stop or meter. The homeowner generally controls the building-side valve, while the utility may control the meter, curb stop, or public-side service equipment. Confirm the boundary rather than assuming the visible valve belongs to you.
If buried piping or hardscape blocks access to the shutoff or service line, review the scope before authorizing work. Excavation service may be needed when reaching the valve requires opening soil or concrete.
Call Jay's Plumbing and Sewer Now @ 586-634-3450 for emergency flooding, a main valve that won't close, or replacement work requiring professional isolation and testing.
Testing Your New Valve and Keeping It Reliable
After installation, reopen the curb stop gradually while watching every joint. Run faucets to bleed air, inspect the valve under full service pressure, and close the new handle to confirm that downstream flow stops completely. If water continues at a fixture, check whether the valve is partially closed or another branch remains supplied.
Write down the installation date and valve type. Keep the area clear so future plumbers or occupants can reach it without moving furniture or opening a wall. A small label near the valve can identify it as the whole-building shutoff.
A simple maintenance routine
Cycle the valve gently through a partial movement and back to its normal position about every six months. Don't force a stuck handle. If the valve sits near an exterior wall penetration, maintain the surrounding seal where appropriate, and don't box the assembly in during future remodeling.
Common questions deserve direct answers:
- Does replacement require inspection? It may, depending on the municipality and scope. Confirm before work begins.
- What does the utility tag mean? The tag may identify the meter or service equipment, but it doesn't by itself settle every ownership question.
- How often should the valve be tested? A gentle check about every six months helps identify stiffness or incomplete shutoff before an emergency.
- Could pressure problems come from another component? Yes. If the valve operates but pressure remains abnormal, a failing pressure regulator or another system issue may be involved.
If you're investigating a damp wall, unexplained water use, or a valve-area leak, professional leak detection information can help you decide whether the source is the valve or concealed piping.
Call Jay's Plumbing and sewer Now @ 586-634-3450 to schedule a valve inspection, replacement, leak check, or related residential and commercial plumbing service.
Jays Plumbing and Sewer can evaluate the valve, confirm the access and ownership questions, replace failed main shutoffs, and test the system after service. Visit Jays Plumbing and Sewer to request service in Macomb County, Oakland County, Fraser, and nearby Southeast Michigan communities, or call Jay's Plumbing and sewer Now @ 586-634-3450 for emergency plumbing help.
