
A leaking faucet handle usually starts the same way, with a damp ring around the base of the handle, a drop on the counter, or a little water where it shouldn't be after you've shut the faucet off. In a kitchen or bathroom in Macomb County or Oakland County, that's the kind of problem people notice while rinsing dishes, brushing teeth, or wiping down a sink, then ignore for a week because it still “mostly works.” That's usually when a small seal problem turns into a steady leak inside the faucet body.
The important part is not to assume the handle itself is the problem. More often, the issue is inside the faucet, where worn O-rings, cartridges, stem seals, packing nuts, or gaskets stop holding pressure the way they should, and water finds its way out around the handle area instead of staying sealed inside the fixture. The EPA's WaterSense program notes that even a faucet leaking at one drip per second can waste more than 3,000 gallons of water per year, and the average household's leaks can waste more than 10,000 gallons annually (EPA WaterSense leak facts). In Michigan winters, when temperature swings and dry indoor heat work on old seals, I see those weak spots show up faster than homeowners expect.
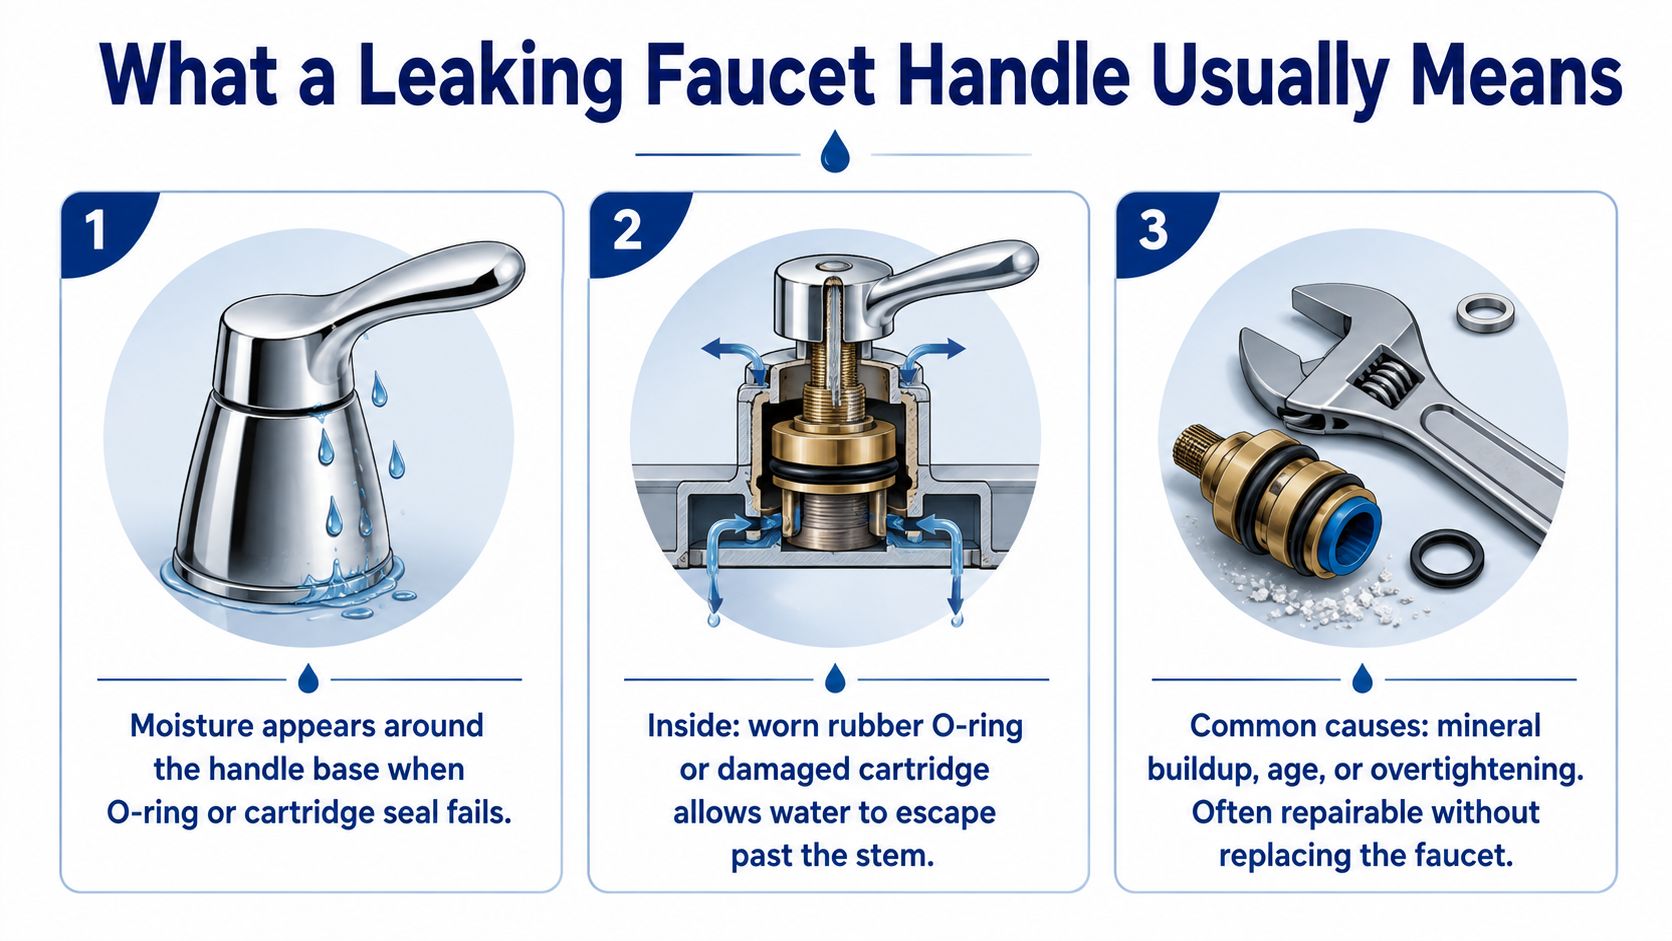
Table of Contents
- What a Leaking Faucet Handle Usually Means
- Confirming the Leak Source Before You Touch Anything
- Safe Shut-Off and Basic Disassembly Steps
- Matching the Fix to Your Faucet Type
- When to Stop and Call a Licensed Plumber
- Preventing the Next Handle Leak in Your Home
What a Leaking Faucet Handle Usually Means
A homeowner usually notices it during a normal routine. The handle feels normal, the water shuts off, but moisture keeps showing up around the base, or there's a small wet spot in the cabinet under the sink. That is usually the faucet telling you the sealing parts inside are no longer holding pressure the way they should.
The leak is usually internal, not cosmetic
A leaking faucet handle usually points to worn internal seals, not a bad-looking handle. Pressure is still moving water through the valve area, and that water is escaping around the stem, cartridge, or packing area instead of staying contained inside the faucet body. The handle can look fine while the working parts inside are already tired.
A handle-area leak also deserves attention because even a small drip adds up. The EPA's leak guidance is a good reminder that a faucet leak is not just a nuisance, it affects water use and can keep feeding moisture into the cabinet area (EPA WaterSense leak facts). That can shorten the life of the faucet and leave you dealing with swollen wood, stained finishes, or corrosion around the base.
Practical rule: if the water shows up around the handle, start by suspecting a seal problem inside the faucet.
Why the handle leak feels different from a spout drip
A spout drip usually sends you toward the outlet side of the faucet, where the seat, washer, or cartridge is doing the work. A handle-area leak points toward the stem, cartridge, or packing area instead. That difference matters, because the wrong repair wastes time and parts.
The usual inside causes are straightforward. A rubber seal can wear out and let water slip past the stem, a cartridge can stop holding pressure the way it should, or a packing nut can loosen enough for moisture to creep out. In older homes around Fraser, Warren, Royal Oak, and nearby neighborhoods, that kind of wear often shows up on fixtures that have already seen years of use and mineral buildup.
The repair path depends on the faucet style. Stem-style faucets often need new washers, O-rings, or packing adjustments. Cartridge faucets usually call for a cartridge replacement or new seals, and the work is different enough that guessing can make the job harder than it needs to be.
Confirming the Leak Source Before You Touch Anything
A lot of handle leaks get misdiagnosed because water rarely stays where it started. It can run down the faucet body, collect at the base, or show up as moisture on the escutcheon even when the handle isn't the source. That's why the first job is to prove where the water is coming from.
Use a paper towel test and a dry surface
Start by drying the entire faucet base, handle, and surrounding counter or sink deck. Then wrap a dry paper towel around the handle area and watch for fresh moisture after the faucet has been used. Moen recommends confirming that water on the escutcheon or base isn't being mistaken for a handle leak, and that simple paper-towel check helps separate a true handle problem from splashback or a base leak (Moen handle-area leak guidance).
If the towel gets damp only around the handle, you're probably dealing with the internal seal area. If the base gets wet while the handle stays dry, the leak may be coming from the mounting point, a loose packing nut, or water traveling down from somewhere else. That difference saves a lot of unnecessary parts swapping.
Water on the outside doesn't always mean the faucet is leaking from that exact spot.
Check on and off, not just one position
Test the faucet with the water on, then again after it's shut off. Some faucets leak only under pressure, while others seep after the valve closes. If you're working in a basement bathroom or laundry area in Southeast Michigan, don't mistake condensation on a cold pipe for a plumbing leak. A damp cloth, a dry surface, and a little patience usually tell the story.
This is also where a full plumbing inspection can be worth more than a guess. If you're unsure whether the moisture is coming from the faucet, a nearby supply connection, or another hidden source, a leak detection visit can confirm the source before you start ordering parts. Leak detection service details can help make that distinction before the repair starts.
Safe Shut-Off and Basic Disassembly Steps
Once you've confirmed the leak really is coming from the handle area, shut the water down before you touch a tool. That's the step homeowners rush past, and it's the one that turns a manageable repair into a soaked cabinet or a stripped finish.
Shut off the supply and relieve pressure
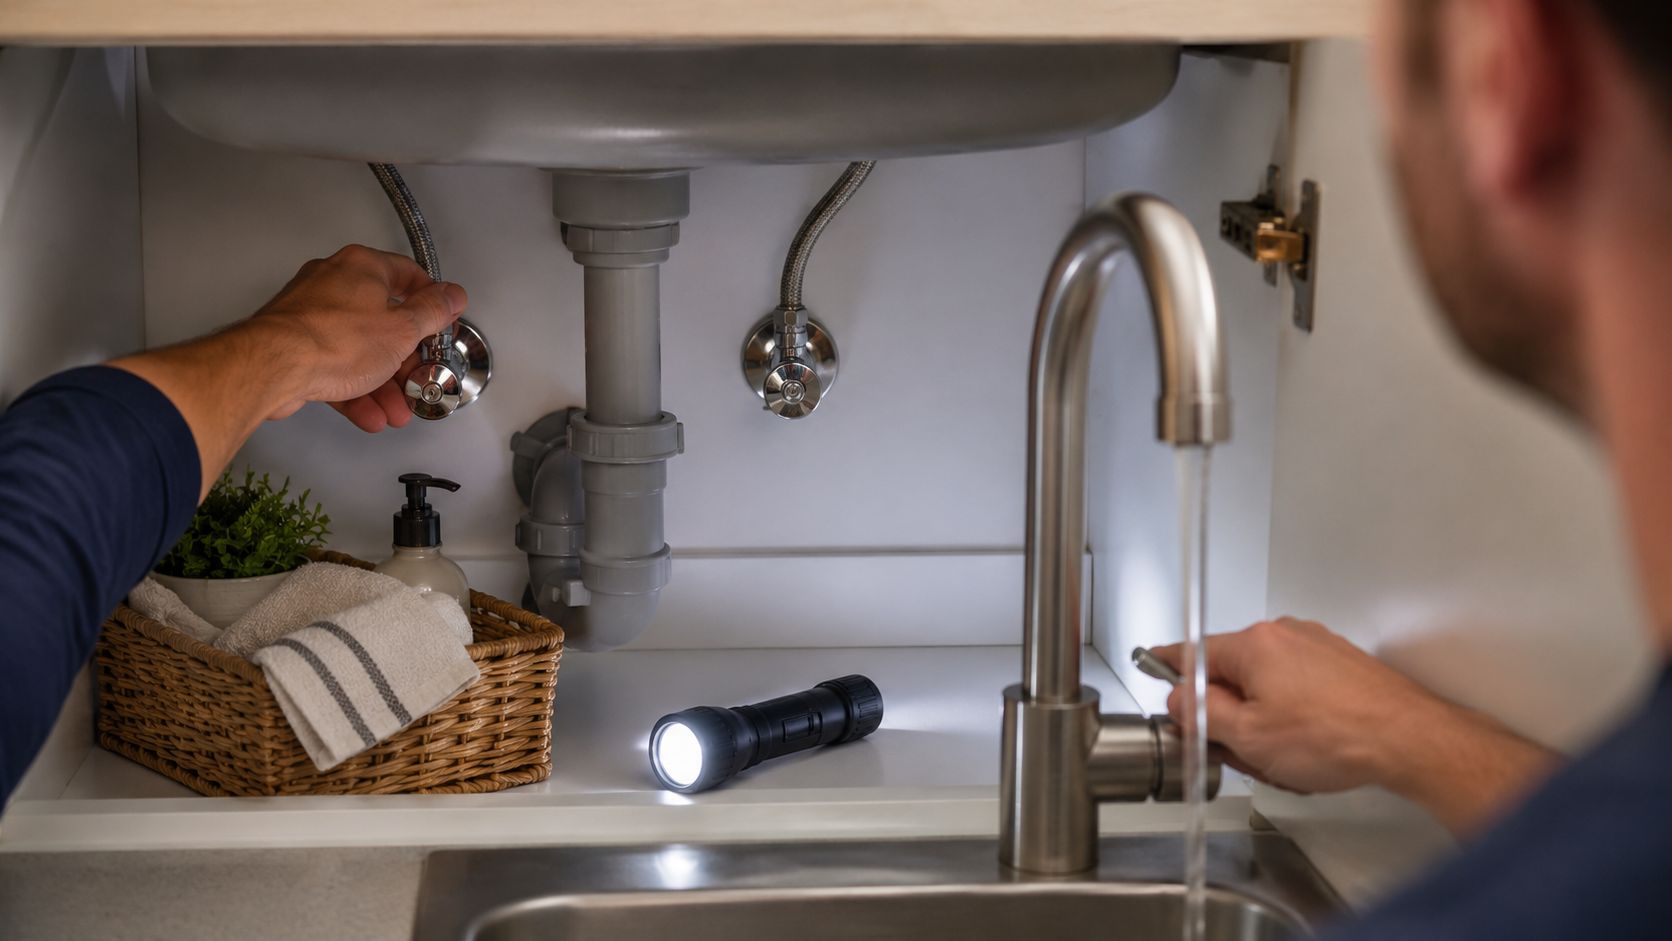
Turn off both the hot and cold supply valves under the sink if the faucet has them. Then open the faucet to drain out the leftover water and release pressure from the lines. Portland's faucet repair guidance follows that same basic flow, shut off the valves, open the faucet, remove the cap and handle screw, then inspect the internal parts before reassembly (Portland Water faucet leak guide).
That sequence matters because trapped pressure can push water around the moment you loosen a fitting. If the valve under the sink feels stiff or doesn't close cleanly, stop there and call a plumber instead of forcing it.
Remove the handle without damaging the finish
Protect the faucet with painter's tape if you're using a tool near chrome or brushed nickel. Then remove the decorative cap, back out the handle screw, and lift the handle straight off if it will move. A lot of good faucets get scratched up because someone pries sideways with a screwdriver or grabs the wrong wrench.
If you want to see the kinds of tools that usually come out for this job, the list on Jays Plumbing and Sewer tools is a good reference point for the basics. On a simple repair, a homeowner might only need a screwdriver, an Allen wrench, and a little patience. On a stuck handle, that's often the point where the job stops being a quick fix.
If the handle won't budge without force, the faucet is telling you to slow down.
A lot of modern faucets were built to be serviced, not replaced. The trick is to work gently, keep track of small parts, and stop if the stem or cartridge starts binding.
Matching the Fix to Your Faucet Type
The repair depends on the faucet design. Two faucets can leak from the handle and still need completely different parts, which is why guessing usually leads to the wrong cartridge, the wrong washer, or a second trip to the hardware store.
Older compression faucets
Compression faucets usually rely on a stem, washer, packing nut, and related seals. When these wear out, water can escape around the stem instead of shutting off cleanly. The fix is often in the internal seal area, not the outside handle itself.
Cartridge and ceramic-disc faucets
Single-handle faucets often use cartridges, and newer models may use ceramic discs. Kohler notes that when water leaks from under the handle area while the faucet is on or off, dirt and debris may have collected in the valve or cartridge, and the recommended fix is replacing that valve or cartridge (Kohler handle-area leak guidance). That fits what I see in the field, the handle is usually just where the symptom shows up.
Hard water can make the problem worse. Mineral exposure and repeated temperature changes wear on rubber seals and internal parts, and a plumbing article notes that water can escape upward and seep out around the handle when those seals fail (Adaven Plumbing on leaking faucet bases and handles).
| Common Handle-Leak Causes by Faucet Type | Likely Failed Part | Typical DIY Fix |
|---|---|---|
| Compression faucet | Washer, stem O-ring, packing nut | Replace the worn seal or tighten carefully |
| Cartridge faucet | Cartridge, cartridge O-ring | Replace the cartridge with the correct matching part |
| Ceramic-disc faucet | Internal disc seal or cartridge assembly | Clean debris first, then replace the failing assembly if needed |
Brand matching matters
Pull the old part before buying a new one if you can. Faucet brands vary enough that a part that looks close can still fit wrong, and mineral buildup can make the old part look more damaged than it really is. If the faucet is older, corroded, or an oddball model, matching the exact replacement is often the difference between one repair and two.
When to Stop and Call a Licensed Plumber
Some handle leaks are fair DIY jobs. Others are the kind of repair that eats an afternoon, a couple of parts, and your patience, then still leaks.
Clear signs the repair should stop
If the valve body is corroded, the stem is seized, or the handle won't release without heavy force, stop before something snaps. If you've already replaced the part once and the leak came back, there's probably a deeper issue in the faucet body, the valve, or the surrounding connections. Water stains inside the cabinet are another warning sign, because that means the leak may not be isolated to the handle at all.
A main shut-off valve that won't close fully is also a line you shouldn't cross. At that point, the repair isn't just about the faucet, it's about controlling water safely while the fixture is serviced. That's where a licensed plumber can diagnose the fixture, the shut-offs, and any hidden leak path without guessing.
Why a professional diagnosis can save time
Buying the wrong cartridge twice is a common homeowner mistake. So is replacing a handle seal when the leak is coming from the base or supply connection. A plumber who works in Macomb and Oakland County sees the common fixture brands, the common failures, and the common shortcuts that don't hold up.
For kitchen plumbing, bathroom plumbing, and fixtures tied into broader residential plumbing or commercial plumbing systems, a professional can also check whether the leak is part of a bigger issue, like supply valve wear or a hidden damp spot nearby. That same visit can flag drain cleaning needs, pipe repair concerns, or other fixture problems before they spread.
If you want one local option, Jays Plumbing and Sewer handles faucet repair along with leak detection, drain cleaning, sewer repair, water heater repair, water heater replacement, pipe repair, garbage disposal repair, sump pump repair, and other plumbing work for homes and businesses in the area. Kitchen and bathroom plumbing repair and installation is the kind of service page to look at when the repair has moved beyond a simple part swap.
Preventing the Next Handle Leak in Your Home
Most handle leaks don't start with a dramatic failure. They start with small wear, repeated use, and mineral buildup that slowly weakens the seal. The good news is that a few habits go a long way.
Simple habits that help faucets last longer
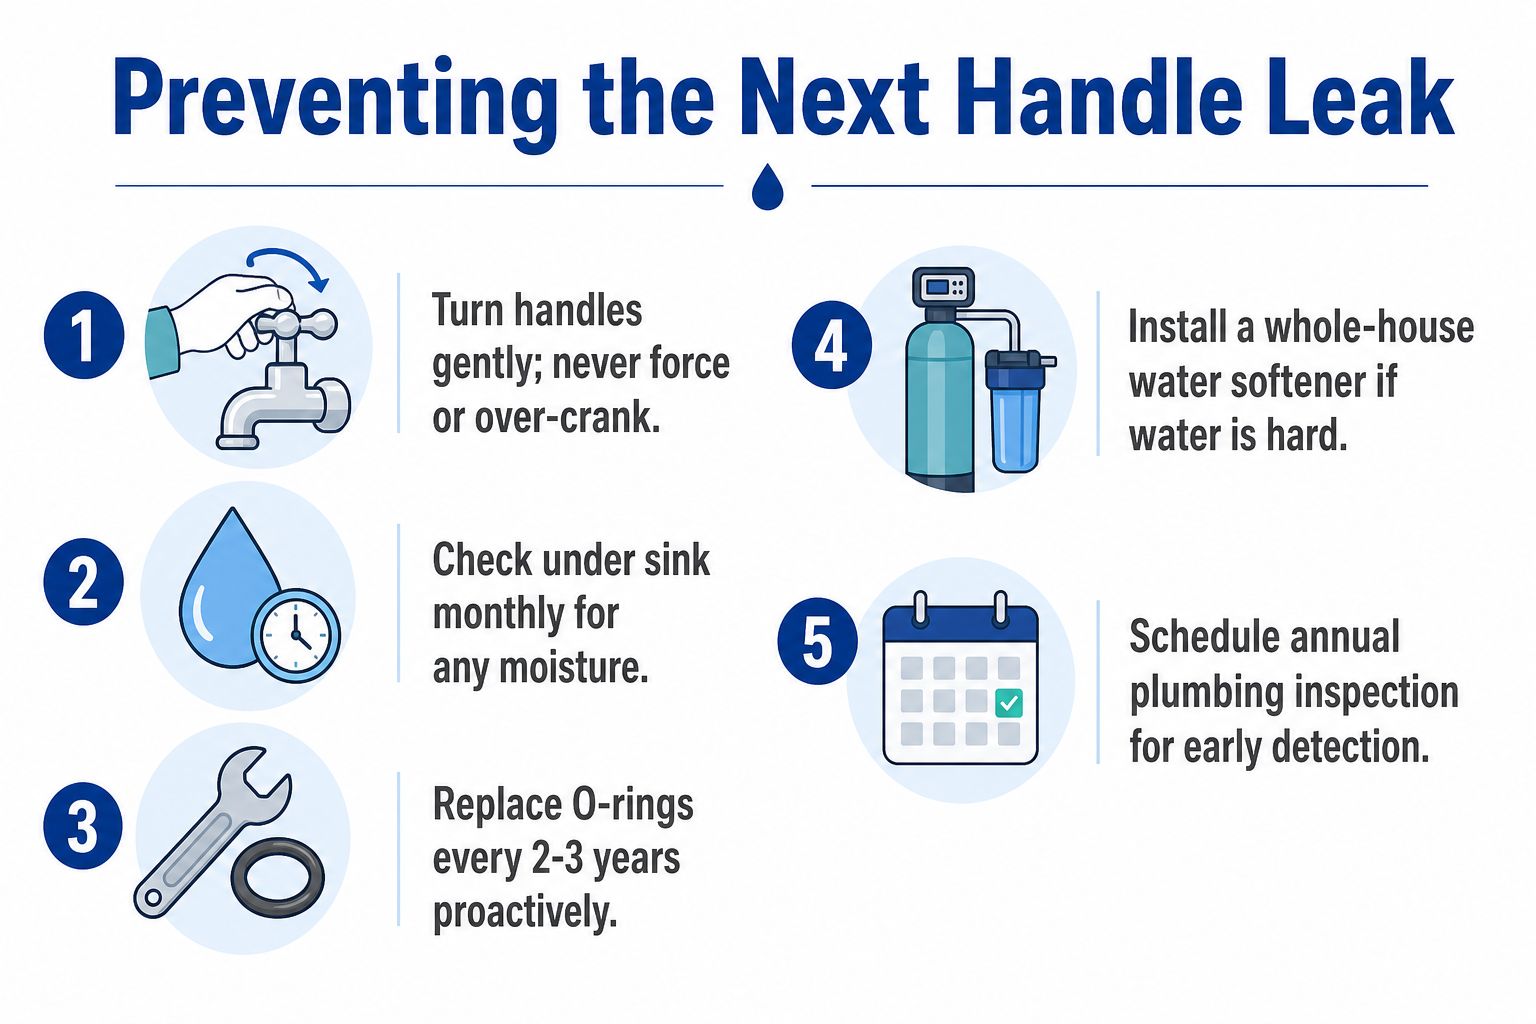
Turn the handle gently. A faucet shouldn't need force to shut off, and over-cranking just wears the internal parts faster. Keep an eye under the sink for moisture once in a while, especially after cold weather or when the house has had a lot of use.
A quick look at the aerator can also help because debris and buildup often start at the fixture before they work deeper into the valve. In Michigan homes, hard water and winter temperature swings make that kind of maintenance more useful than people expect.
Small checks catch small leaks before they become cabinet damage.
Know when to schedule a checkup
If a faucet starts feeling rough, sticky, or inconsistent, that's the time to look at it, not after it's already dripping down the handle. Seasonal attention is especially useful in basements, older bathrooms, rental units, and lightly used commercial sinks where minor leaks can hide for a while. Preventive plumbing service can also catch nearby issues, like supply line wear or early signs of leak detection problems, before they spread into bigger repairs.
Call Jay's Plumbing and sewer Now @ 586-634-3450 when the handle leak won't stop, the faucet body is corroded, or you just want a plumber to sort it out before it becomes a bigger repair. If you're in Macomb County, Oakland County, Fraser, or a nearby community, Jays Plumbing and Sewer can help with faucet repair, leak detection, and the other plumbing issues that often show up in the same visit.
