
You reach behind the toilet to shut off the water before replacing a flapper, and the handle spins without stopping the flow. Or you notice a slow bead of water forming where the valve meets the wall. In either case, you may need to change the toilet water supply valve, but first make sure the shutoff is actually the problem.
That distinction matters in older homes across Macomb County, Oakland County, and Wayne County. A toilet that hisses, refills by itself, or trickles into the bowl often has a worn fill valve or flapper inside the tank, not a bad supply stop. The right diagnosis prevents an unnecessary repair and reduces the chance of disturbing a corroded connection.
Table of Contents
- When the Shutoff Valve Is the Real Problem
- Tools, Parts, and Prep Before You Start
- Removing the Old Toilet Supply Valve
- Installing the New Quarter-Turn Valve
- Testing the Install and Catching Small Leaks
- When to Call a Licensed Plumber Instead
- Preventive Tips and How Jay's Plumbing Can Help
When the Shutoff Valve Is the Real Problem
Start at the wall and work toward the tank. A failing shutoff valve commonly shows moisture around the valve stem, the packing nut, the compression connection, or the supply line outlet. Green corrosion, mineral scale, a handle that turns freely, or a valve that never fully stops the water are stronger clues than toilet noise alone.
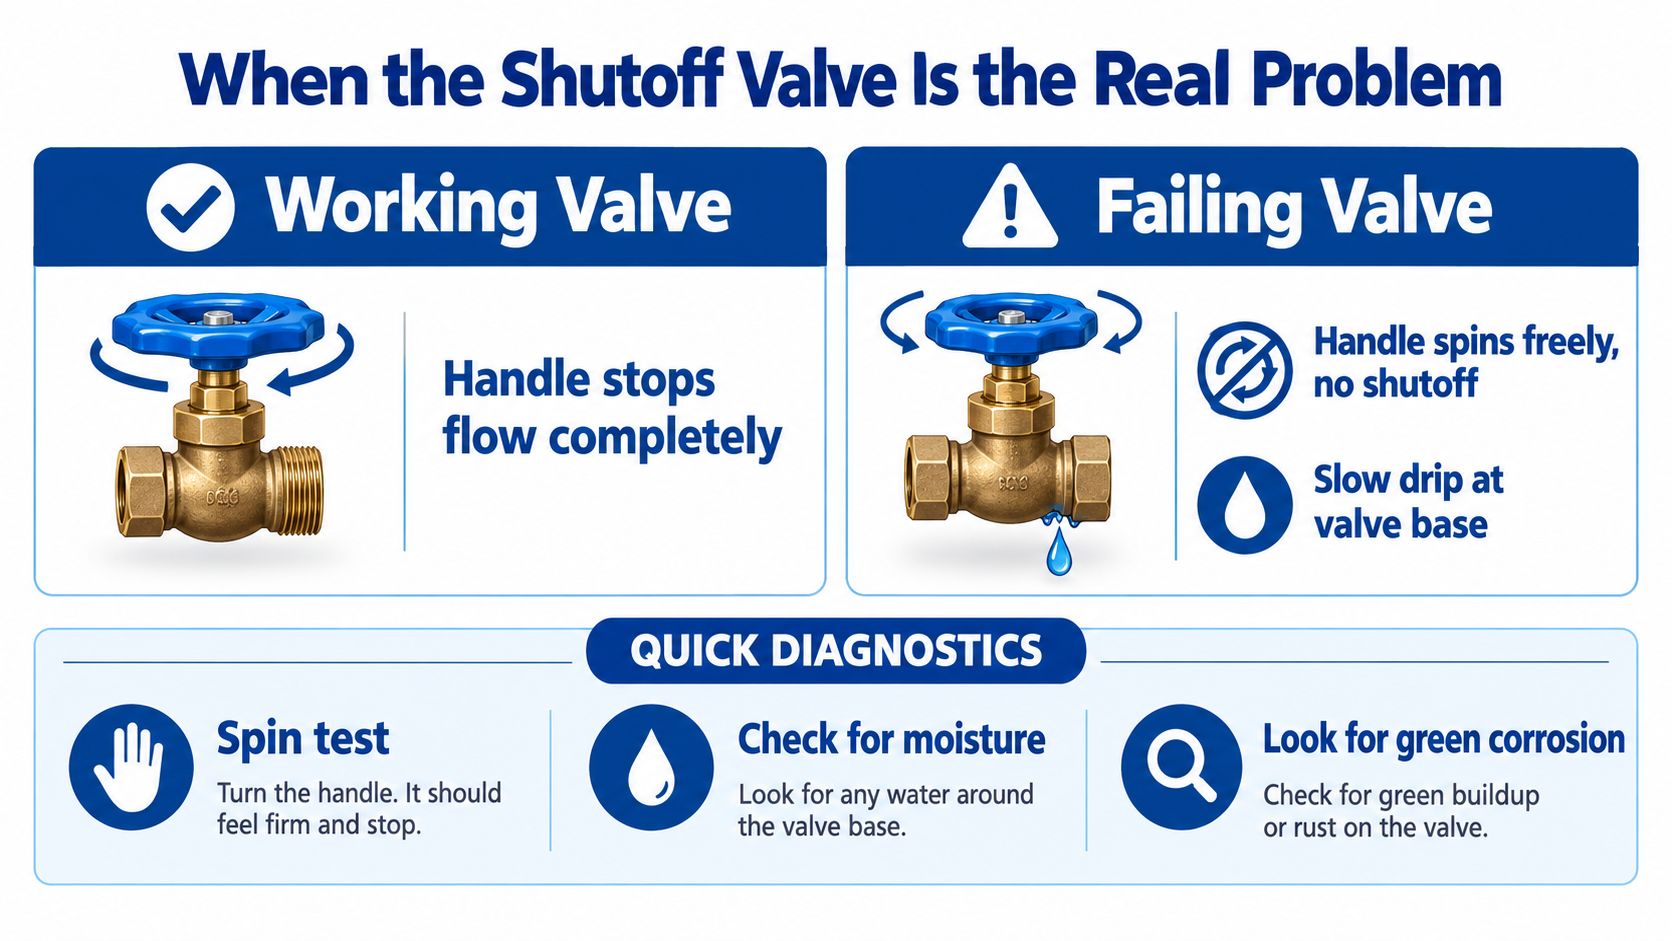
A quick tank-versus-valve check
Turn the handle clockwise until it stops, without forcing it. Flush the toilet and hold the trip lever down to empty the tank. If water continues entering the tank or the tank refills slowly while the valve is closed, suspect the internal fill valve, not the wall-mounted shutoff.
A flapper problem looks different. The toilet may ghost flush, refill on its own, or allow water to trickle from the tank into the bowl. Independent toilet repair guidance separates these symptoms from a shutoff problem, because the fill valve and flapper control tank operation while the shutoff only controls water entering the fixture. The toilet problem guide from Lowe's offers a useful symptom-based comparison.
Practical rule: If the valve closes firmly and stops the refill, leave it alone while you repair the tank component.
A slow drip at the valve base, a wet stem, or a handle that can't stop the supply points toward replacement. Older multi-turn compression stops are often described as lasting 5 to 10 years before packing and seat wear become common, while quality quarter-turn brass valves are commonly described as lasting 10 to 20 years or more in normal residential use. That service-life comparison is summarized in this toilet shutoff valve replacement guide.
Treat the job as planned maintenance unless water is actively spraying or flooding. Once you know the valve is at fault, prepare the correct parts before disturbing an old Southeast Michigan connection.
Tools, Parts, and Prep Before You Start
Put everything on the bathroom floor before you pick up a wrench. You'll need an adjustable wrench, a basin wrench for a tight wall space, tongue-and-groove pliers, Phillips and flathead screwdrivers, a flashlight or headlamp, a small bucket, old towels, and a wet/dry vac if a spill would be difficult to contain.
The replacement part is usually a quarter-turn angle stop with a 3/8-inch compression outlet. Standard residential angle stops commonly have a 1/2-inch inlet and a 3/8-inch compression outlet, as shown in this toilet plumbing diagram. Check the existing valve and supply line rather than relying only on a package label.
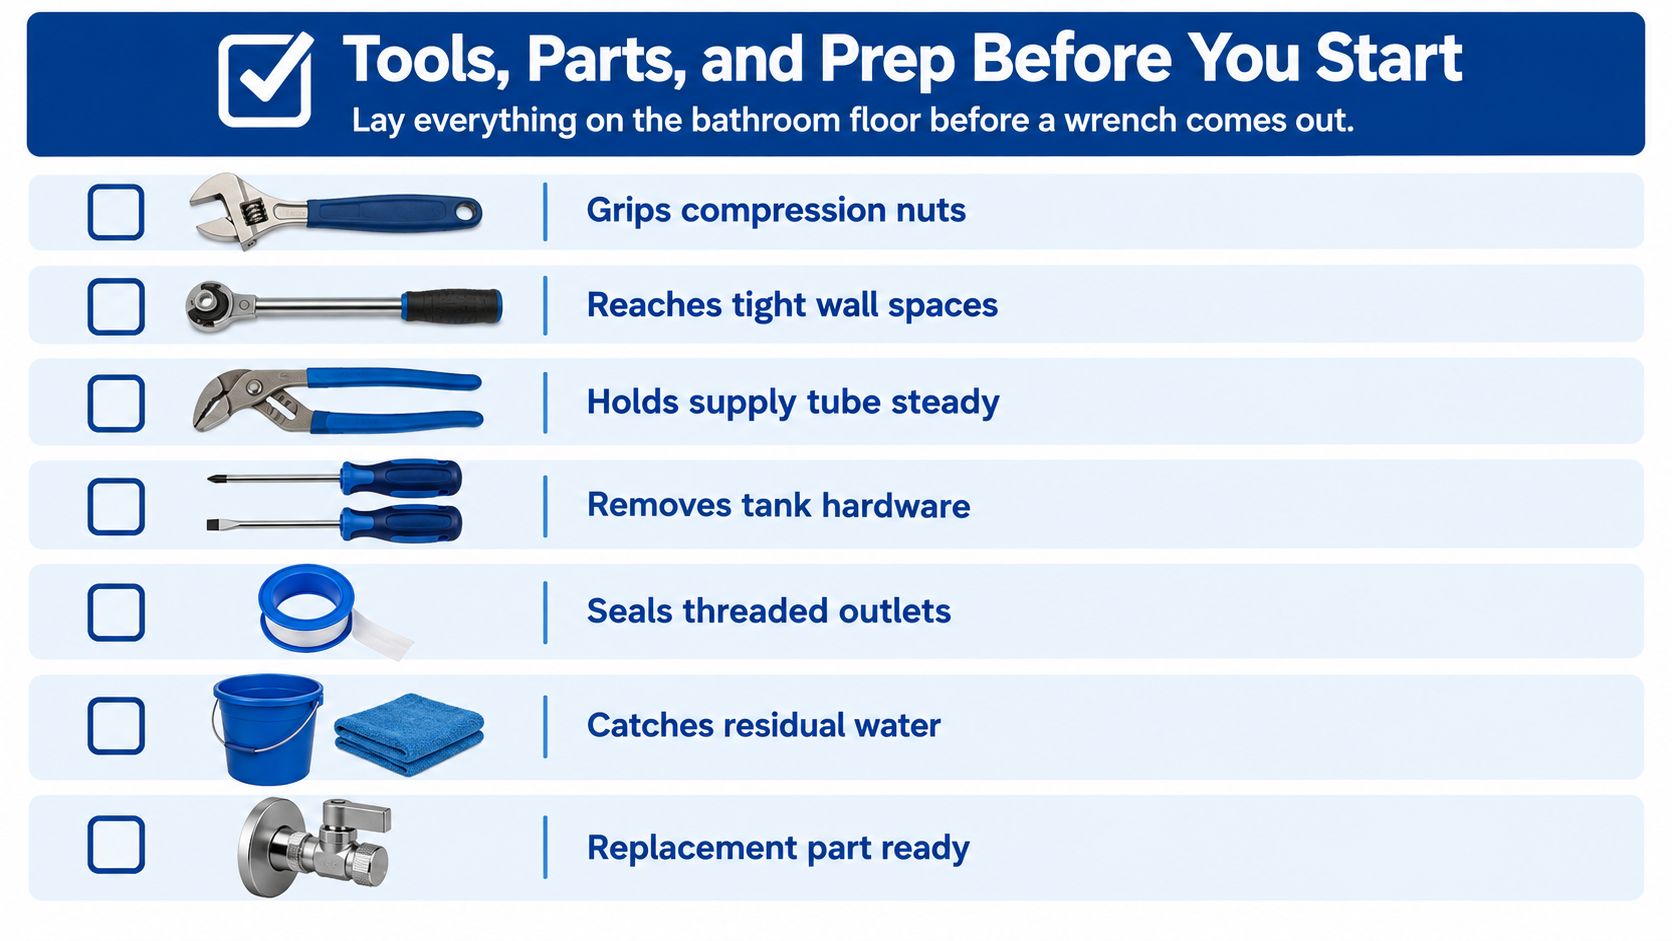
Match the parts before shutting water down
Have a replacement supply line ready if the old ferrule is damaged or the connector looks brittle. You may also need a new compression nut and ferrule, plumber's tape for compatible threaded joints, and thread sealant rated for potable water. Don't assume tape will fix a compression connection. Compression joints seal at the ferrule, not at the threads.
Read the preparation guidance for a toilet supply line replacement if the connector itself shows corrosion, kinks, or damage. Locate the home's main shutoff, operate it before starting, and make sure you know what you'll do if it doesn't close completely.
Place towels beneath the valve, remove clutter around the toilet, and set the tank lid somewhere safe. Close the main water supply, flush while holding the trip lever down, and sponge out remaining tank water. Keep the bathroom door open for ventilation and adequate lighting. In Michigan, work on potable supply lines may require a permit in some municipalities, so confirm local requirements before altering piping.
Removing the Old Toilet Supply Valve
Confirm that the main shutoff is closed and that the tank is empty. Open a nearby faucet briefly to release pressure, then place the bucket beneath the toilet connection. A small amount of water will remain in the supply line even after the system is shut down.
Loosen the supply-line nut at the bottom of the tank with an adjustable wrench. Once it's free, move to the valve outlet and back off the other supply-line nut. Keep the line supported with your other hand so it doesn't bend or twist against the fill valve inside the tank.
Next, work on the compression nut where the shutoff meets the water stub-out. A basin wrench can help in the narrow space behind the bowl, while tongue-and-groove pliers may hold the valve body steady. Turn slowly and watch the pipe coming from the wall.
If the stub-out turns when the compression nut turns, stop immediately. A broken connection inside the wall can create a much larger repair than the valve you started with.
Older chrome stops in Southeast Michigan homes may have corrosion bonding the nut to the pipe. Forcing that connection can twist copper, damage a threaded fitting, or disturb a connection hidden behind the escutcheon. Don't use heat near the wall or toilet unless the surrounding materials and piping are fully understood.
With the old valve removed, inspect the ferrule. A ferrule that is cracked, split, badly scored, or stuck to the pipe usually calls for a new supply connection rather than a simple valve swap. Clean the exposed stub-out gently with a wire brush, wipe away residue, and keep the old valve available for comparison while you confirm the replacement size.
Installing the New Quarter-Turn Valve
Slide the new compression escutcheon onto the supply tube before positioning the valve. The escutcheon covers the opening at the wall, but it won't correct a damaged pipe or hide a connection that sits under sideways stress.
Wrap two clockwise wraps of Teflon tape around the threaded outlet of the new quarter-turn stop when the outlet calls for a threaded seal. Don't put tape on the compression threads. Press the valve squarely against the wall, with the outlet aimed toward the toilet and the handle clear of the baseboard, tile trim, or bowl.
Hand-thread the supply nut onto the valve outlet. Hold the supply line steady and tighten the nut with a wrench until the compression seal is snug. Plastic nuts need a light touch, often less than a quarter turn beyond hand-tight. More force can distort the nut or damage the fitting.
Reconnect the supply line to the tank using the same controlled approach. Support the line so it doesn't twist, kink, or place sideways force on the fill valve. Keep the new stop closed while you finish the installation and inspect the alignment.
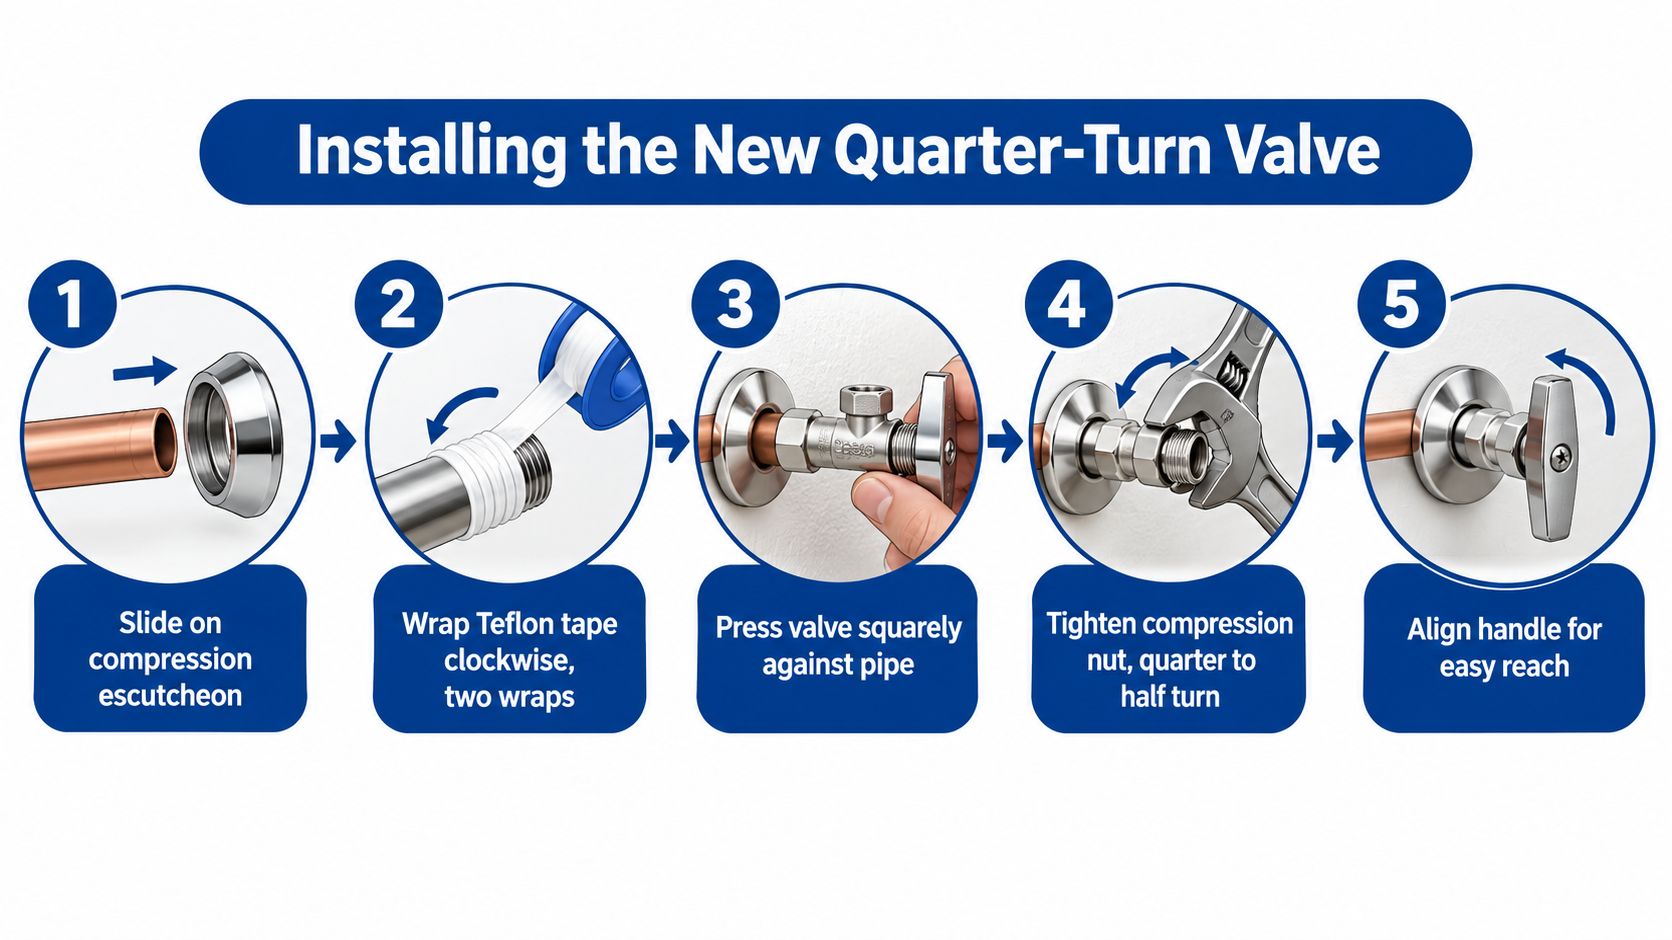
Look at the finished connection before adding pressure
The valve should sit straight, the escutcheon should cover the old wall opening, and no joint should lean sharply toward the toilet. Quarter-turn stops use a ball or cartridge mechanism that opens and closes with a 90-degree turn, unlike older multi-turn valves that compress a washer against a seat. The design difference is explained in this comparison of toilet shutoff valve types.
Open the main water shutoff slowly. Watch the wall connection, compression nut, valve body, and tank connection as pressure returns. If you see immediate seepage, close the main again rather than tightening repeatedly against a moving or corroded pipe.
For related main shutoff concerns, review this guide to main water shutoff valve replacement.
Testing the Install and Catching Small Leaks
Leave the new stop closed while you restore the home's main water supply. Then open the toilet stop gradually, pausing as water reaches the supply line and tank. Watch the wall-side connection first, followed by the valve outlet and the tank connection.
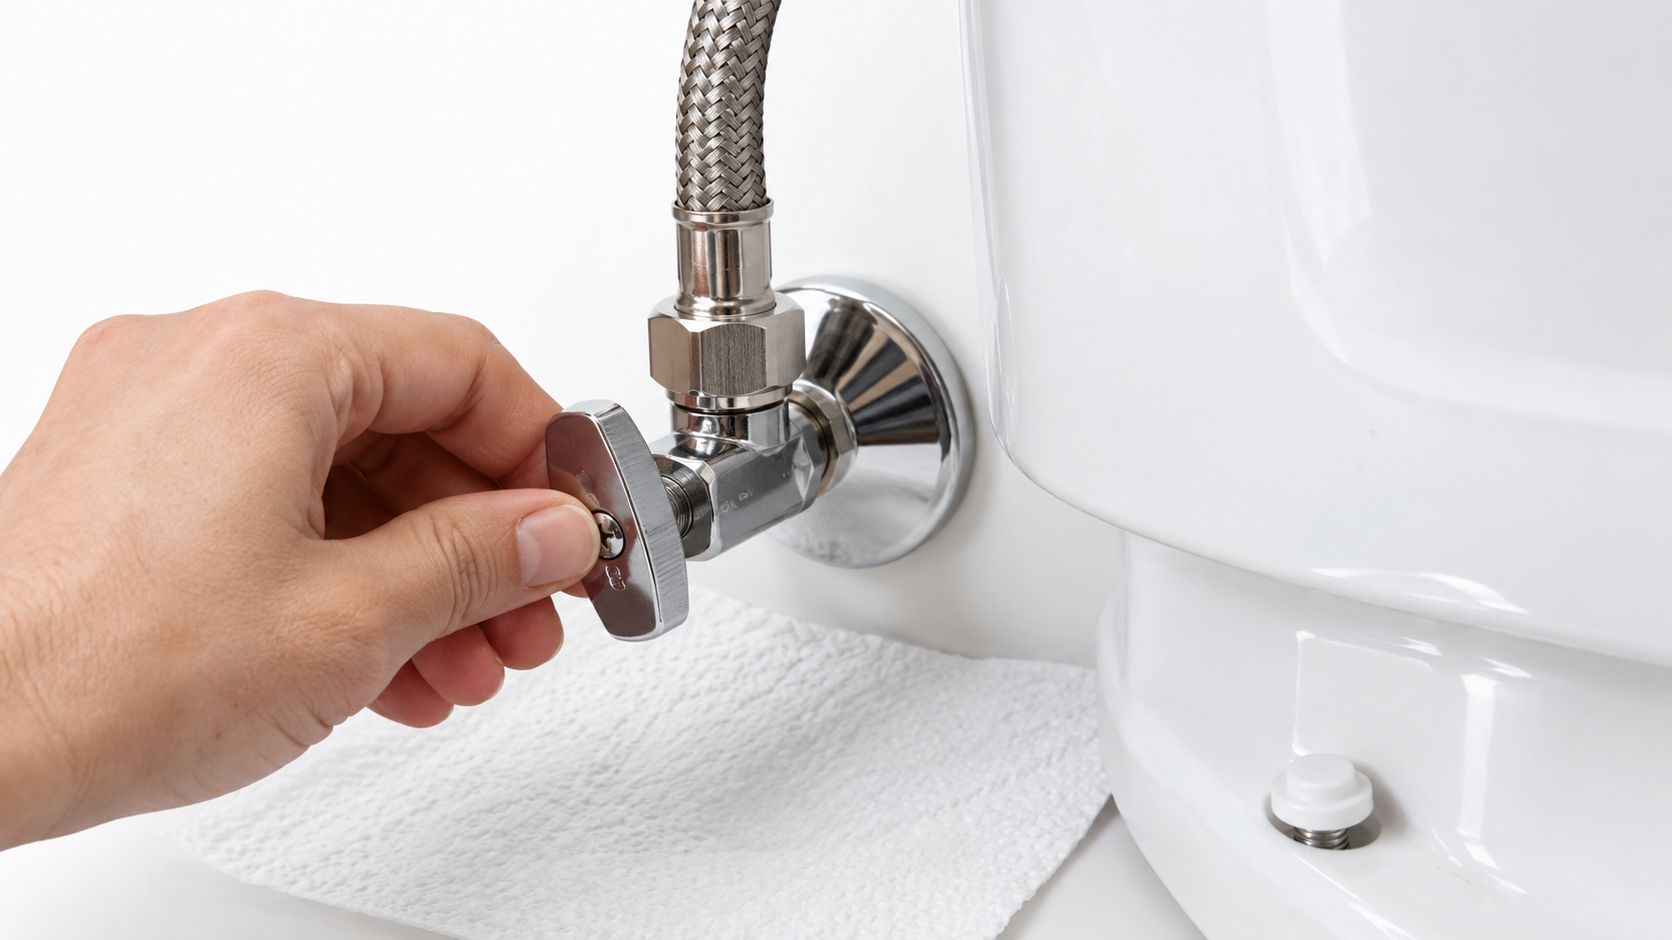
Wrap a dry paper towel around each connection. A towel often reveals a slow seep that your eyes miss, especially against chrome or a painted wall. Leave the towels in place for two full minutes while the line is pressurized, then inspect the floor and the valve base.
Flush the toilet two or three times to cycle the fill valve and check how the tank recovers. The shutoff should operate smoothly, and the supply line shouldn't move when the tank fills. If the toilet continues hissing or refilling after the new stop passes the leak test, return to the tank diagnosis rather than tightening the wall connection.
For broader leak tracing around fixtures and piping, this water leak detection guide can help organize the inspection.
After the repair, recheck the wall joint, supply line, valve base, and floor over the next 24 hours. Listen for a persistent hiss, feel for dampness with a clean towel, and don't leave a new connection unobserved if the home is vacant.
When to Call a Licensed Plumber Instead
Some shutoff valves should not become a homeowner wrench project. If the stem is corroded solid, the valve body is crumbling, or the compression nut refuses to move without twisting the pipe, stop. A damaged stub-out inside the wall can turn a contained bathroom repair into wall access, pipe repair, and water damage cleanup.
Use the same caution with an old braided connector on a chrome riser, a galvanized-to-copper transition, or a home without an accessible main shutoff. Mixed materials and hidden fittings require more judgment than just matching the visible valve. If water continues leaking after the main is closed, the main itself may need service before the toilet stop can be changed safely.
Call for help when you see:
- Movement at the wall: The stub-out rotates as you loosen the compression nut.
- Hidden water damage: There's staining on the ceiling below, damp drywall, or a floor that feels soft.
- A persistent wet valve: The valve sweats or stays damp after the system has been dried.
- A different leak source: Water appears at the toilet base, flange, or tank rather than at the supply connection.
- Required piping work: The repair involves opening the wall, soldering a new drop, or changing the supply line behind the escutcheon.
In Macomb and Oakland County, work that opens a wall or alters concealed supply piping may involve a licensed plumber and, in some municipalities, a permit. Local building conditions vary, especially in older homes around Fraser, Sterling Heights, Clinton Township, Troy, Macomb, and Shelby Township.
An emergency plumber is appropriate when water is actively flowing, the main shutoff won't work, or a connection fails during the repair. A professional can also distinguish a valve problem from bathroom plumbing, pipe repair, leak detection, or toilet flange work before the wrong component gets replaced.
Preventive Tips and How Jay's Plumbing Can Help
Operate the toilet shutoff gently twice a year so the stem doesn't sit untouched for years. Check the supply tube for bulges, kinks, green corrosion, or dampness, and insulate exposed valves in unheated spaces where Michigan winters can threaten pipes. Keep chemical drain cleaners away from the toilet supply connection, since they don't repair a shutoff and can create a separate handling hazard.
A quarter-turn brass stop is generally easier to operate than an older multi-turn compression stop, and the newer design avoids relying on a washer that can harden, crack, or seize. Replace a damaged supply line at the same time rather than installing a new valve onto a connector that already shows wear.
Jays Plumbing and Sewer handles toilet valve swaps, corroded shutoff replacements, supply line upgrades, bathroom plumbing, residential plumbing, and commercial plumbing across Macomb and Oakland County. The company also provides drain cleaning, sewer repair, water heater repair, water heater replacement, garbage disposal repair, sump pump repair, and leak detection for homeowners, landlords, property managers, businesses, and real estate professionals.
Free written estimates and same-day emergency calls for active leaks are available, with warranties on parts and labor. A quick phone consultation can help you decide whether the valve is a reasonable DIY project or whether the older piping deserves an on-site inspection.
Call Jay's Plumbing and Sewer at 586-634-3450 for help diagnosing a leaking or stuck toilet supply valve, replacing a corroded stop, or checking the connection after a DIY repair. You can also visit Jays Plumbing and Sewer to schedule residential or commercial plumbing service in Macomb, Oakland, and nearby Southeast Michigan communities.
