

You notice a damp spot on the bathroom floor just after the toilet finishes filling. The tank looks normal, but the flexible hose underneath is wet near one of its connections. In a Michigan home with a finished basement below, that small drip deserves attention before it reaches flooring, drywall, or a ceiling.
Replacing a toilet supply line is often a manageable DIY repair, but swapping the hose isn't always the whole fix. The leak may come from the angle stop, the fill valve connection, a damaged seal, or pressure stress that will affect the replacement. This guide explains how to replace a toilet supply line safely, how to test it under pressure, and when a plumber near me search is the smarter next step for a home or business in Macomb County, Oakland County, or Wayne County.
Table of Contents
- Why Toilet Supply Lines Fail and When to Replace Them
- Choosing the Right Replacement Line for Your Toilet
- Tools and Preparation Before You Start
- How to Replace Your Toilet Supply Line Without Causing Leaks
- Leak Testing and Troubleshooting After Installation
- Preventing Future Failures and When to Call a Professional Plumber
Why Toilet Supply Lines Fail and When to Replace Them
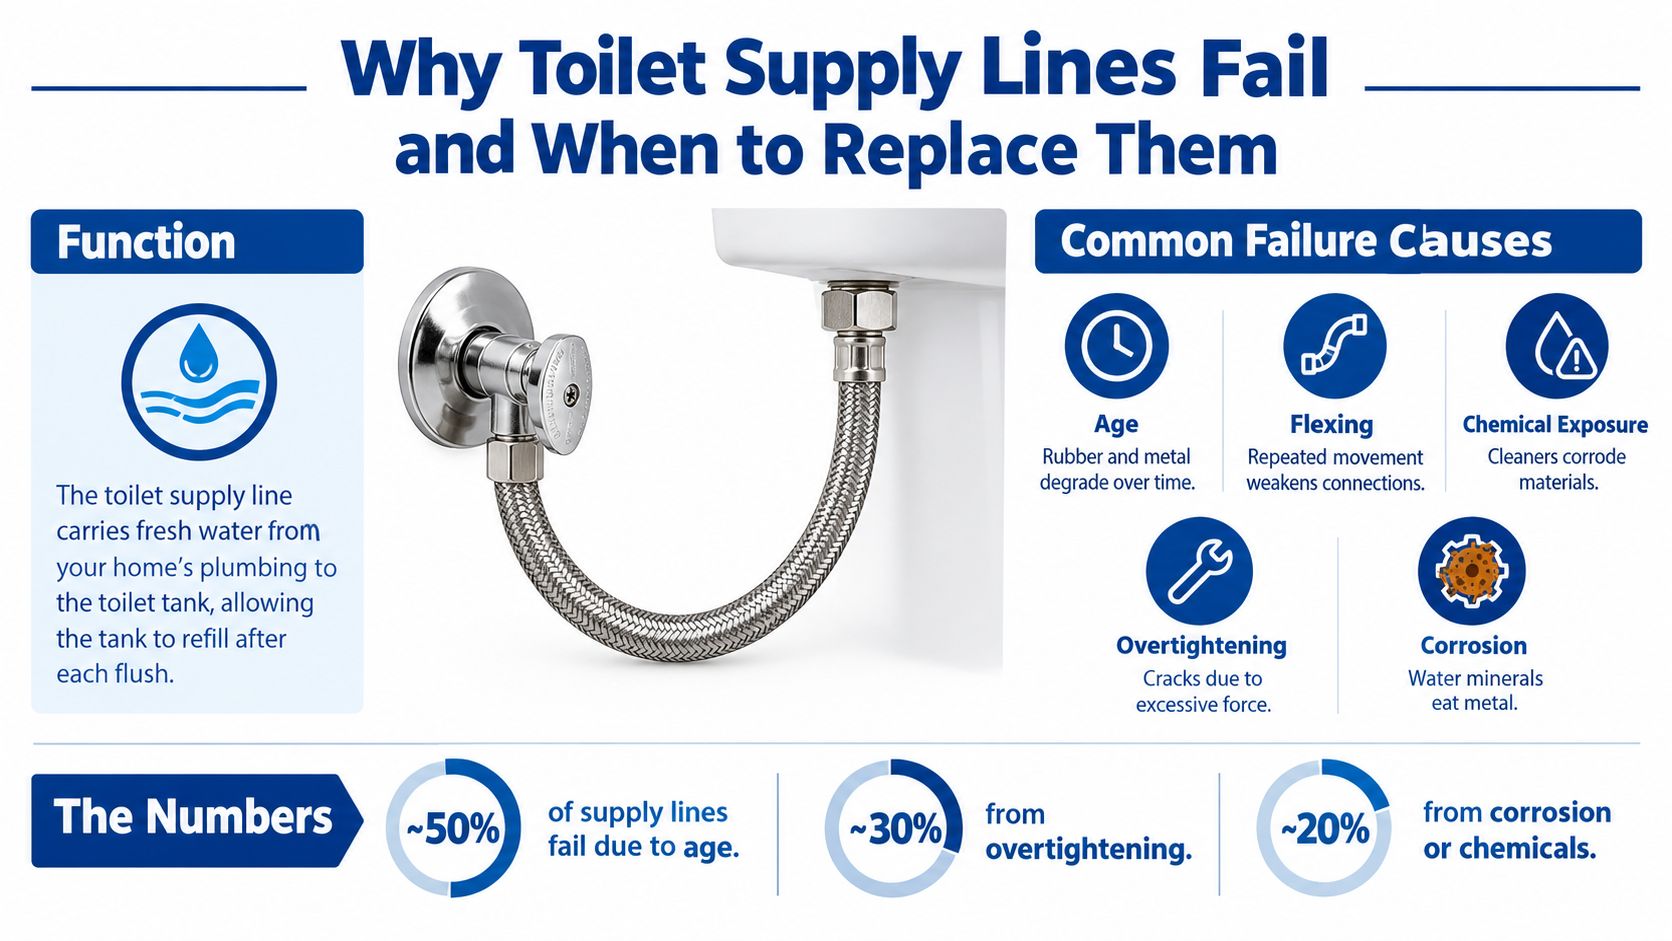
A toilet supply line carries water from the shutoff valve at the wall or floor to the fill valve under the tank. Modern braided connectors usually last for years, but they still contain an inner tube that can deteriorate from age, flexing, chemical exposure, overtightening, and corrosion. The stainless braid helps resist movement and limits blowout, but it can't seal a liner that has already cracked or weakened.
A statistical analysis of flexible toilet connector claims estimated only 3 to 4 reported claims per 100,000 connectors for a seven-year-old connector, while the manufacturer cited an expected service life of 7 to 10 years in the same analysis. That extremely low failure rate explains why homeowners often ignore these parts. It doesn't mean an older connector is risk-free, especially after repeated toilet repairs or movement.
Practical rule: A supply line that looks acceptable can still deserve replacement if it has reached the end of its intended service window or has been disturbed during other plumbing work.
Look for moisture at either nut, a swollen or cracked plastic fitting, rust staining, a kinked braid, broken strands, or a hose that rubs against the wall or toilet. A connector that's under tension isn't installed correctly, even if it isn't leaking today. In older Fraser, Sterling Heights, Clinton Township, Troy, Macomb, and Shelby Township homes, tight bathroom layouts and finished lower levels make careful inspection worthwhile.
Toilet failures have also been tied to significant water damage. One insurance-study summary reported that 78% of toilet failures involved faulty supply lines, toilet flanges, fill valve assemblies, or toilet overflows, with an average loss of $5,584 after deductible (insurance study summary on toilet water damage). That doesn't mean every leaking line creates a major claim, but it shows why a small connector can become a costly failure point.
If you see water near the toilet but can't identify the source, start with this guide to finding a water leak in your house. A proper diagnosis prevents replacing a hose when the valve or tank connection is the problem.
Choosing the Right Replacement Line for Your Toilet
For most residential toilets, a braided stainless-steel connector is the practical choice. It handles ordinary vibration and movement better than a basic plastic line, installs without rigid pipe alignment, and is widely available with toilet-specific fittings. Rigid copper can provide a neat, durable installation, but it requires accurate cutting, bending, and connection work. Plastic vinyl lines cost less in some situations, but they're less forgiving when exposed to movement, poor alignment, or rough handling.
Common packaging may show 3/8-inch x 7/8-inch compression and Ballcock-nut fittings. The 3/8-inch side normally connects to the angle stop, while the 7/8-inch Ballcock nut connects to the toilet fill valve. Match the existing fittings rather than relying only on appearance, because older or unusual fixtures can use different arrangements.
Measure the old line from connection point to connection point. Choose a replacement that reaches comfortably while leaving 1 to 2 inches of slack, as recommended by installation guidance from Best Flushing Toilets. Slack lets the line absorb minor movement without pulling on the tank or valve. Don't use extra length to create a tight loop, and don't force a short hose into place.
| Line Type | Best For | Lifespan | Pros and Cons |
|---|---|---|---|
| Braided stainless steel | Most homes, rentals, and commercial restrooms | Guidance ranges from 8 to 10 years for proactive maintenance, while other product guidance describes 10 to 20 years under normal conditions (maintenance guidance, product guide) | Flexible and vibration-tolerant. Still depends on a sound inner tube, good alignment, and careful tightening. |
| Rigid copper | Exposed, carefully planned installations | Varies by material and conditions | Clean appearance and durable material. More difficult to align and less convenient for a quick replacement. |
| Plastic vinyl | Basic, low-movement applications | Facility guidance places plastic replacement around 5 to 7 years (lifecycle guidance) | Inexpensive and easy to handle. More vulnerable to aging, flexing, and installation stress. |
A published burst rating doesn't tell you whether the line is right for a particular toilet. Real-world failures often begin with poor alignment, chemical exposure, mineral deposits, a stiff valve, or overtightening. For a Michigan rental or a commercial restroom, braided stainless is usually the more sensible maintenance choice, provided the valve and tank connection are also in good condition.
Tools and Preparation Before You Start
Gather everything before shutting off the water. A short repair becomes frustrating when the old line is removed and the replacement turns out to be too short or has the wrong tank fitting.
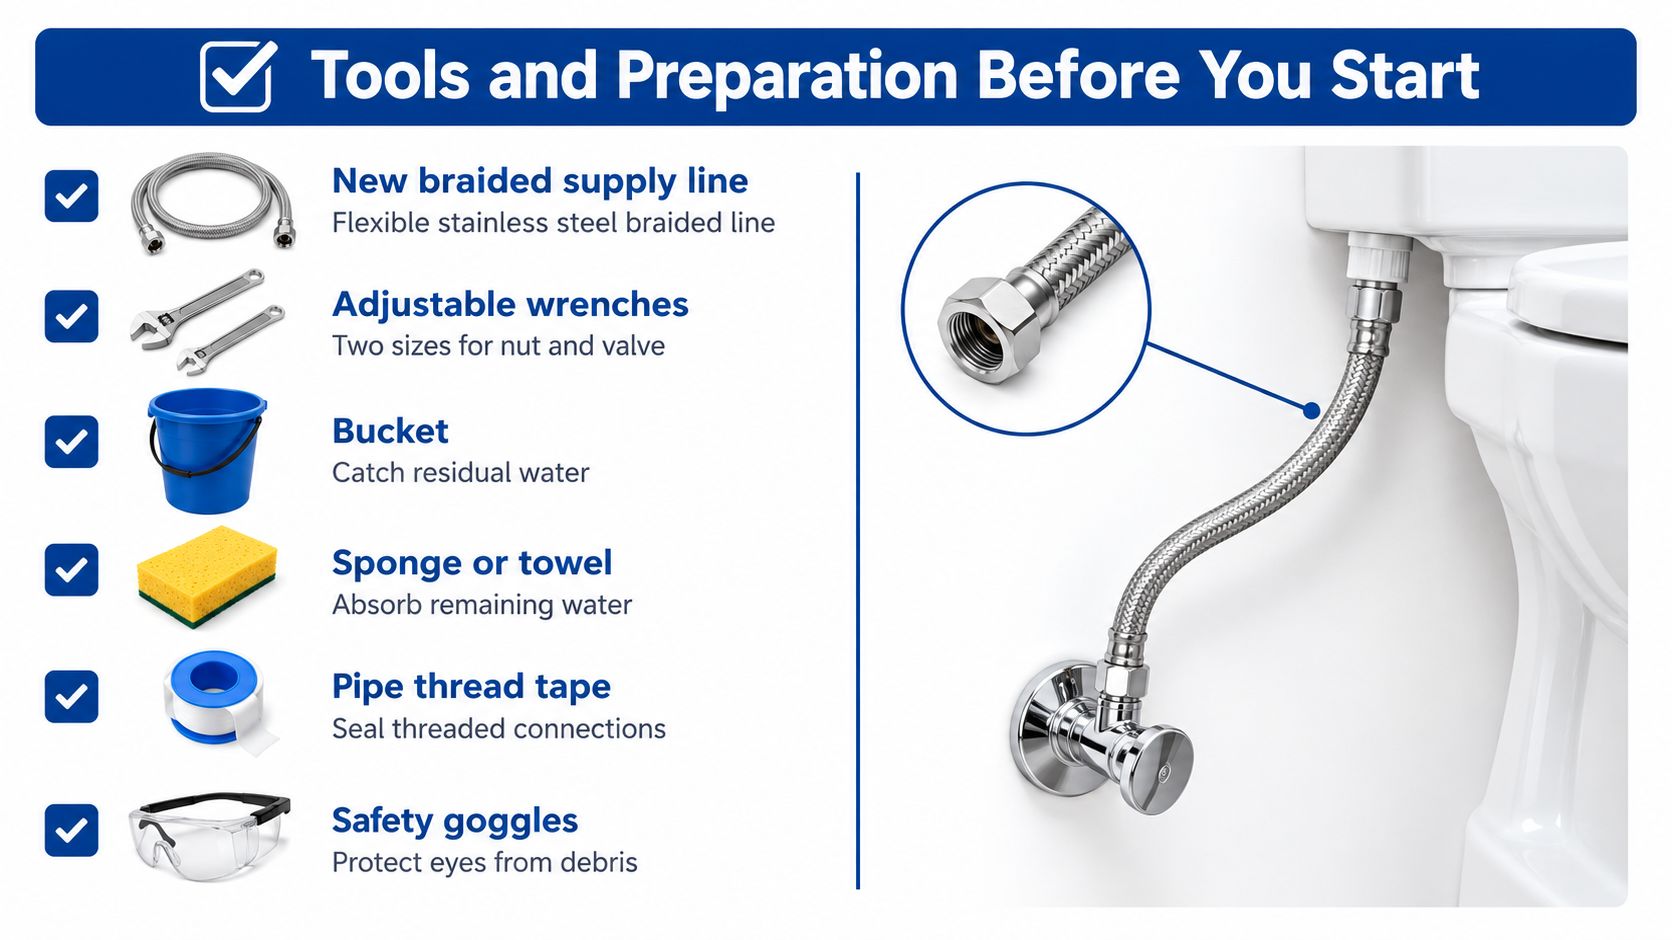
You'll typically need:
- New braided supply line: Match the length and fitting style before installation.
- Two adjustable wrenches: One holds the valve or fitting while the other loosens the connection.
- Bucket: Place it below the lower connection to catch water left in the line.
- Sponge and towels: The tank will still contain water after flushing.
- Thread tape: Use it only where the connection manufacturer calls for a threaded seal. Compression and Ballcock connections generally seal through their washers, not through wrapping tape around the threads.
- Safety glasses: They protect your eyes when working around corroded fittings or mineral deposits.
- Drop cloth: Protect finished flooring, especially in bathrooms above a finished basement.
Check the shutoff before you begin
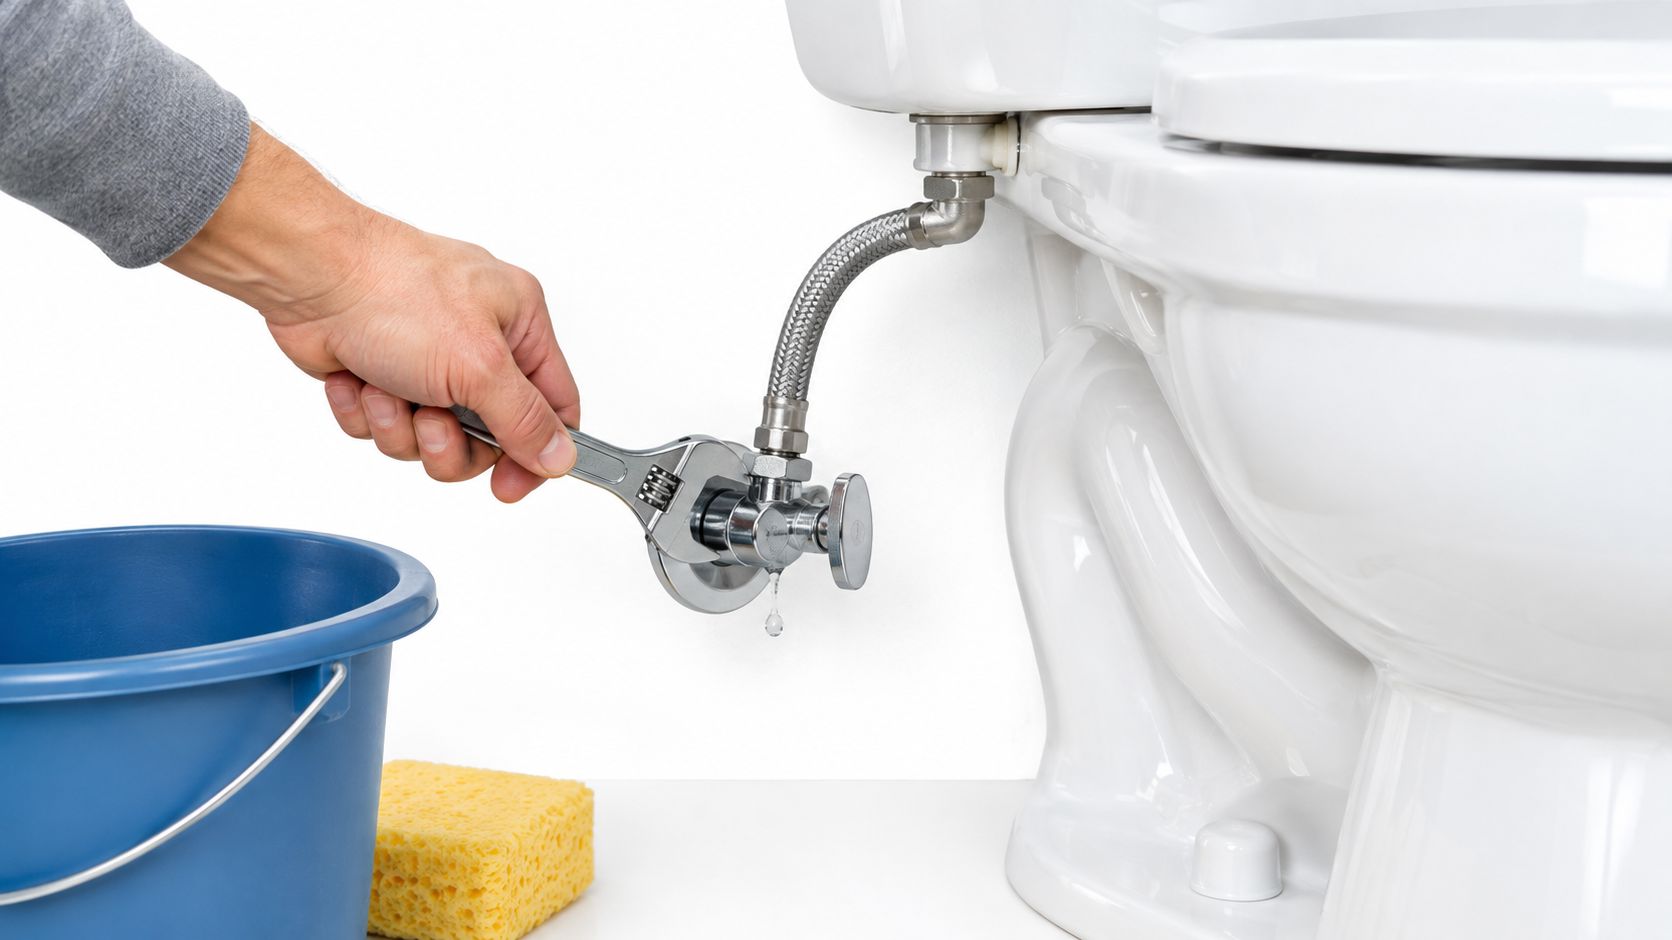
The small valve under the toilet is usually called the angle stop. Turn it clockwise gently until it closes. Don't muscle it if the handle is stiff, the stem is corroded, or the valve turns without stopping the water. A partially seized valve can start leaking around its stem when operated.
Test the valve before disconnecting anything. After closing it, flush the toilet and watch whether the tank refills. If the tank continues filling, reopen the valve and stop the project until you have another way to isolate the water. Know where the main house shutoff is, because it may be needed if the fixture valve won't close or begins leaking.
Protect the room and consider local requirements
Clear cleaners, rugs, storage items, and anything else that can get wet. Keep the tank lid on a stable surface, not on the toilet seat or a narrow counter. If you're replacing only a flexible connector, local requirements can vary. A summary of the 2024 International Residential Code says that installing, altering, repairing, replacing, or relocating a plumbing-system component generally requires a plumbing permit, while local authorities may treat toilet replacement without rough-in changes differently (2024 IRC permit summary). Verify with the local authority or ask a licensed plumber if you're unsure.
How to Replace Your Toilet Supply Line Without Causing Leaks
Work slowly. The most common avoidable damage happens when someone treats the plastic tank nut like a heavy-duty pipe fitting.
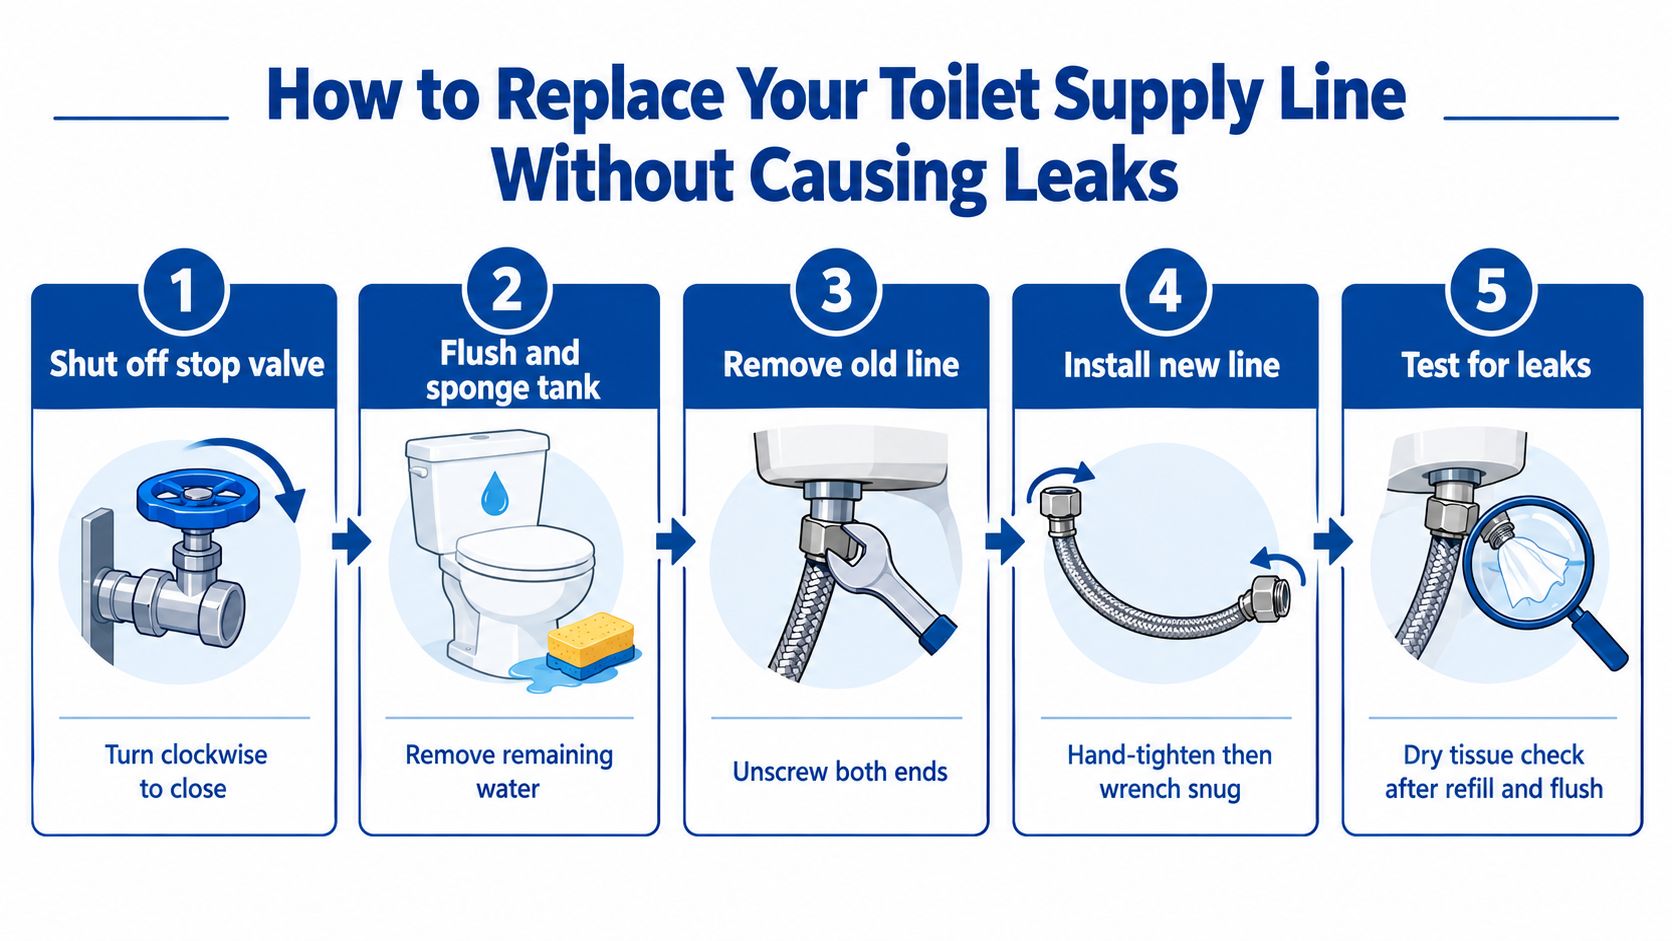
Close the stop valve. Turn the angle stop clockwise until it stops. If it won't close fully, don't proceed with the line disconnected unless the main water supply is off.
Flush the toilet. Hold the handle down long enough to drain the tank. Use a sponge to remove the water left in the bottom of the tank, then place a bucket under the lower connection.
Disconnect the old line. Loosen the metal valve-end nut and then the tank-end nut. Use one wrench to steady the valve or fill valve connection so you don't twist the plumbing inside the tank.
Compare the replacement. The new line should match the old line's connection style and reach without pulling. If the old connector was kinked, rubbing, or stretched, correct the route rather than duplicating the problem.
Connect the tank end first. Seat the washer squarely against the fill valve. Hand-tighten the plastic tank-end nut. Do not use a wrench on this plastic nut, because excessive force can crack the porcelain tank or damage the seal.
Connect the valve end. Thread the metal compression nut onto the angle stop by hand so it doesn't cross-thread. Tighten it with a wrench only about a quarter turn past hand-tight, following the recommended toilet supply line replacement workflow.
Check the route. Leave 1 to 2 inches of slack, with no sharp bend, twist, or sideways pull. The braid shouldn't press hard against the wall or toilet base.
Open the valve gradually. Turn the stop counterclockwise while watching both connections. If the valve itself begins dripping, close it and use the main shutoff. A new hose won't correct a failing angle stop.
The tank connection should be secure, not crushed. Porcelain and plastic reward a light touch. For another repair involving toilet connections, see this guide on how to replace a toilet flange, but don't confuse a supply-line leak at the tank with a flange leak at the floor.
Leak Testing and Troubleshooting After Installation
A connection can look dry while the tank is filling and still seep once pressure changes. Testing is part of the repair, not an optional final glance.
Dry the nuts and nearby surfaces completely. Open the stop valve and watch the tank-end connection, the valve-end connection, and the valve stem. Place a dry tissue around each joint if necessary. Let the tank refill, then check again after one complete flush, following the post-installation leak-check guidance.
Read the location of the moisture
Water at the lower metal nut points toward the compression connection or angle stop. Water at the plastic tank nut may indicate a misaligned washer, damaged fill valve shank, or a connection tightened too much. Water appearing higher on the tank can run downward and make the lower fitting look guilty, so dry the area and observe where moisture starts.
If a connection seeps, close the stop valve, dry the fitting, and make only a very small additional tightening. A wrench-heavy turn usually makes the situation worse. If the leak continues, remove the connection and inspect the washer, threads, valve, and fill valve shank rather than repeatedly tightening.
When the line isn't the real problem
A braided line can hide inner-tube damage. The liner may have degraded from age, chemical exposure, flexing, or overtightening, while the braid remains intact. A new connector can also leak again if the angle stop is corroded, partially seized, or unable to close cleanly.
Check for broader water-loss symptoms. The EPA estimates that household leaks waste nearly 1 trillion gallons annually, about 10,000 gallons per home per year, and that roughly 30% of household leaks come from running toilets (EPA water-sense leak information). In homes across Fraser, Sterling Heights, Clinton Township, Troy, Macomb, and Shelby Township, a supply-line repair may uncover a separate fill valve issue or pressure-related stress that deserves attention.
Call a professional if the valve won't isolate the fixture, the tank connection is damaged, the leak persists after correct installation, or water pressure appears unusually high. A licensed plumber can test the valve, inspect the fill valve, and determine whether the connector is the symptom rather than the cause.
Preventing Future Failures and When to Call a Professional Plumber
Treat the supply line as a maintenance item, not a permanent fixture. Facility guidance places plastic connector replacement around 5 to 7 years and braided stainless replacement around 8 to 10 years, with immediate replacement after a pressure surge or visible damage (supply-line lifecycle guidance). Other product guidance describes braided stainless lines lasting 10 to 20 years under normal conditions, so the right interval depends on material, installation quality, water conditions, and risk tolerance (braided connector guide).
Inspect the connector when you clean the bathroom and after any toilet repair. Replace it promptly if you see corrosion, kinks, fraying, swelling, staining, or moisture. Don't ignore a stiff angle stop, because operating a deteriorated valve can turn a planned repair into an active leak.
Michigan weather adds practical concerns. During cold weather, protect vulnerable plumbing from freezing, especially in exterior-wall bathrooms, crawl spaces, and vacant properties. Heavy rain can expose drainage and sewer problems, while a failed sump pump can turn a small fixture leak into a larger basement cleanup. Property managers should include toilet connections in routine inspections for rentals and commercial restrooms.
DIY is reasonable when the valve works, the fittings are accessible, and the source is clear. Stop and call a licensed plumber for a seized valve, damaged porcelain, repeated seepage, suspected pressure stress, or questions about permits and local requirements. The same professional may also help with bathroom plumbing, leak detection, pipe repair, drain cleaning, sewer repair, water heater repair or replacement, garbage disposal repair, sump pump repair, and commercial plumbing. For urgent water problems, 24/7 emergency plumbing service is the appropriate route.
If you need an estimate or want the leak diagnosed before replacing parts, call Jay's Plumbing and Sewer at 586-634-3450. The company serves Macomb County, Oakland County, and Wayne County, including Fraser, Sterling Heights, Clinton Township, Troy, Macomb, and Shelby Township.
Call Jay's Plumbing and Sewer at 586-634-3450 for toilet supply line replacement, leak detection, shutoff valve evaluation, and related residential or commercial plumbing service. Visit Jays Plumbing and Sewer to schedule service or request an estimate before a small bathroom leak reaches your finished basement.
