

You walk into the bathroom in the morning, turn on the light, and spot water under the sink. Or the faucet keeps dripping after you shut it off. Or the basin drains so slowly you're standing there brushing your teeth over a puddle. That's usually the moment people start guessing, and guessing is what turns a simple bath sink repair into two or three wrong parts and a wet vanity floor.
Most sink problems come down to five questions. Where is the water coming from? When does it leak? Is the problem in the faucet, the drain, the trap, or the supply line? Can a safe repair solve it? What needs a plumber? If you answer those in the right order, the repair gets a lot easier.
Table of Contents
- Why Your Bath Sink Is Acting Up
- How to Diagnose the Source Before You Fix Anything
- Fixing Common Bath Sink Problems Without Making Them Worse
- Hidden Leaks Odors and Trap Issues You Should Not Ignore
- Repair Replace or Call a Professional Plumber Near You
- Keep Your Bath Sink Working and Know When to Get Help
Why Your Bath Sink Is Acting Up
A bathroom sink usually fails in familiar ways. The faucet drips because an internal sealing part wears out. The aerator clogs with mineral scale and the flow gets weak. The pop-up stopper linkage loosens up or binds. Under the sink, the trap, tailpiece, or supply connections start seeping.
In homes around Fraser, Sterling Heights, Clinton Twp, Troy, Macomb, and Shelby Twp, I see the same local patterns over and over. Older homes often have mixed generations of plumbing parts under one sink. Hard water leaves buildup on aerators and moving parts. Michigan winters and seasonal temperature swings don't help either. A house that shifts a little, freezes near outside walls, or goes through dry and damp cycles can expose a weak washer, a tired shutoff, or a trap joint that was only holding by luck.
A small drip matters more than one might think. A leaky bathroom sink faucet can waste more than 3,000 gallons of water per year if it drips once per second, and EPA WaterSense says the average household's leaks can waste more than 9,300 gallons annually. Nationally, household leaks are estimated to waste nearly 1 trillion gallons each year according to EPA WaterSense leak guidance.
The usual trouble spots
- Faucet body and handle area: Drips at the spout often point to an internal washer or cartridge issue. Moisture around the handle can point to a seal problem.
- Aerator at the spout tip: Scale can restrict flow and make people think the whole faucet is failing.
- Pop-up drain assembly: Loose linkage or worn sealing parts can cause leaks or a stopper that won't stay up or down.
- P-trap and tailpiece: These joints catch a lot of blame because they're visible, but they still need to be proven as the source.
- Supply lines and shutoff valves: Slow seeping here can mimic a drain leak because water runs down the cabinet wall and collects at the bottom.
Practical rule: Don't replace parts because they're easy to reach. Replace parts because you've proved they're leaking.
That's how a pro approaches bath sink repair. Understand the symptom, diagnose it, fix the confirmed failure, then verify the repair. If the problem is obvious and isolated, a homeowner can often handle it. If the leak is hidden, intermittent, or keeps coming back, that's the time to call Jay's Plumbing and sewer 586-634-3450.
How to Diagnose the Source Before You Fix Anything
You open the vanity after a normal morning routine and find the cabinet floor wet, but the trap looks fine. That is where sink repairs go sideways. Water often shows up where it lands, not where it starts.
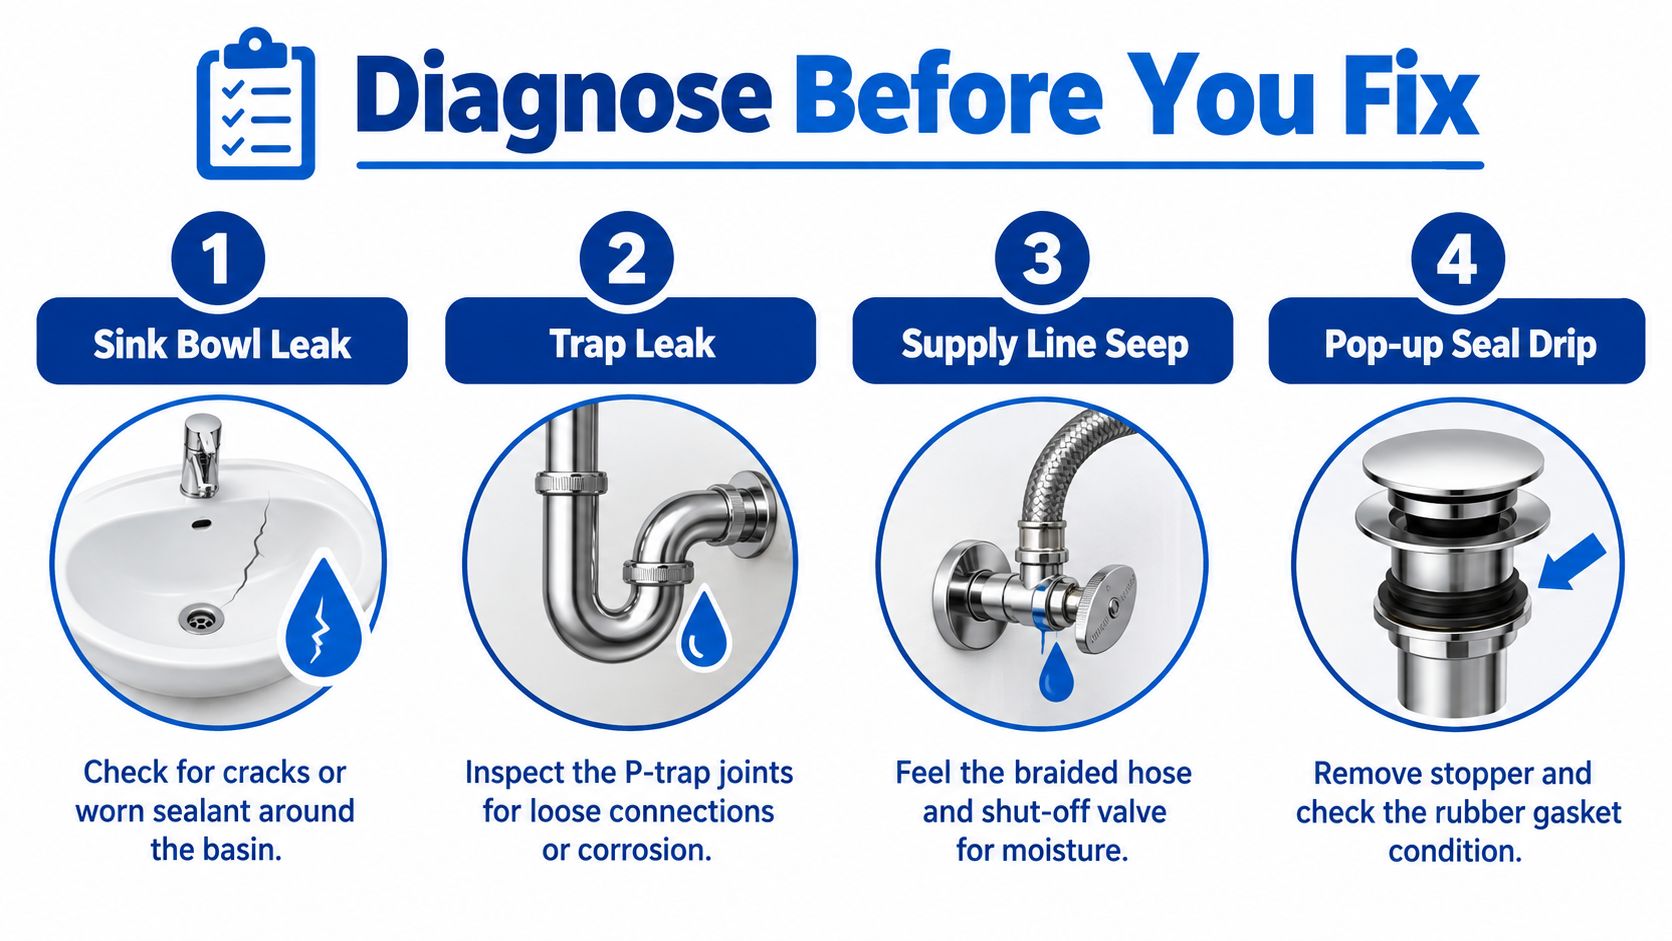
Start with a clean, dry sink
Take everything out from under the sink. Dry the faucet base, supply lines, shutoff valves, drain body, tailpiece, trap, and cabinet floor. Use a flashlight and a dry paper towel. In the field, that paper towel usually finds a slow seep faster than your eyes will.
Then test one condition at a time. Do not run water and open the stopper and wiggle fittings all in the same minute, or you lose the trail.
Let the sink sit dry and unused
If fresh moisture appears with no water running, check the shutoff valves, supply hoses, and the wall behind the sink. A drain leak will not start on its own while the fixture is idle.Run only the faucet
Keep the stopper open and use a small flow first, then a stronger one. Watch the faucet body, handle area, supply connections, and the underside of the sink rim. Leaks that show up during this step are usually on the pressurized side, or at the faucet-to-sink seal.Fill the bowl partway
Leave it sitting for a few minutes before draining. If water appears before you pull the stopper, inspect the drain flange, sink basin, and overflow path. That step gets skipped all the time, and it matters on sinks that leak only when the bowl holds water.Drain the basin and watch below
Now check the pop-up assembly, tailpiece joints, trap nuts, and the wall connection. A leak that starts only during discharge usually points to the drain assembly, not the faucet.Come back after ten minutes
Some leaks travel along the supply tube or cabinet wall before they drip. Delayed moisture changes the diagnosis.
If the wet area seems to extend beyond the vanity, use this guide on how to find a water leak in your house before assuming the sink is the only problem.
Use timing to narrow it down
Timing is one of the best clues.
- Leak appears with the faucet running: check the faucet body, handle seals, supply connections, and the sink deck around the faucet.
- Leak appears only when the bowl is full: check the drain flange seal, overflow channel, and any hairline crack in the basin.
- Leak appears only while draining: check the pop-up body, tailpiece, trap washers, slip nuts, and the drain in the wall.
- Leak appears when nobody used the sink: check supply-side seepage or moisture coming from another source nearby.
One clue matters more than people think. If the trap is wet only on top, the trap may be catching water from above rather than leaking at its own joint.
What a plumber checks first
Under the sink, I look for tracks before I touch a wrench. Mineral crust, staining on the back wall, swelling at the cabinet floor, and one clean drip path usually tell more than the first guess does.
Check these spots closely:
- Shutoff valve stems and compression nuts
- Braided supply hose connections
- Faucet shanks and mounting area under the sink
- The drain body where it passes through the basin
- Tailpiece and trap slip-joint washers
- The wall tube where the trap enters the drain
That order saves time and parts. Prove which component fails under which condition, then repair that part. That is how you avoid replacing a trap for a leak coming from the faucet base, or tearing into a faucet when the bowl only leaks when it is full.
Fixing Common Bath Sink Problems Without Making Them Worse
A bath sink repair usually goes sideways after the wrong part gets blamed. I see it all the time. The trap gets replaced because it is wet, but the leak is dripping down from a faucet shank. A stopper gets forced tighter, but the actual problem is a worn pivot seal at the back of the drain body.
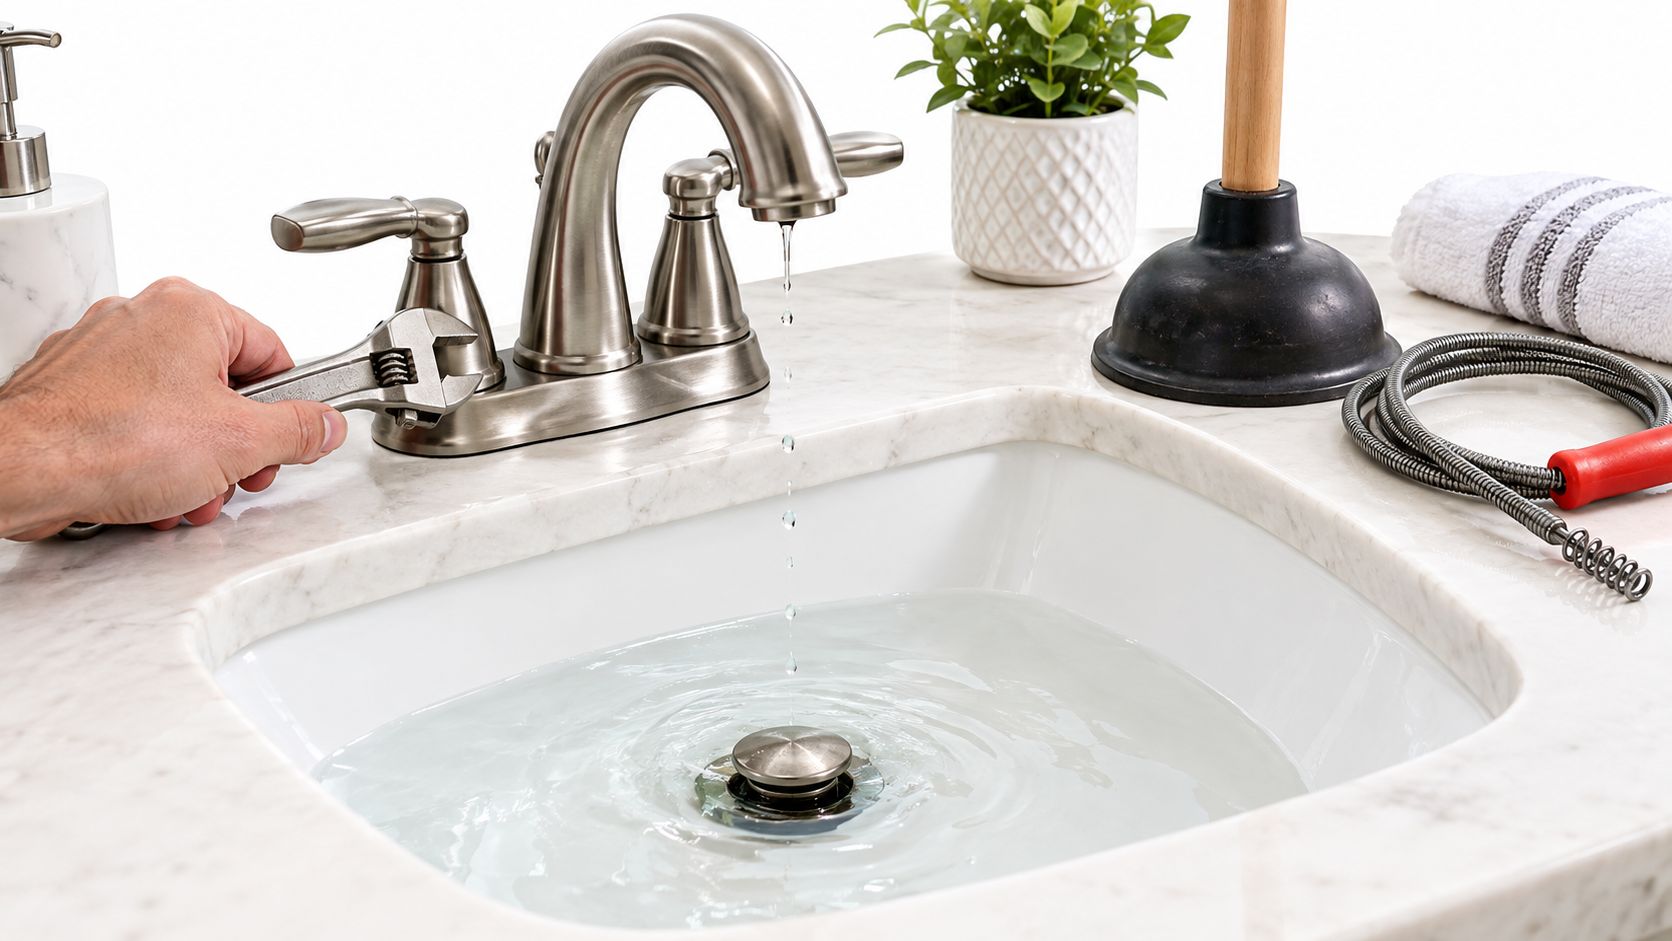
The safest repair is the one that matches the failure you already proved. That means a short retest after each adjustment. Run the faucet. Fill the bowl if needed. Drain it. Then watch the exact spot that failed before you put everything back together.
Repairing a dripping washer-style faucet
For a standard washer-style faucet at a bath sink, the repair sequence is well established: shut off the supply, open the faucet fully to depressurize, remove the handle, bonnet, and stem, replace the washer, and reassemble, as outlined in this plumbing fixture maintenance reference.
What matters is matching the repair to the leak pattern. A drip at the spout points you one direction. Moisture around the handle points you another. If water shows up under the sink only while the faucet runs, stop and verify whether it is coming from the body, the shanks, or the supplies before you open the faucet itself.
Use this order:
- Confirm the symptom: Check whether the leak shows at the spout, handle, or below the sink.
- Shut off and depressurize: Use the local stops if they hold. Open the faucet to relieve pressure before disassembly.
- Keep the parts laid out in order: Small stem parts are easy to flip or misplace.
- Inspect before replacing: A new washer will not fix a damaged seat or a cracked stem.
- Reassemble and retest slowly: Bring the water back on a little at a time and watch for seepage.
If the leak is concentrated around the handle, this guide to a leaking faucet handle helps narrow down whether the packing, cartridge area, or handle parts are at fault.
One shop habit helps here. Reopen the water slowly. A full, fast turn can splash the area and make a new repair look like it is still leaking.
Clearing a slow drain safely
A slow bath sink drain usually starts near the stopper, not deep in the branch line. Hair, soap film, toothpaste residue, and scale collect where water first narrows and swirls.
Start simple and check the result after each step. If the sink drains better after cleaning the stopper, you found the restriction. If it still backs up and the trap stays dry during the test, then it makes sense to go lower.
- Clean the stopper and drain opening first: Remove visible buildup by hand.
- Check the pop-up movement: A stopper set too low can act like a clog.
- Flush with hot tap water: Hot tap water helps loosen residue without stressing older plastic parts.
- Open the trap only when the test points there: Put a container underneath and loosen slip nuts by hand first, then finish gently with pliers if needed.
Be careful with drain cleaners. They can sit in the trap, splash back during disassembly, and soften older washers. If someone already poured chemical cleaner into the sink, flush thoroughly and wear gloves and eye protection before opening anything.
Here's a short visual if you want to see the faucet side of the repair process before opening things up:
Fixing a pop-up stopper that won't work right
A pop-up stopper is a linked assembly under the sink. The parts include the lift rod, clevis strap, horizontal pivot rod, pivot ball with retaining nut and washer, spring clip, and the stopper itself, as described in this pop-up sink stopper glossary.
That layout matters because the visible part is often not the failed part. The stopper may look stuck from above, while the problem is a loose clip, a bent rod, or a worn seal at the pivot opening.
Check these points in order:
- Loose spring clip: The linkage disconnects and the stopper stops responding.
- Misaligned clevis strap: The lift rod moves, but the stopper barely rises or will not seal.
- Worn pivot seal: Water shows up near the back of the drain body during draining.
- Debris around the stopper: The linkage works, but the stopper cannot move or seat cleanly.
Do not force the linkage to line up. If the rod angle looks wrong, loosen it and reset the parts. Overtightening the retaining nut is a common mistake. It can bind the pivot rod or distort the washer, which creates the leak you were trying to stop.
One local option for homeowners and property managers who do not want to keep guessing is Jays Plumbing and Sewer, which handles leak detection, fixture repair, drain cleaning, and camera inspections for residential plumbing and commercial plumbing in Fraser and nearby communities.
Hidden Leaks Odors and Trap Issues You Should Not Ignore
Some of the most frustrating bath sink repair calls involve a sink that only leaks once in a while, smells bad, or leaves a cabinet damp even when nobody has used it for hours. Those are the problems that fool people into replacing the faucet when the issue is lower or farther back.
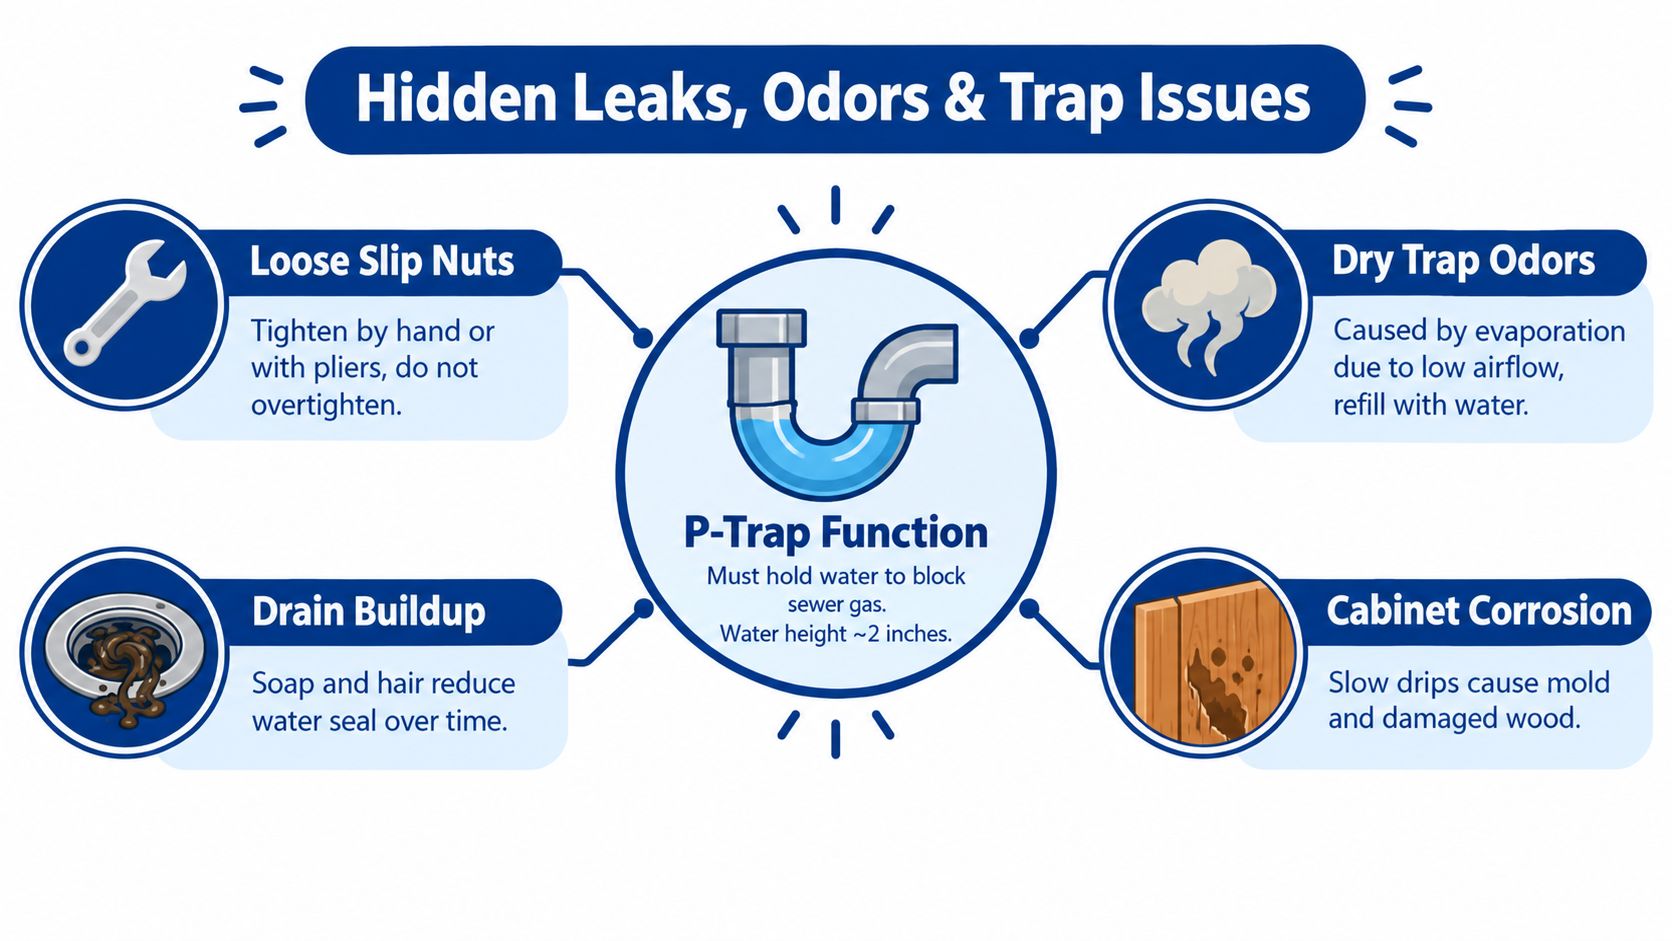
Why the trap matters for more than drainage
The P-trap under a bathroom sink holds water in the curved section to create an airtight seal that keeps sewer gas from entering the home, according to this This Old House explanation of sink stopper and trap function. If the trap leaks, dries out, or gets reassembled poorly, you can end up with both water damage and odor problems.
That's why trap work isn't just about stopping drips. It's also about keeping the drain system sealed.
For homeowners chasing odor issues, this guide on what causes sewage smell in the house helps separate sink-related causes from bigger drain or vent problems.
Fit and alignment clues
Trap parts need to fit correctly. One widely cited residential code rule says a lavatory uses a 1 1/4-inch trap size, while some guidance notes lavatory traps may be 1 1/4-inch or 1 1/2-inch depending on the installation and local code interpretation, as noted in this trap size reference.
The trap arm should also slope downward at about 1/4 inch per foot toward the wall drain, based on this P-trap slope guide. If the arm is level, back-pitched, or dropped too aggressively, drainage problems and alignment strain can follow.
Moisture behind the cabinet wall after the sink sits unused usually points away from the faucet and toward a hidden supply or drain issue.
Signs the problem is deeper than the fixture
Watch for patterns like these:
- Mineral crust on one fitting: Often points to a slow seep that's been there a while.
- Recurring corrosion under the drain body: Suggests more than a one-time splash.
- A sewer smell at the sink: Can mean trap seal trouble or poor reassembly.
- Cabinet swelling or staining at the back panel: Often means the leak is tracking from behind, not dropping straight down from the sink.
Those clues matter in older homes and mixed-use buildings across Macomb County, Oakland County, and Wayne County, where bathroom plumbing has often been repaired in layers over time.
Repair Replace or Call a Professional Plumber Near You
You run the sink, wipe everything dry, and ten minutes later the cabinet floor is wet again. That is the point where guessing gets expensive.
The decision is not really about DIY versus plumber first. It is about whether you have proved which part is failing. If the leak shows up only during a fill-and-drain test, the problem is usually different from a leak that appears with the faucet running, or one that shows up hours later near the back wall. That distinction tells you whether a simple repair is likely to hold or whether replacing parts, or bringing in a pro, makes more sense.
Bath Sink Repair Decision Guide
| Option | Best For | Typical Cost and Risk |
|---|---|---|
| Clean and adjust | Minor slow drain, dirty aerator, loose pop-up linkage | Low material cost. Low risk if parts come apart cleanly and go back without cross-threading. |
| Targeted repair | Confirmed washer, stopper linkage, trap washer, or one proven joint | Usually the lowest-cost fix if testing has isolated the failure point. Risk goes up fast when the actual leak source has not been confirmed. |
| Replace fixture or drain assembly | Repeated failures, visible corrosion, stripped threads, mismatched parts, poor prior installation | Higher parts cost, but often the better value when several pieces are near the end of their life. |
| Call a professional | Hidden leak, recurring moisture, odor issue, wall-side drain trouble, or failed DIY | Higher upfront service cost than trying a minor fix yourself. Lower chance of repeat leaks, cabinet damage, or replacing the wrong part. |
A repair makes sense when one problem has been isolated and the surrounding parts are still sound. A loose slip nut, a worn trap washer, or a bad stopper pivot can often be corrected without tearing into the whole sink. After the repair, the sink needs to pass the same test that exposed the problem in the first place. Run water. Fill the basin. Drain it. Dry the area and check again later.
Replacement is the better call when the sink has a history. If the drain body is corroded, the popup has already been patched twice, and the trap pieces no longer line up without stress, replacing one small part often buys only a little time. Older lavatories in Fraser homes also tend to have a mix of original and hardware-store parts. Those setups can be made to work, but they are harder to seal reliably.
Call a plumber when the symptoms do not stay at the sink. Moisture at the back of the cabinet, staining below the shutoffs, smells that return after trap work, or leaks that only show up after the sink sits unused all point to a problem that needs better isolation. At that stage, a pro is not just there to tighten fittings. The job is to separate fixture trouble from wall, drain, or supply-line trouble before more material gets replaced.
Local factors that change the call
In Southeast Michigan, timing matters for practical reasons. Cold snaps expose weak shutoffs and brittle supply lines. Busy households and rental properties also push bathroom fixtures harder, so a marginal repair can fail sooner than expected. If you are selling, managing a tenant turnover, or dealing with repeated moisture inside a vanity, a confirmed fix matters more than squeezing one more month out of a tired assembly.
Broader plumbing symptoms matter too. If the sink problem comes with slow branch drainage, backups elsewhere, or signs of leakage beyond the cabinet, treat it as part of a larger plumbing issue rather than a sink-only repair.
Jay's Plumbing and sewer 586-634-3450 is a reasonable call when you want a second opinion before opening walls, a camera inspection before invasive drain work, or emergency plumbing with upfront job-based pricing and cleanup practices like shoe covers and drop cloths.
Keep Your Bath Sink Working and Know When to Get Help
The best bath sink repair is the one you don't have to make twice. Most repeat problems come from skipped checks, wrong-size parts, or a leak that was never fully diagnosed in the first place.
A simple maintenance routine goes a long way:
- Check the aerator: Mineral scale can build up and reduce flow.
- Test the shutoff valves: Don't wait until an emergency to find out one is frozen.
- Look at trap and supply connections: Catching a small seep early is easier than repairing cabinet damage.
- Clean the pop-up linkage area: Hair and residue create both drainage and stopper problems.
- Watch for changes in water use: Hidden leaks often announce themselves.
EPA guidance on bathroom sink maintenance notes that a faucet dripping once per second can waste nearly 3,200 gallons per year and more than $30 in water costs, while mineral scale can build up on aerators and reduce flow. WaterSense also recommends checking lavatory faucets for leaks, replacing aerators, and using labeled faucets with flow rates between 1.5 and 1.8 gallons per minute, according to this EPA bathroom sink maintenance guidance.
For homeowners in Fraser, Sterling Heights, Clinton Twp, Troy, Macomb, and Shelby Twp, the long-term fix is a habit: prove the source, make the right repair, and verify the sink stays dry afterward. That's how you avoid repeat callbacks, hidden cabinet damage, and the kind of plumbing issue that spreads from one vanity to the rest of the house.
If you're not sure what you're seeing, or the pattern doesn't add up, it's time to stop guessing and get help.
Jays Plumbing and Sewer handles bathroom plumbing repairs, leak detection, drain cleaning, sewer repair, and emergency plumber calls across Macomb County, Oakland County, and nearby Wayne County communities. If your sink is dripping, leaking under the cabinet, draining slowly, or showing signs of a hidden issue, visit Jays Plumbing and Sewer or call Jay's Plumbing and sewer 586-634-3450 to schedule service or ask a question.
