

You wake up to the tank refilling on its own, or you hear that faint hiss after everyone's gone to bed. Most homeowners think the toilet is “just acting weird,” but a toilet tank leak into the bowl is usually water moving past a seal you can't see from the floor. That hidden seep can keep going for weeks, and the only clue may be a higher water bill and a toilet that seems to flush itself now and then.
The good news is that this problem has a clear path to diagnosis. You don't have to guess which part to buy first, and you don't have to replace the whole toilet because of one bad seal. In a lot of cases, the repair is simple, but the trick is finding out whether the leak is coming from the flapper, the flush valve seat, the overflow path, or the tank-to-bowl gasket before you open your wallet.
Table of Contents
- Why Your Toilet Tank Is Leaking Into the Bowl
- Run a Dye Test Before You Buy Any Parts
- Identify Which Component Is Failing
- Step-by-Step Repair for the Most Common Causes
- When the Leak Is Bigger Than a Flapper
- Preventing the Leak From Coming Back
- Toilet Tank Leak Questions Homeowners Ask Most
Why Your Toilet Tank Is Leaking Into the Bowl
You hear the toilet refill after nobody has used it, then notice the tank water sitting lower than before. There may be no puddle on the floor. In a toilet tank leak into the bowl, water passes through an internal seal and runs directly into the bowl, so the first signs are sound, changing water level, or an occasional flush-like refill.
Start by watching the tank before buying parts. Mark the water level with a pencil, wait without flushing, and check whether it drops. Then add dye and observe where the color goes. A tank that loses water while the floor remains dry points toward the flapper, flush valve, or another internal path. A stable tank level with water around the base points to a different repair.
Where the water escapes
The common leak paths are limited. Water may pass under a worn flapper, move across a damaged flush valve seat, or escape through a tank-to-bowl gasket that has shifted, cracked, or hardened. The overflow tube can also carry water into the bowl when the fill valve is set too high or fails to shut off.
Practical rule: a falling tank level with a dry floor usually means an internal seal or overflow problem, not a supply line leak.
The water can run for months while the bathroom looks normal. It travels from the tank into the bowl and then through the drain, leaving no floor stain to find. Check the tank's water level and dye behavior before replacing a flapper, because those clues help separate a worn seal from a fill or overflow issue.
If water is spilling over the tank's rim or the toilet is close to overflowing, shut off the supply valve and review this toilet overflow guide. For homes in Fraser, Sterling Heights, Warren, Shelby Township, Troy, and nearby Macomb or Oakland County neighborhoods, stop the water first if the valve will not close, the tank is cracked, or the leak reaches the floor. A plumber can then identify whether the tank needs a seal repair or replacement.
Run a Dye Test Before You Buy Any Parts
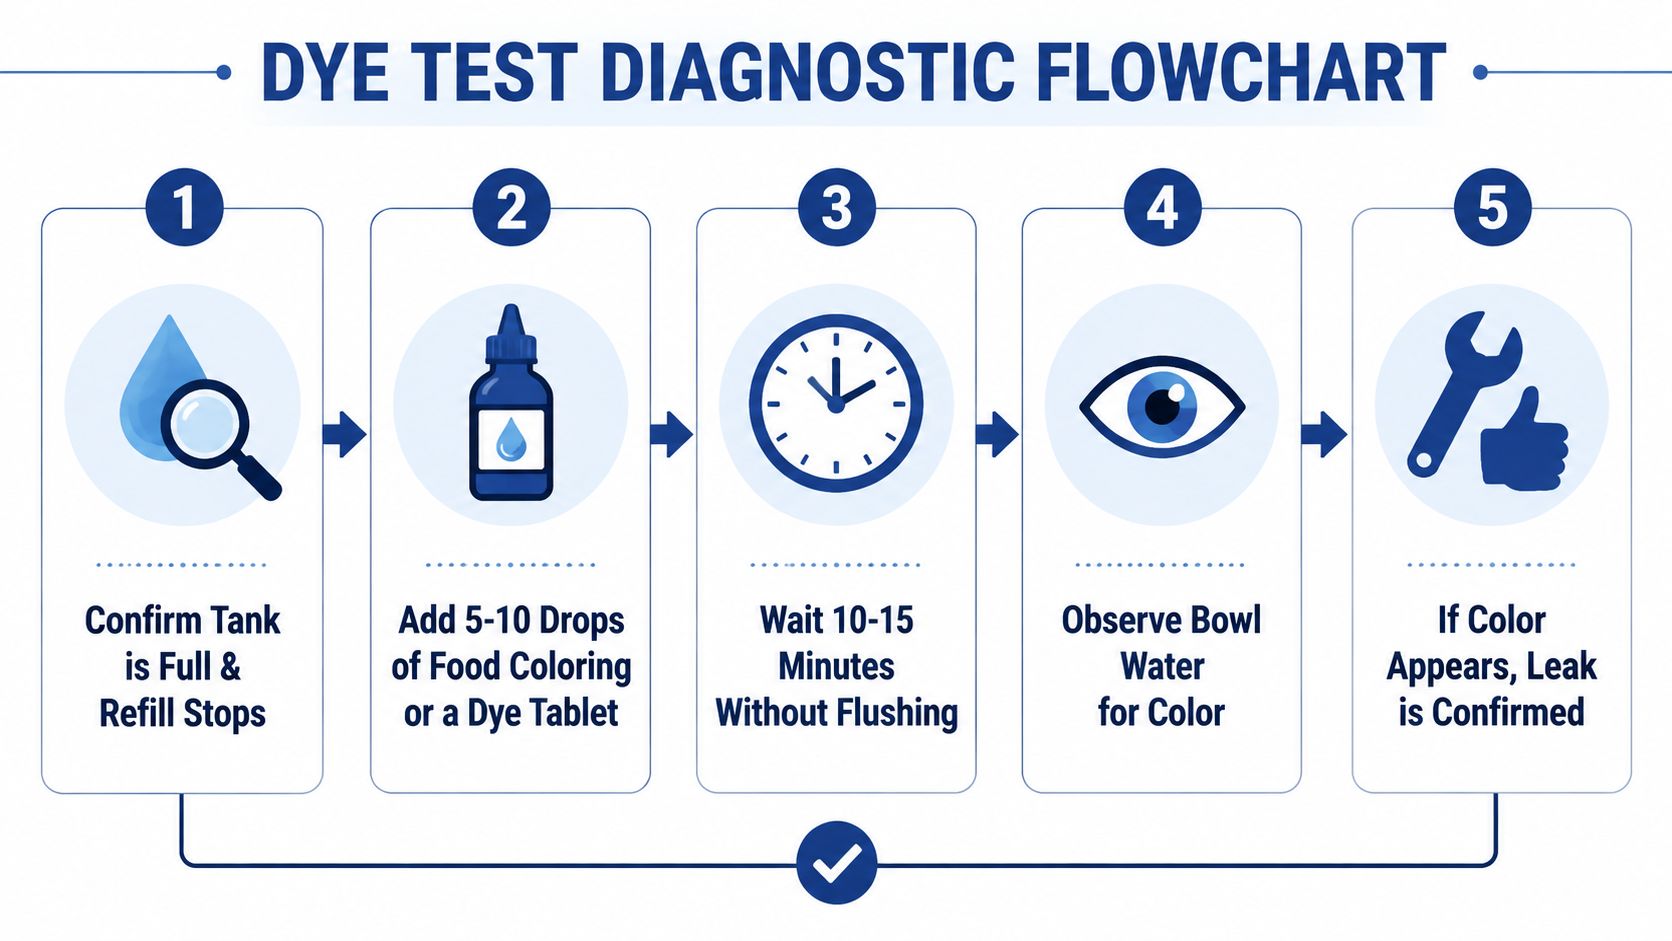
A dye test shows whether water is leaving the tank before you spend money on a flapper or valve. Lift the lid, confirm the tank is full, and wait until the refill stops. Add dye tablets or 8 to 10 drops of dark food coloring to the tank water. Do not flush. Wait 10 to 20 minutes, then inspect the bowl for color. Follow this toilet dye test guidance for the basic procedure.
Reading the result
Color in the bowl confirms that tank water is passing the internal seal. Check the flapper and flush-valve seat first, then note how the tank level changes. A tank that drops below the overflow tube gives you a different clue than one that stays near the top while dye still reaches the bowl.
Keep the test clean. Flushing during the wait removes the dye before a slow leak becomes visible. Too little dye can also hide a weak leak path. If the bowl stays clear but you hear the fill valve restart, repeat the test with enough dye and waiting time.
Water moving down the overflow path points to the fill side of the tank rather than a simple flapper seep. Check that path before buying parts, because the float or fill valve may be admitting too much water. If the bowl remains clear and the tank level holds, inspect for moisture at the tank-to-bowl seam instead of assuming an internal leak.
For a broader explanation of hidden leak service pricing, see this leak detection cost page. Shut off the supply and call a plumber if the valve will not close, the tank is cracked, or water reaches the floor.
Identify Which Component Is Failing
Start with the symptom, not the replacement part. A toilet tank can send water into the bowl through several paths, and each path changes the tank's water level in a different way. Use the dye result and the level change together before buying anything.
Use the tank water level as a map
If the tank water drops below the overflow tube and then refills, the flapper is the first component to inspect. If dye reaches the bowl while the water remains near the top of the overflow tube, the leak may be slower and located at the flush valve seat. Water running through the overflow tube points to an overfill problem, usually involving the float or fill valve.
A tank-to-bowl gasket leaves an external clue. Look for moisture, staining, or seepage around the seam where the tank meets the bowl, especially near the bolts or beneath the tank. The porcelain pieces may need to be separated because the gasket sits between them.
| Tank Leak Symptom | Most Likely Failing Component |
|---|---|
| Dye in the bowl and tank level drops below the overflow tube | Flapper |
| Dye in the bowl, water stays near overflow level | Flush valve seat |
| Water trickling down the overflow tube | Float or fill valve |
| Moisture or staining at the tank-to-bowl seam | Tank-to-bowl gasket |
Water in the bowl does not prove the flapper is defective. It proves that tank water is escaping through an internal path.
A slow, clean dye leak with a stable tank level deserves a closer look at the flush-valve seat before replacing the flapper. A falling tank level points more strongly to the flapper or its sealing surface. If water runs through the overflow tube, replacing either seal will not correct the overfill.
Buying parts before making that distinction wastes time. A homeowner in Macomb County could install a new flapper and still hear the refill cycle if mineral buildup is keeping the seat from sealing, or if the gasket is misaligned. In a commercial restroom, choosing the wrong component also creates avoidable downtime and another service call. Stop and call a plumber if the tank is cracked, the porcelain shifts, or you cannot isolate the supply safely.
Step-by-Step Repair for the Most Common Causes
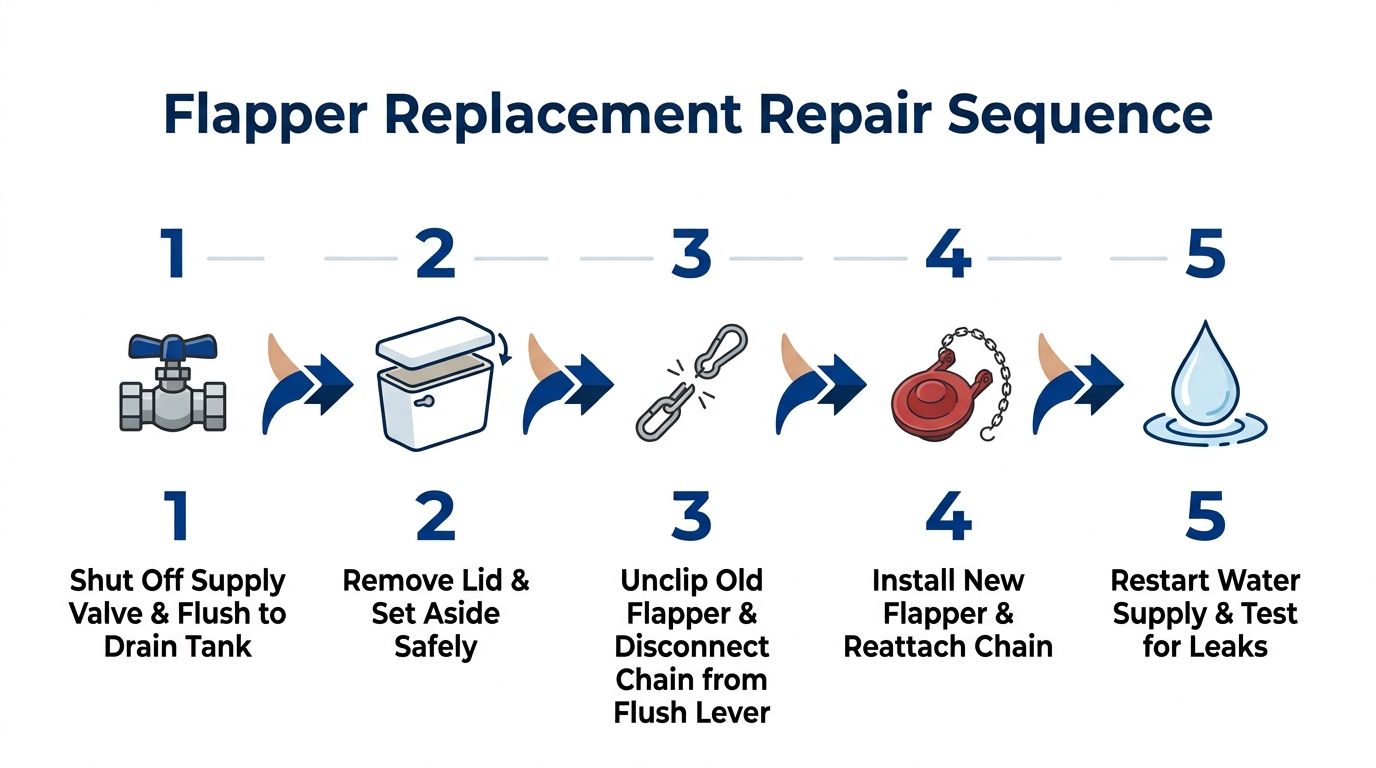
The usual fix starts with the simplest culprit. Shut off the supply valve, then flush the toilet to drain the tank as much as possible. Remove the lid and set it somewhere safe, because a slipped porcelain lid is how a small repair turns into a broken tank.
Start with the flapper and chain
Unclip the old flapper and note how the chain connects to the flush lever. Disconnect the refill tube from the overflow pipe before installing a new flapper that matches the toilet's brand and style. A mismatched part can sit just slightly off and keep leaking even when it looks installed correctly.
Hook the chain with a little slack so the flapper can close cleanly when the lever rests. If the chain is too tight, it props the flapper open just enough to leak. Refill the tank and watch the flapper seat, then listen for a clean stop in the refill cycle.
Move to the tank-to-bowl gasket if the leak stays
If the bowl still shows color, the gasket between the tank and bowl may be the problem. Disconnect the water line, remove the bolts under the tank, and lift the tank off carefully. Scrape away the old gasket, then press the new one into the groove with the rubber side against the porcelain.
Reassemble everything in reverse and tighten the bolts evenly so the tank stays level. Don't crank one side down harder than the other. That's how porcelain cracks start. Once the tank is back together and filled, repeat the dye test to confirm the bowl stays clear.
For a simple running-toilet check that lines up with what you see in the tank, this running toilet guide is a useful reference point.
When the Leak Is Bigger Than a Flapper
A flapper swap solves a lot of these problems, but not all of them. If the tank-to-bowl bolts spin freely, the porcelain is cracked around the holes, or the tank feels unstable, stop there. Pulling harder on those bolts can split the tank and turn a repair into a replacement.
A persistent low hiss after a new flapper goes in usually means the leak path wasn't the flapper at all. If you see moisture creeping from under the tank, or water on the floor near the base, the gasket or a hairline crack is a stronger suspect. That's the point where a licensed plumber should remove the tank and inspect the seal properly.
Signs it's time to stop
- Free-spinning bolts: The tank hardware isn't holding, and over-tightening can crack the porcelain.
- Moisture under the tank: The gasket or tank base may be failing.
- Fill valve keeps cycling: The shutoff side may be worn, scaled, or misadjusted.
- Visible crack around the tank hole: The tank itself may not be safe to keep tightening.
If the tank feels unstable in your hand, don't keep squeezing the bolts. That's how a seal repair turns into a broken tank.
In homes around Warren, Clinton Township, Rochester Hills, and the rest of southeast Michigan, I'd rather have a homeowner stop early than keep tightening and create a bigger problem. This is also where a plumber can check the supply side, test the valve, and make sure the issue isn't sitting in a part you can't see without pulling the tank.
Preventing the Leak From Coming Back
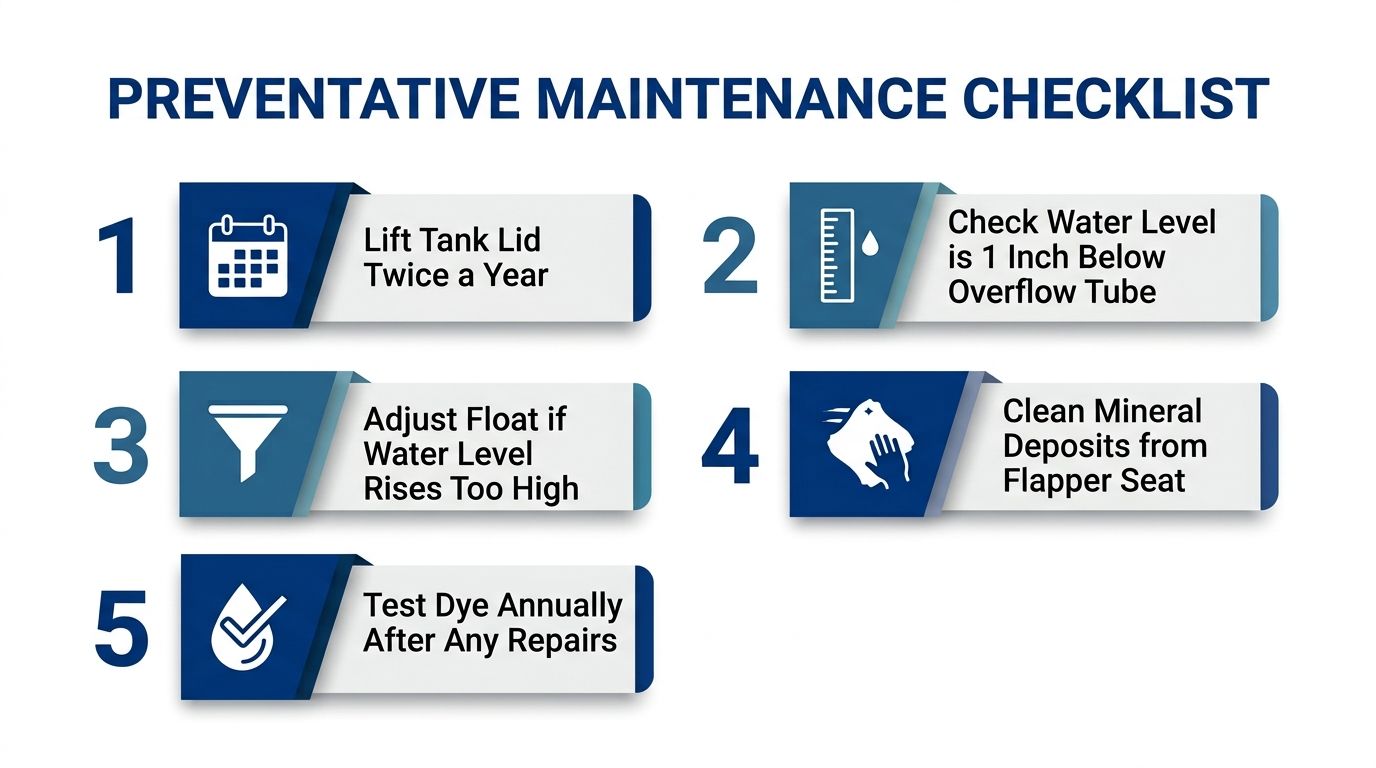
Once the bowl is holding water cleanly, keep an eye on the tank before the leak returns. Lift the lid twice a year and check that the water sits about one inch below the overflow tube. If the level creeps up, the float or fill valve needs attention before water starts running where it shouldn't. Overflow tube guidance
Listen at night when the house is quiet. A faint refill or a soft hiss is usually easier to hear then than in the middle of the day. That kind of sound often shows up before the bill does.
Avoid in-tank drop-in tablets. They're hard on rubber parts, and they can age a flapper or seal faster than the porcelain shows it. A better habit is to compare your water bill against the same month last year, then look harder if the numbers rise without a change in how you use water.
For homes in Macomb County and Oakland County, a pre-winter plumbing check makes sense too. Michigan winters put extra stress on aging parts, and cold-weather service calls often reveal small issues before they turn into frozen pipe trouble or an emergency plumber visit. If you manage apartments, offices, or commercial restrooms, the same rule applies, because silent toilet leaks don't care whether the building is residential or commercial.
Toilet Tank Leak Questions Homeowners Ask Most
How long does a flapper usually last
A flapper has no fixed service life. Water quality, toilet use, and cleaning products all affect the rubber. Check it periodically and replace it by five years at the latest if it no longer seals reliably, as the EPA WaterSense leak guidance recommends.
Will adjusting the float stop the leak
Adjusting the float can stop water from rising into the overflow tube. It will not repair a worn flapper, a damaged flush valve seat, or a tank-to-bowl gasket. Watch the water level first. If the tank reaches the overflow opening while filling, check the float or fill valve. If the level settles correctly but dye still moves into the bowl, look at the flapper and flush valve seal instead.
How much water can a silent leak waste
A leaking toilet can waste a substantial amount of water, even when the refill sound is hard to hear. Older guidance reported that a constantly running toilet could waste 200 gallons of water or more every day, while another EPA estimate put a leaking toilet at 180 gallons per week. Those figures come from different guidance and conditions, so use the dye test and your water bill to judge the leak in your home. The EPA archive release provides additional background.
Can a tank-to-bowl gasket leak damage the floor
Yes. Water escaping at the tank-to-bowl connection can run toward the subfloor, leaving stains, swollen flooring, or soft spots around the toilet base. Shut off the supply and stop using the toilet if water is collecting beneath the tank. A gasket replacement requires removing the tank, and cracked porcelain calls for a plumber rather than another round of tightening.
Are in-tank cleaners safe
I avoid drop-in cleaners when a toilet has seal trouble. Their chemicals can wear rubber parts, shortening the service life of the flapper or gasket. Use a bowl cleaner instead, and inspect the tank parts if the leak returns after cleaning.
Does insurance or a home warranty cover this
A home warranty may cover a listed plumbing part, but plans differ. Insurance generally addresses sudden damage rather than routine wear. Read both policies before assuming the repair or resulting floor damage will be paid.
Call Jay's Plumbing and sewer Now @ 586-634-3450
If the toilet keeps refilling, leaks into the bowl, or leaves moisture around the tank, Jays Plumbing and Sewer provides leak detection, toilet repair, bathroom plumbing, residential plumbing, and commercial plumbing in Macomb and Oakland County. Stop using the fixture and schedule service when the tank is cracked, the connection keeps leaking, or a repair requires removing the tank.
